
Table of contents: Installation ↓ Removal the midrange speaker cover ↓ Removal the front armrest ↓ Removal the inner door handle with… ↓ Removal the inner door handle opening ↓ Removal the trim with the remote… ↓ Installation ↓ Removal the window frame trim ↓ Removal and keypad for control panel… ↓ Installation ↓ Creating an additional cut for the… ↓
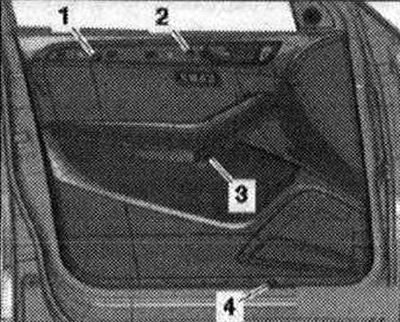
Turn off the ignition. Remove the decorative trim. Unscrew bolts "1...4".
Separate the door trim with the pliers for dismantling "3392" from the back below along the entire perimeter, starting from the door, to do this, install the pliers next to the fastening clamps between the door trim and the door.
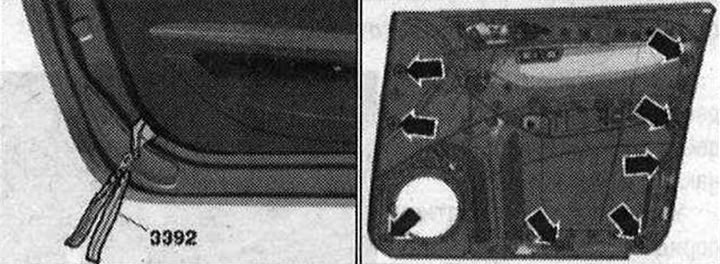
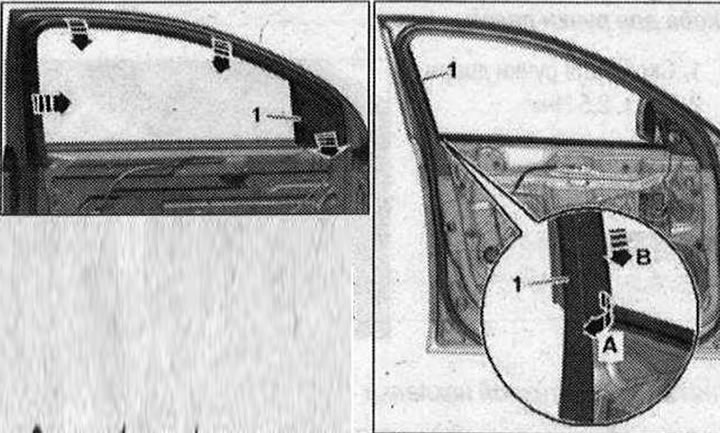
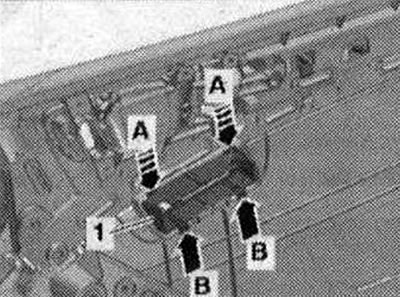
Position of the mounting clamps "arrows".
Remove door trim "1" around the perimeter in width approximately 15 mm from the door "arrow A". The clips are no longer secured in the door. Press the inner door handle "2" in the place shown with the door trim upwards from the clip "3" "arrow B". Disconnect the door trim at the top of the glass shaft from the door and remove.
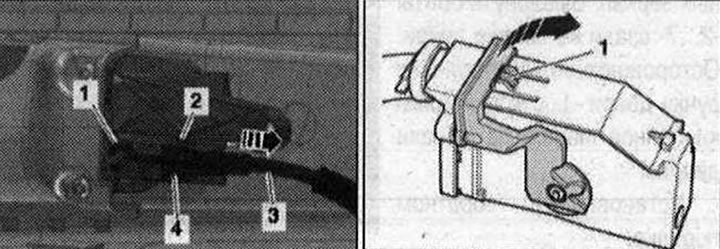
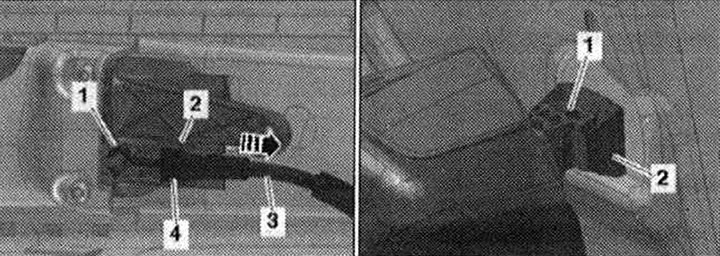
Carefully disconnect the bracket "4" from the cable support "2". Remove the cable "3" of the inner door drive in the "direction of the arrow" from the cable support. Disconnect the end of the rod "1" to the inner door drive.
To disconnect the electrical connector, press the safety lock, turn the fastening bracket in the "direction of the arrow" and remove the connector.
Remove the door trim.
Installation
Insert the end of the rod "1" into the lever of the internal door mechanism. The open side of the loop at the end of the cable should be facing downwards. Pull the cable "3" of the internal door drive "in the direction of the arrow" and insert it into the cable support "2". The bracket "4" should snap into the cable support with an audible click.
For the collision sensor (pressure sensor) to function properly, the door must be tightly sealed. The door trim fastening clamps "arrows" serve to seal the system. Replace the door trim fastening clamps if necessary. Connect the plug connector to the door control unit. Install the door trim at the window groove and press downwards. Carefully attach the door trim clamps to the door and press the trim until you hear the clamps lock to the door. Fix the inner door handle "1" in the bracket "2" by pressing the handle until you hear it lock to the door.
Installation in reverse order.
Removal the midrange speaker cover
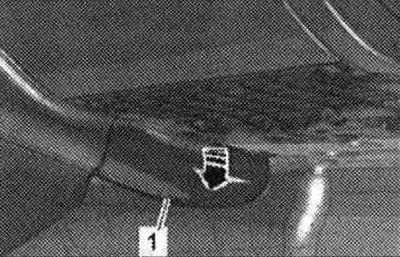
Remove the front door trim. Unscrew the screws "arrows" behind the door trim and remove the speaker trim "1".
Installation in reverse order.
Removal the front armrest

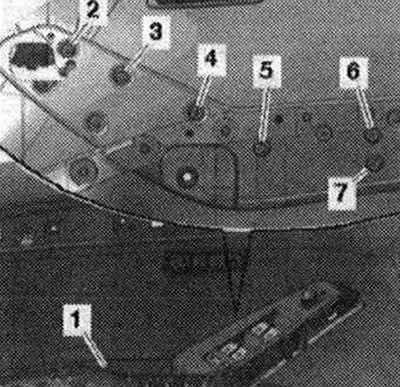
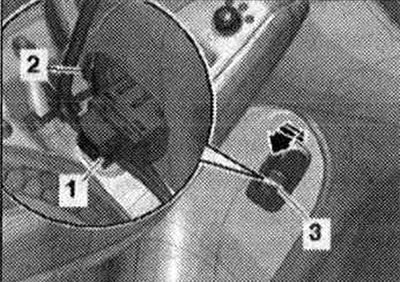
Remove the front door trim. Unscrew bolts "2...9" at the back of the door trim. Disconnect armrest "1" with wedge "3409" from the inner door handle "arrows" and remove it.
Installation in reverse order.
Removal the inner door handle with the mounting location for the front pushbutton panel
Remove the front door trim. Remove the front armrest.
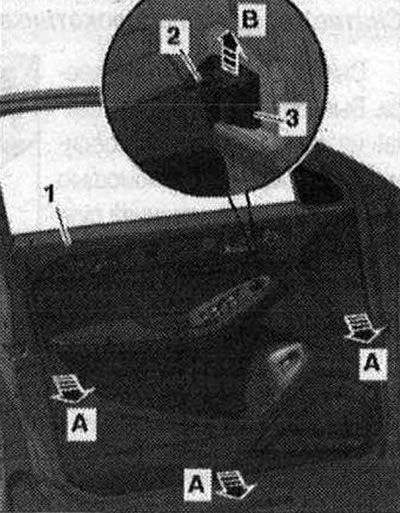
Remove the window lift control panel. Driver's door: remove the switch for adjusting the position of the outside mirrors. Unscrew the bolts "2...7" on the rear of the door trim. Carefully remove the inner door handle "1" with the button panel mount from the door trim.
Installation in reverse order.
Removal the inner door handle opening
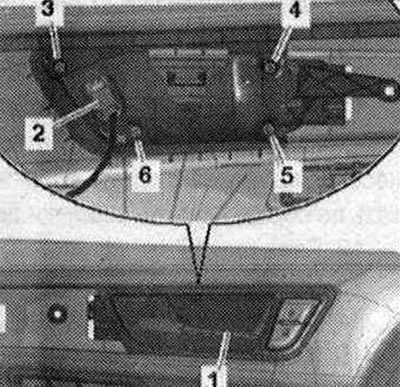
Remove the front door trim. Disconnect the plug connector "2" from the interior door lock switch. Kit version with backlight: disconnect the el. connector. Unscrew bolts "3...6". Remove the interior door drive "1" from the door trim.
Installation in reverse order.
Removal the trim with the remote trunk lid release switch "E188"
Remove the trim of the front door on the driver's side. Disconnect the plug connector "1" from the remote trunk lid release switch. Unlock the clamp "2" and press the trim "3" with the remote trunk lid release switch out of the door trim "arrow".
Remove the remote trunk lid release switch from the trim.
Installation
Installation in reverse order: install the cover until it clicks into place.
Removal the window frame trim
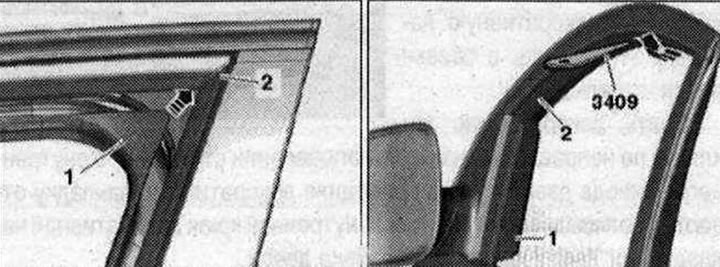
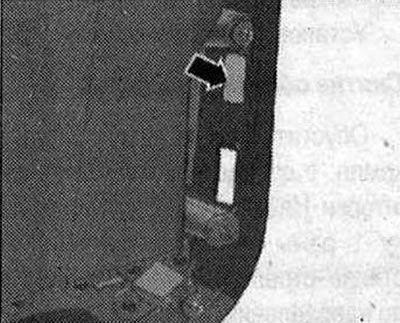
Lower the door window. Remove the front door trim. Remove the tweeter cover. Version with tweeter: Remove the tweeter. Version with lane assist: Remove the lane assist button "E530". Starting from the bottom at the rear end and inwards, carefully press the trim "1" of the window frame using the wedge "3409" along the window guide "arrow A". At the same time, detach the window frame trim downwards and remove it from the frame "arrow B".
Insert trim "1" of the glass frame, starting from the rear end inwards "arrow", into the glass guide "2".
Cover the glass frame with trim "1" using wedge "3409" glass guide "2" "arrow"
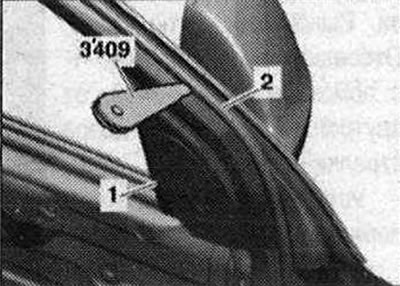
Make sure that the glass guide is not pulled off the door frame. Slide wedge "3409" between the window frame trim and "1" and door seal "2" along the entire length and simultaneously press the trim to the door frame.
Installation in reverse order.
Removal and keypad for control panel "E97"
Remove the front door trim. Remove the driver's seat control panel with memory function "E97". First, unlock the button panel "1" above the "arrow A" and push it forward from the door trim.
Installation
Installation in reverse order: first insert the pushbutton panel from below the "arrow B" and press it until it clicks.
Creating an additional cut for the key for deactivating the interior security system "E183" / the switch for the security alarm system "E217" in the door trim
The driver's side door trim is supplied as a genuine part without a cut for the "E183" / "E217" button. If necessary, make a cut in the new driver's side door trim as described below. Cut a cut for the "E183" / "E217" button in the door trim, making the cut along the specified marking on the back of the door trim. Install the front door trim.