
Table of contents: Door handle bracket ↓ Removal the tweeter cover ↓ Removal the rear door trim ↓ Installation ↓ Removal the rear armrest ↓ Removal the rear inner handle ↓ Removal the window frame trim ↓ Installation ↓ Scheme of installation of sun… ↓ Removal the sun blind on the door… ↓ Installation ↓ Removal the sunshade hanging eye ↓
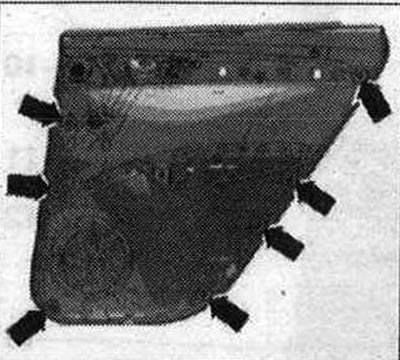
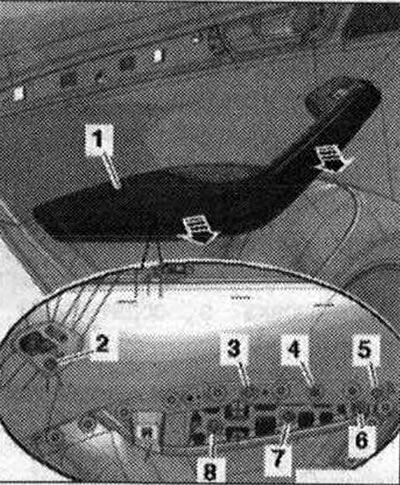
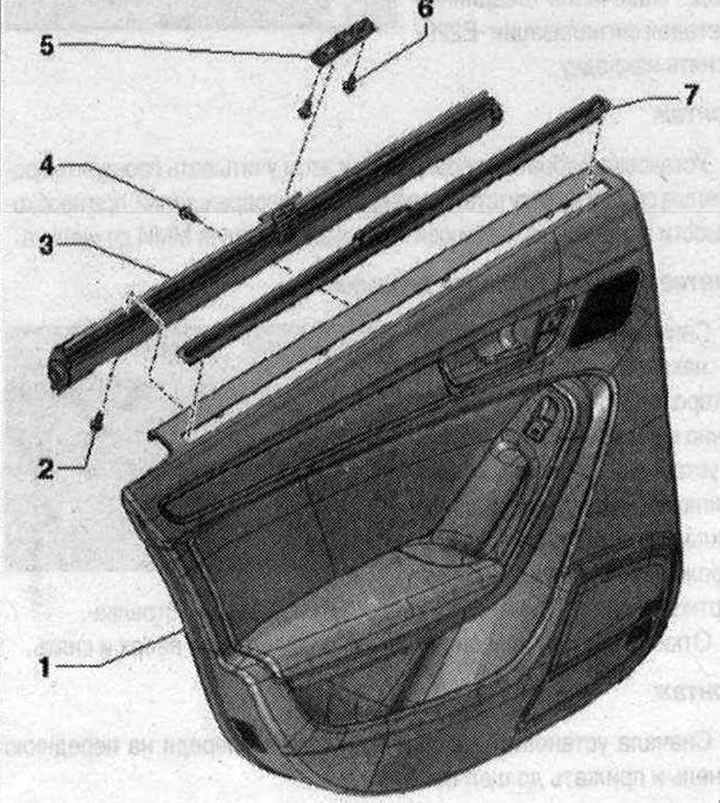
The picture shows the rear left door trim.
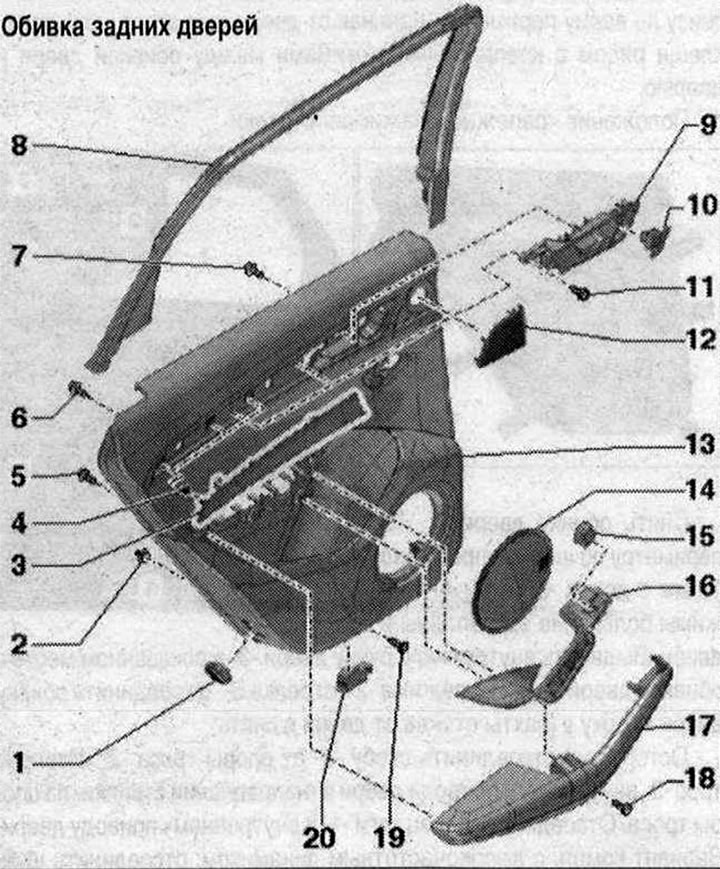
1. Active and passive reflector; 2. Fastening clamp with sealing gasket for door trim. 7 pcs.; 3. Decorative trim for door trim; 4. Clip for decorative trim. 3 pcs. Press into door trim; 5. Armrest bolt. 7 pcs. 1.2 N·m; 6. Closing handle bolt. 2 pcs. 1.2 N·m; 7. Bolt for the opening of the inner door handle. 4 pcs. 1.2 N·m; 8. Facing of glass frames; 9. Internal door opening handle mechanism; 10. Interior lock button, rear. Driver's side: Interior lock button, rear left "E310". Front passenger side: Interior lock button, rear right "E311"; 11. Door trim bolt. 2 pcs. 2.5 N·m; 12. High-frequency speaker cover; 13. Rear door trim; 14. Speaker cover for midrange speaker; 15. Power window switch in the rear door. Driver's side: power window switch in the rear left door "E52". Front passenger side: power window switch in the rear right door "E541" 16. Handle in the door; 17. Armrest; 18/19. Door trim bolt. 2.5 Nm; 20. Threshold illumination
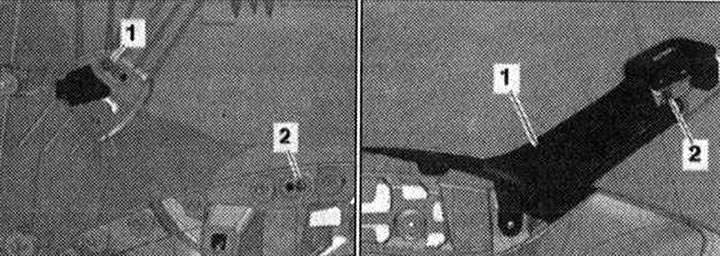
Door handle bracket
1. Door handle bracket; 2. Bolt 2.5 Nm
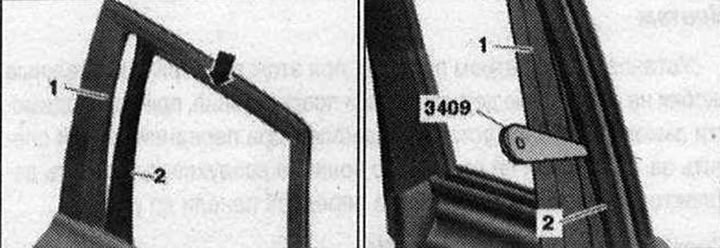
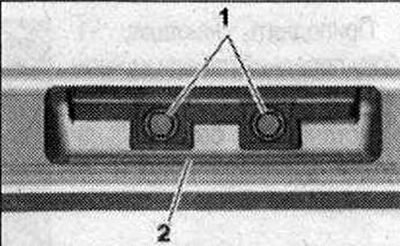
Removal the tweeter cover
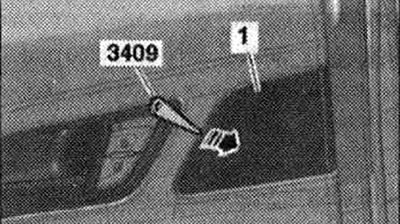
Disconnect the cover of the high-frequency speaker "1" using the wedge "3409" or the screwdriver "arrow" and remove it.
Install the cover until it clicks into place.
Removal the rear door trim
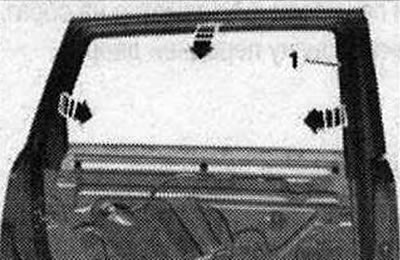
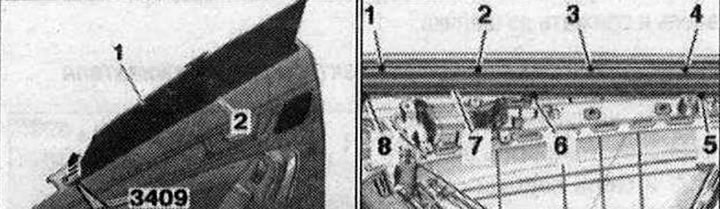
Turn off the ignition. Remove the decorative trim. Unscrew bolts "1...4".
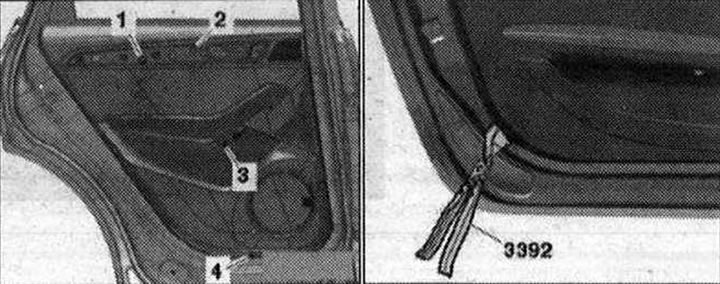
Separate the door trim with the pliers for dismantling "3392" from the back below along the entire perimeter, starting from the door, to do this, install the pliers next to the fastening clamps between the door trim and the door.
Position of the mounting clamps "arrows".
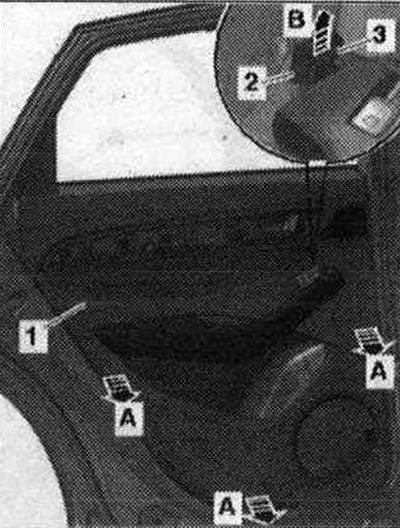
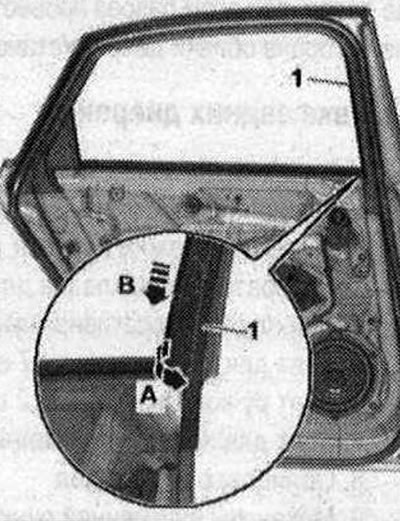
Remove door trim "1" around the perimeter in width approximately 15 mm from the door "arrow A". The clips are no longer secured in the door. Press the inner door handle "3" in the place shown with the door trim upwards from the clip "2" "arrow B". Disconnect the door trim at the top of the glass shaft from the door and remove.
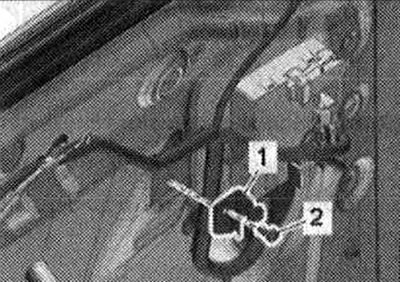
Carefully detach the bracket "4" from the cable support "2". Remove the cable "3" of the inner door drive in the "direction of the arrow" from the cable support. Disconnect the end of the rod "1" to the inner door drive. Option complete with high-frequency speaker: disconnect the plug connector of the high-frequency speaker.
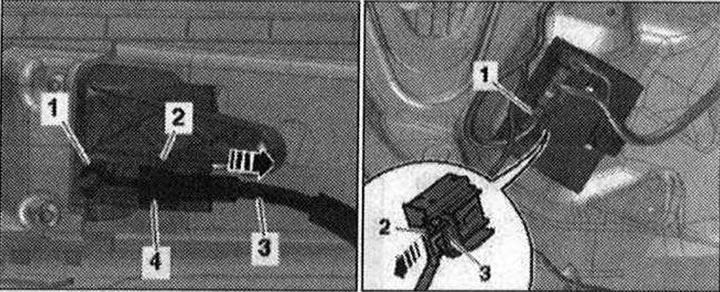
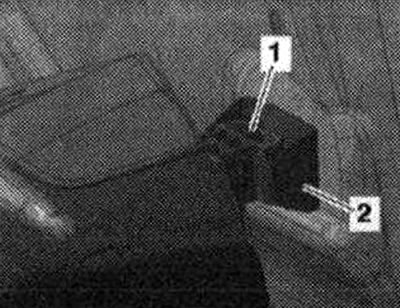
Disconnect the plug connector "1" of the door control unit, to do this, remove the lock "2" "arrow" and press the release button "3".
Remove the door trim.
Installation
Insert the end of the rod "1" into the lever of the internal door mechanism. The open side of the loop at the end of the cable should be facing downwards. Pull the cable "3" of the internal door drive "in the direction of the arrow" and insert it into the cable support "2". The bracket "4" should snap into place in the cable support with an audible click. Connect the plug connector to the door control unit. Install the door trim at the window groove and press it downwards. Carefully attach the clips for the door trim to the door and press the trim until you hear the clips lock to the door. Fix the internal door handle "1" in the bracket "2" by pressing the handle until you hear it lock to the door.
Installation in reverse order.
Removal the rear armrest
Remove the rear door trim. Unscrew bolts "2...8". Disconnect armrest "1" with wedge "3409" from the inner door handle arrows- and remove it.
Installation in reverse order.
Removal the rear inner handle
Remove the rear door trim. Remove the rear armrest. Unscrew bolts "1" and "2".
Remove the inner handle "1" from the door trim. Disconnect the plug connector "2" of the window lift switch.
Installation in reverse order.
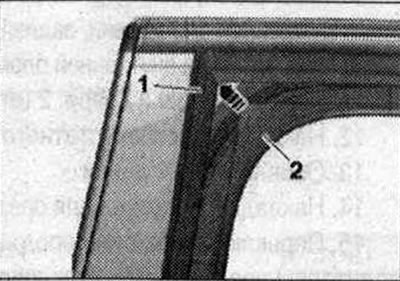
Removal the window frame trim
Lower the door window. Remove the rear door trim. Option complete with sunblind: remove the sunblind hinges. Starting from the front end and inwards, carefully press the trim "1" of the glass frame using the wedge "3409" along the glass guide "arrow A". At the same time, detach the glass frame trim downwards and remove it from the frame "arrow B".
Starting from the front, remove the glass frame trim "1" from the glass guide "arrows".
Installation
Insert trim "1" of the glass frame, starting from the front end inwards "arrow", into the glass guide "2".
Place the window frame trim "2" along the glass guide, while the glass frame trim should fit into the "arrow" groove.
Pass wedge "3409" between glass frame trim "1" and door seal "2" along the entire length and simultaneously insert the glass frame trim to the door frame into the glass guide groove.
Installation in reverse order.
Scheme of installation of sun protection blind on door glass
The illustration shows the rear left sunshade.
1. Rear door trim; 2. Sunshade bolt. 4 pcs. 1.2 N·m; 3. Door glass sunshade; 4. Sunshade bolt. 3 pcs. 1.2 N·m; 5. Sunshade mounting loops; 6. Bolt for suspension eye. 2 pcs. 1.3 N·m; 7. Guide bar;
Removal the sun blind on the door glass
Remove the rear door trim. Carefully remove the guide strip "2" with the wedge for dismantling "3409" from the door trim "arrow". Do not completely remove the sun blind "1" from the door trim and remove the trim through the guide strip.
Unscrew screws "1...6" and "8". Remove sunblind "7", slightly tilting it outward from the door trim.
Pass the sunshade trim through the groove in the door trim and remove.
Installation
Installation in reverse order: the guide strip must be installed in the door trim only in a certain position.
Removal the sunshade hanging eye
Unscrew bolts "1" and remove the hanging eye "2" of the glass frame.
Installation in reverse order.