
Table of contents: Loading the trunk ↓ Rigging loops ↓ Load-bearing net ↓ Laying mesh ↓ Mounting hooks ↓ Safety net ↓ Side niche ↓ Increasing the size of the trunk ↓ Storage shelf ↓ Through loading hatch with cover ↓
Loading the trunk
Baggage items must be properly stored.
In the interests of maintaining good vehicle dynamics, remember the following:
- Ensure that the load is distributed evenly.
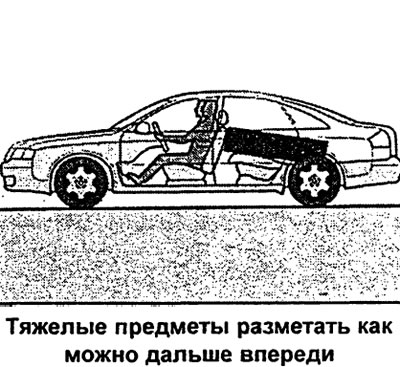
- Place heavy objects as far forward as possible.
- Secure luggage items using safety nets or non-elastic tension straps and rigging loops.
Attention
- Remember that when transporting heavy objects, the dynamic qualities of the car may change due to the shift in the center of gravity - there is a risk of an accident! Therefore, the mode and speed of movement must be selected accordingly.
- Place the load so that it does not move forward in the event of sudden braking - risk of injury!
- To avoid exhaust gases getting into the passenger compartment and poisoning, never drive with the trunk not fully closed, and especially with the trunk open!
Note: The air pressure in the tires must correspond to the vehicle load, see the tire pressure sticker on the fuel filler cap.
Rigging loops
There are four rigging loops in the trunk for securing luggage.
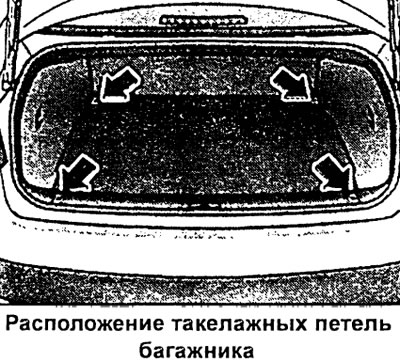
- Secure the load using rigging loops (see arrows).
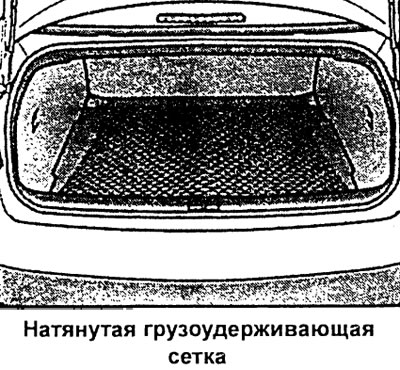
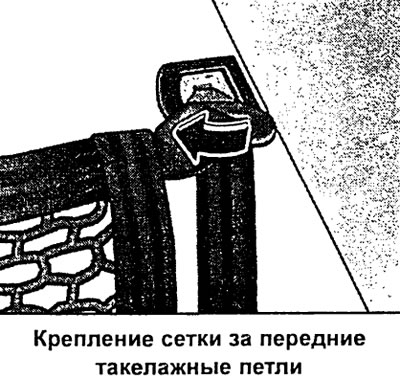
Load-bearing net
The mesh prevents light loads from shifting.
First pass the front hooks through the rigging loops. Then pass the back hooks through the rigging loops.
Laying mesh
The stowage net prevents light loads from shifting in the trunk.
- Spread the storage net in the trunk. The opening in the net should point upwards.
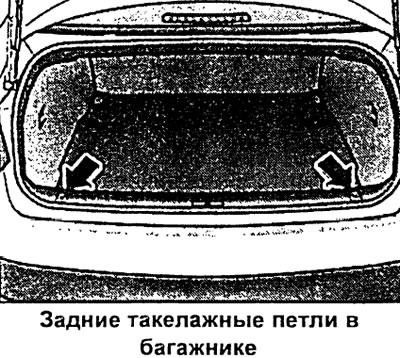
- First, thread the bottom hooks of the laying net through the rear rigging loops.
- Then pull the net up and secure it with tapes to both fastening hooks located under the storage shelf.
- If there are additional hooks in the net (depending on modification) thread these hooks through the front rigging loops (behind the back of the rear seat).
Attention. The laying net is designed for items weighing no more than 5 kg. The net does not provide reliable fastening of heavier items - risk of injury!
Mounting hooks
Lightweight items of luggage can be hung on the mounting hooks.
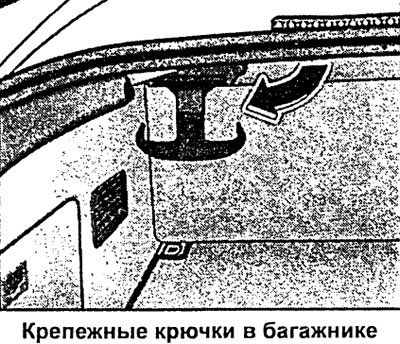
There are two fastening hooks under the storage shelf in the trunk. The stowage net is hung from these hooks.
If you do not use a storage net, these hooks can be used to hang bags, packages, etc.
Safety net
The safety net can be used to secure cargo effectively and reliably.
- Straighten the safety net in the trunk. The inscription "TOP" should point upwards, and the arrow should be in the direction of travel. The free end of the rigging strap should point towards the trunk lid.
- First insert the front hooks parallel to the loop, then turn them.
- Then insert the back hooks parallel to the loop (do not turn the hooks).
- Fold both adjusters up and loosen the rigging straps.
- Place the load so that it is, if possible, completely under the net.
- Pull back the rigging straps and make them tight.
After use, it is recommended to fold the net into the cover and store it in the trunk.

Side niche
In the left side niche of the trunk there is a CD changer for the radio system and a compact disc player (CD-ROM) for the navigation system.
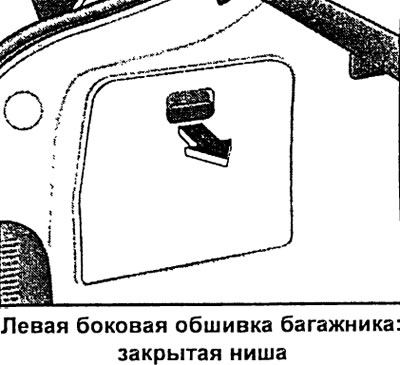
- To open, press the handle down and remove the lid.
The niche can be used to store car accessories, such as a towing rope or jumper cables.
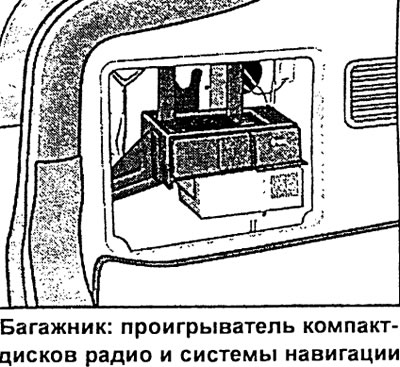
CD changer for radio system and CD-ROM player for navigation system
The radio system's digital CD changer and the navigation system's CD-ROM player are located in this compartment of the trunk. A description of how to use them is provided in the relevant operating instructions.
Increasing the size of the trunk
To increase the size of the luggage compartment, both components of the backrest can be folded forward together or separately.
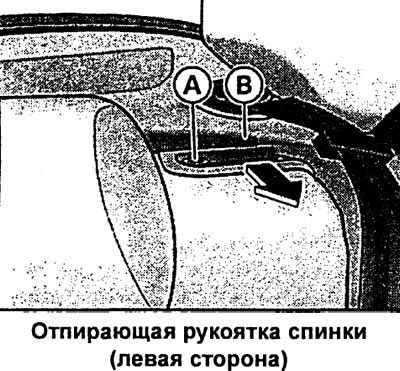
Folding the backrest
- Move the seat belt transverse position adjuster to the extreme position.
- Press the release handle A in the direction of the arrow.
- Fold the back forward.
Returning the backrest to its original position
- Move the backrest back until it is securely locked in place. When the backrest is correctly locked in place, the red marking on pin B should not be visible.
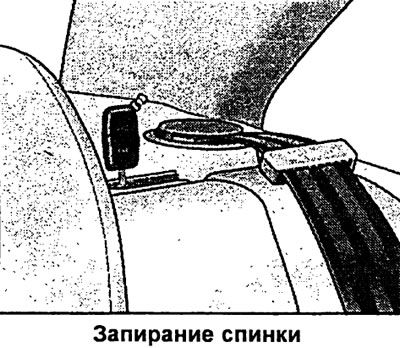
Locking the backrest
- Turn the key inserted into the lock of the release handle to the right.
Unlocking the backrest
- Turn the key inserted into the lock of the release handle to the left.
Correctly fixed rear seat back (normal position) can be locked and unlocked only with the main or emergency key (the lock is in the release handle). This prevents unwanted entry into the trunk from inside the vehicle.
Caution: The backrest must be securely latched onto the lock to ensure the protective effect of the middle seat belt.
Caution: When returning the backrest to its original position, make sure that the seat belts of the outer seats are in the belt guide channel. Otherwise, the belts may get caught in the backrest lock, which may cause damage to them.
Storage shelf
The storage shelf behind the rear seat can be used for light items of clothing.
Attention. Do not place heavy or hard objects on the storage shelf. They may injure people in the car during sudden braking!
Caution: Remember that objects rubbing against the rear window can damage its electrical heating system.
Note: To ensure normal air exchange, do not cover the exhaust slots located at the junction of the rear window and the storage shelf with things.
Through loading hatch with cover
Using the through loading hatch with an adjacent cover, you can transport long items in the cabin (for example, skis), without fearing for their safety, cleanliness and serviceability.
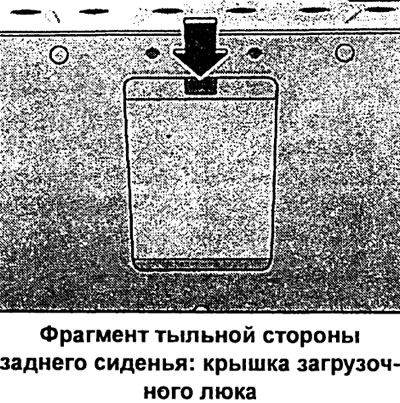
Loading
- Open the trunk.
- In the trunk, press the boot lid release button and move the lid down.
- Move the rear dividing armrest forward.
- In the passenger compartment, press down the loading hatch release button and release the hatch.
- Remove and straighten the cover.
- Insert skis or other similar items through the luggage compartment into the cover located in the passenger compartment.
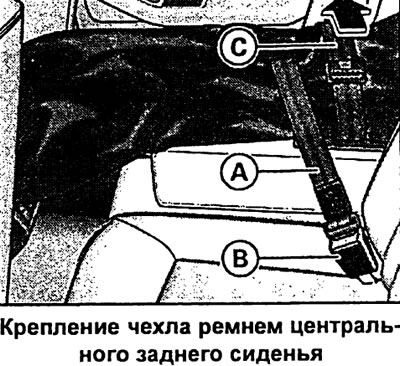
Fastening the car seat cover to the three-point belt of the middle seat
- Insert the belt of cover A into the seat belt buckle of the middle seat B.
- Pull the belt tightly by its free end C.
Attaching the car seat cover to the middle seat lap belt
- Pull out the lap belt of the middle seat.
- Wrap the belt from below one turn around the cover.
- Insert the belt buckle into the appropriate buckle.
- Pull the belt tightly at the other end and allow the excess to be removed using the retractor.
Putting the cover back in place
- Close the boot lid in the trunk.
- Carefully fold the cover and tuck it back into place.
- Close the lid in the cabin.