
Table of contents: Removal ↓ Installation ↓
Attention: When replacing a door handle, it is painted and mounted at a service station before installation.
Removal
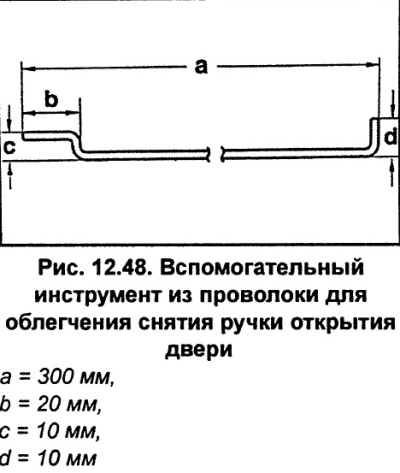
To facilitate removal and installation, it is recommended to make an auxiliary tool from wire yourself (see fig. 12.48).
Remove the door trim.
Lower the glass down until it stops.
Unhook the working rod 8 (fig. 12.48) on the clamp of the rotary lever 3.
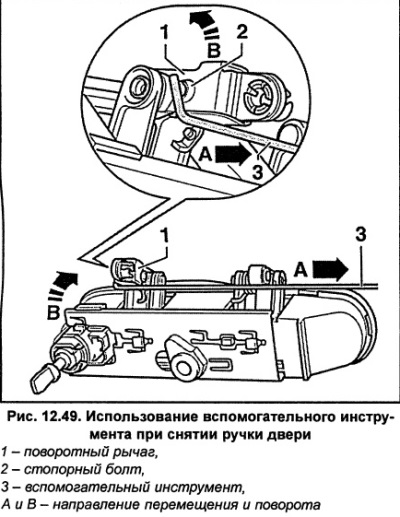
Slightly move the locking bolt 2 (fig. 12.49) in the direction of arrow A. To do this, use auxiliary tool 3 to engage pivot lever 1 as shown in Figure 12.49.
Remove completely from the pivot arm 1 (fig. 12.50) safety pin 2 with auxiliary tool 3 in the direction of arrow A.
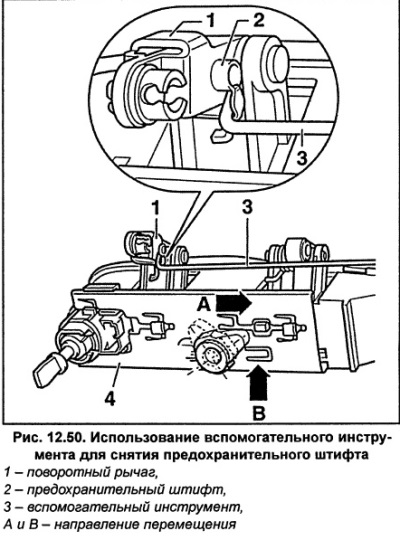
Fold up the rotary lever 1 (fig. 12.50).
Use a small screwdriver to release the safety catch, arrow B (fig. 12.50).
Unlock damper 4 (fig. 12.51) support element 2. To do this, use a 3 x 17 mm wrench to turn stopper 5 in the direction of arrow A.
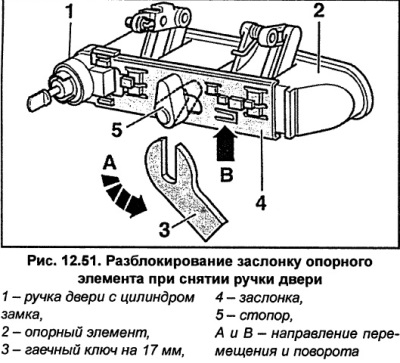
From the outside, remove the door handle with the lock cylinder 1 (fig. 12.51).
Remove the door handle support element 2 from the inside (fig. 12.51).
Installation
Insert the door handle and support piece into the door.
Lock the valve with a wrench.
Push the safety pin 2 using the auxiliary tool into the door handle in the direction of the arrow shown in Figure 12.52.
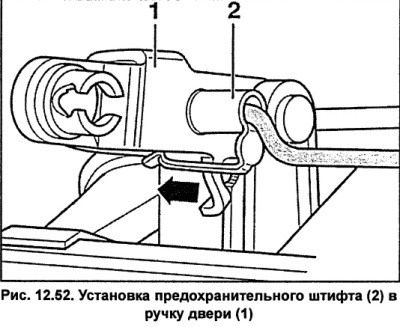
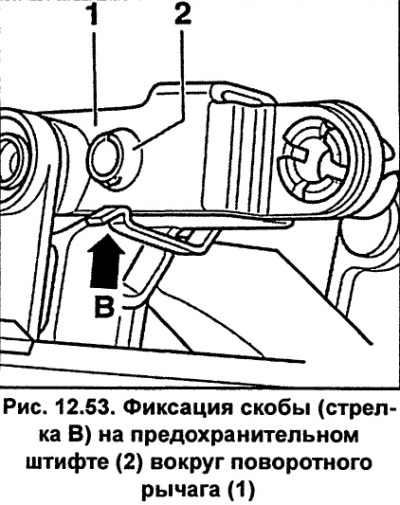
In this case, the bracket, arrow B (fig. 12.53) on the safety pin 2 must snap completely into place around the pivot lever 1.
Attach the working rod to the pivot arm clamp.
Install the door trim.
The original article is located on the online resource AUDImanual