
Solid back. seat
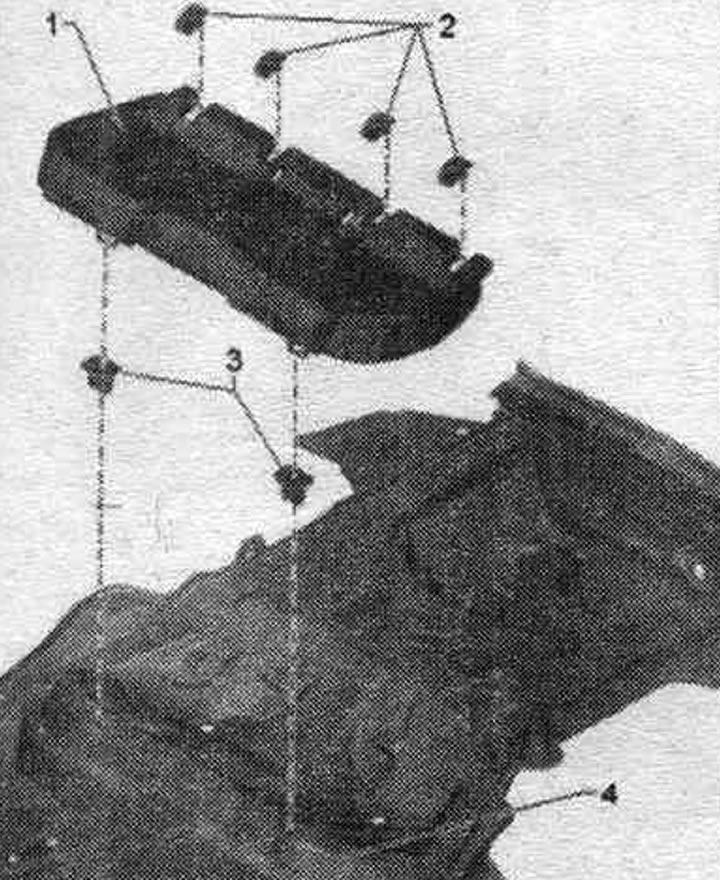
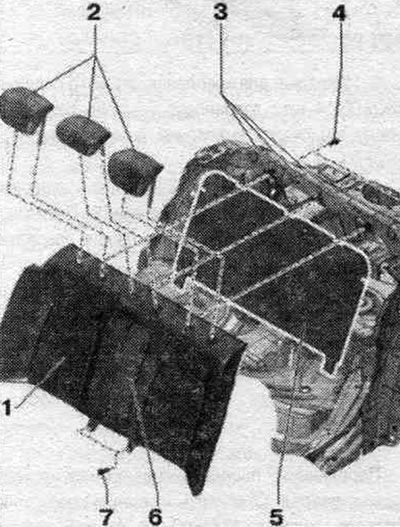
1. Bench seat: one-piece. The wire frame of the bench seat must be checked and corrected if deformed after each disassembly of the bench seat.
2. Pad: for attaching a child seat (ISOFIX); 4 pcs.; secured to the child seat mounting brackets (ISOFIX) welded to the bottom of the vehicle.
3. Mounting attachments: 2 pcs.; for rear mounting. seats; clipped into the bottom. After each removal of the rear cushion. the seat mounting pads must be replaced.
4. Underbody. The supporting base of the body, where the clamping ends are installed, should be inspected after each removal of the undivided seat and, if deformed, straightened.
Removal
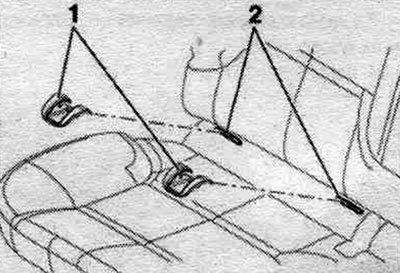
Move the front seats as far forward as possible. Unclip the child seat anchorage pads (ISOFIX) (4 pieces) "1" from the anchorages "2".
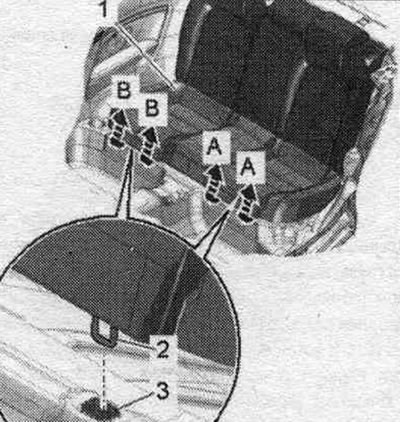
Grasp the bench seat frame with both hands on one side, below "arrow A". Rear cushion. seat "1" with both hands, pull strongly in the upward direction "arrow A" so that hook "2" of the rear cushion. the seat has popped out of the fastening attachment "3". All work must be carried out from the other side of "arrow B". Option with a seat heating system: disconnect the plug connection of the system. heated seats. Remove the bench seat from the vehicle.
Installation
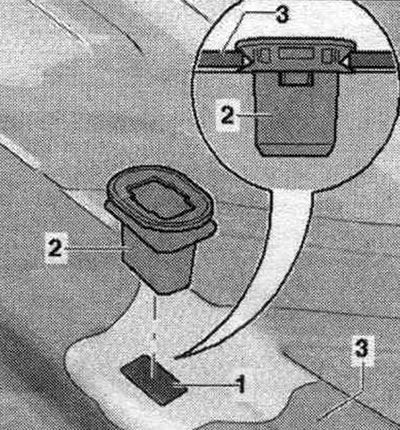
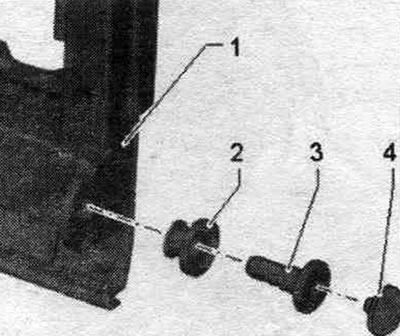
The supporting base of the body, in which the clamping tips are installed, should be checked after each dismantling of the non-divided seat and, if deformed, straightened. The wire frame of the bench seat must be checked after each dismantling and corrected if there is any deformation. After each removal of the rear cushion. the seat mounting attachments are subject to replacement. Installation in reverse order. Remove clamping tips "2" from the body opening and discard. Check the supporting base of the body for deformations and straighten it if necessary. Check the wire frame for deformations and straighten if necessary. Lift floor covering "3" and press clamping tips "2" into the body opening "1" until they click into place. Position floor covering "3" as shown near tip "2." Floor covering "3" should not rest on tip "2." Remember to insert the plug-in connector until it stops and clicks into place.
Install the multi-seat "1" and press the wire frame "2" firmly into the tips "3". Make sure that the wire frame "2" is correctly locked in the tips "3". Finally, check the secure seating of the multi-seat. To do this, you should take hold of the frame of the multi-seat "arrow A" with both hands on one side of the seat and, without jerking, pull it evenly upwards with a force of 100 to 150 Nm, which corresponds to approximately 10-15 kg. Repeat the process on the other side of "arrow B". The bench seat should NOT come out of the end caps. If the bench seat comes out, the process must be repeated in its entirety.
Split back
The back is divided into 2 parts: right back 2/3 and left back 1/3.
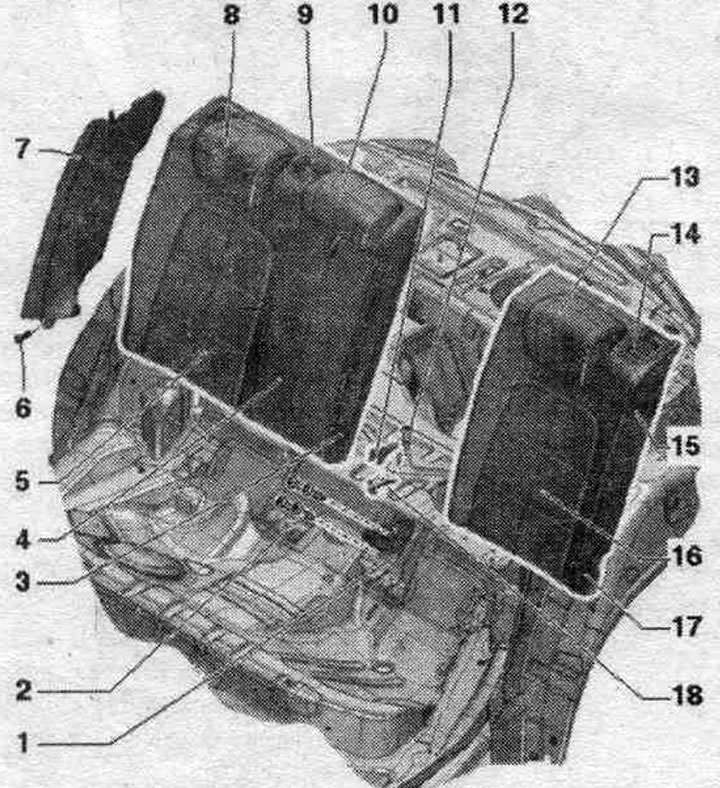
1. Middle support.
2. Bolts: 4 pcs.; 16.5 Nm.
3. Inner support: 2 pcs.
4. Armrest: option with a cover for the opening for transporting long loads, option with a storage compartment (backrest holder cover with cover): The center armrest and storage compartment can only be removed and installed separately. version without a storage pocket (backrest holder lining and backrest holder overlay): The middle armrest, as well as the backrest holder trim and the backrest holder cover, can only be removed and installed separately.
5. Backrest split 2/3 on the right: options: without middle armrest and storage compartment and without middle armrest and cover for the opening for transporting long loads (option with a foam base), with a middle armrest and storage compartment, with a middle armrest and a cover for the opening for transporting long loads.
6. Bolt: 9 Nm for side airbag with side airbag: 3 Nm for side airbag without side airbag.
7. Side airbags.
8. Right headrest.
9. Rear guide. central seat belt guide: If damaged, replace the entire seat belt guide.
10. Middle headrest.
11. Facing of the middle support.
12. Bolt: 9 Nm.
13. Left headrest.
14. Locking plate with locking cylinder.
15. Backrest lock.
16. Backrest divided 1/3 on the left.
17. External support: 2 pcs.; fixed to the back frame.
18. Fixing loop of the middle support.
Internal support
1. Seat back insert.
2. Tip.
3. Bolt - 15Nm.
4. Washer.
Solid backrest. seats
1. Solid backrest. seats.
2. Headrests.
3. Mounting sockets: secured with 2 rivets to the body.
4. Bolt: 3 pcs.; 30 Nm.
5. Rear trim. walls.
6. Armrest.
7. Bolt: 2 pcs.; 33 Nm.
(Text provided by the online resource: «AUDIMANUAL»)