



Table of contents: Tools and materials needed for… ↓ Battery-operated fuse box ↓ Check and care ↓ Charger ↓
Tools and materials needed for battery maintenance
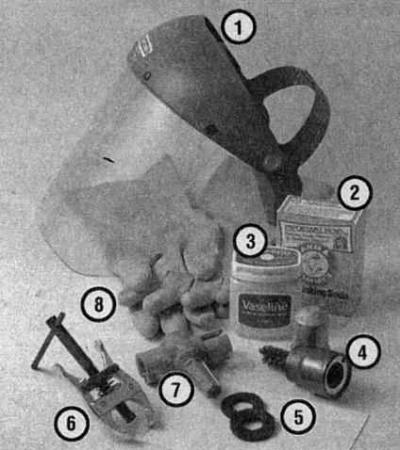
- 1 face shield/safety glasses - when brushing away traces of corrosion, crystallized acid particles can easily get into the eyes
- 2 Baking soda - a solution of baking soda and water can be used to neutralize corrosion
- 3 acid-free petroleum jelly - a layer of petroleum jelly applied to the battery terminals will help prevent them from corroding
- 4 Terminal/Wire Terminal Stripper - This wire brush stripper will remove all traces of corrosion from battery terminals and wire terminals
- 5 impregnated felt washers - installing these washers on each battery terminal directly under the wire tips will help prevent corrosion
- 6 Puller – Sometimes the wire ends can be very difficult to remove from the battery terminals, even after the nuts/bolts have been completely loosened. This tool will help you remove the ends vertically upwards without damaging them
- 7 Terminal/Wire Terminal Stripper - Another type of stripping tool, a slightly modified version of item 4, that performs the same function
- 8 rubber gloves - another means of protection when working with a battery; remember that there is acid in the battery!
Battery-operated fuse box
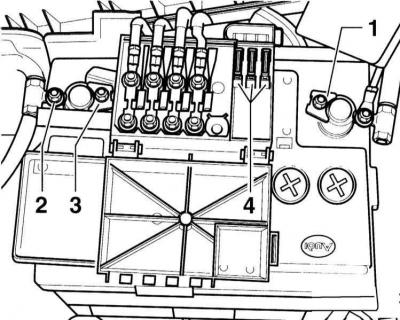
- 1 terminal "-"
- 2 nut
- 3 bolt securing the positive cable, do not unscrew
- 4 fuses
Check and care
Warning: When working with a battery, certain safety precautions must be taken. Highly flammable hydrogen is always present in battery cells, so never allow a lit cigarette or other open flame to approach the battery. Battery electrolyte is a sulfuric acid solution, which causes serious injuries if it gets into the eyes or on exposed areas of the body. In addition, the acid corrodes clothing and paints. When disconnecting a battery, always disconnect the negative cable first and reconnect it last!
1. Battery maintenance is a very important procedure to avoid stopping your vehicle on the road due to a discharged battery. Several tools are required to perform the maintenance procedure.
2. Before beginning any maintenance procedure, always turn off the engine and all electrical equipment first, then disconnect the negative battery cable.
Warning: If your vehicle's radio is equipped with an anti-theft system, make sure you enter the correct code before disconnecting the battery.
3. AUDI cars are usually equipped with batteries that do not require special care. You can remove the lids of the cans and add distilled water. The latest models can be equipped with batteries that do not require any care at all, which are completely sealed.
4. The middle plugs are covered by the main fuse box. To remove the fuse box, you must disconnect the battery ground cable (-).
Warning: This will erase data in electronic memory units, such as the radio code. Read the instructions in the subsection Entering the radio code.
5. Remove hex nut "2" and release the corner of the main fuse box from the battery housing.
6. Remove the caps and check the electrolyte level in each battery can. It should be above the plates. Usually there is a level indicator on each can. If the electrolyte level is below the norm, add only distilled water and then close the can caps.
Warning: Overfilling the cells may cause electrolyte to overflow during boost charging, causing corrosion and damage to components near the battery.
7. If your vehicle's positive battery terminal and cable clamp have a rubber protector, make sure it is not torn or damaged. It should completely cover the terminal.
8. It is necessary to periodically inspect the external condition of the battery for damage such as cracks in the case.
9. Check that the battery cable clamps are tight enough to ensure a good electrical connection. Check each wire along its entire length for cracks or frayed insulation or wires.
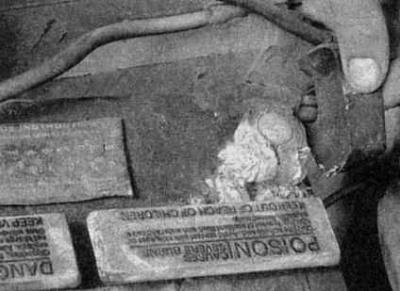
Battery terminal corrosion usually appears as a light, loose powder
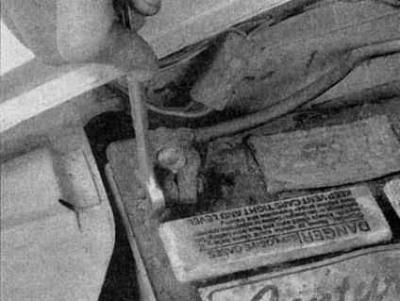
Disconnecting the wire from the battery terminal using a wrench - sometimes, in cases where corrosion has destroyed the nut, special pliers are required for this procedure (always disconnect the ground wire first and connect it last!)
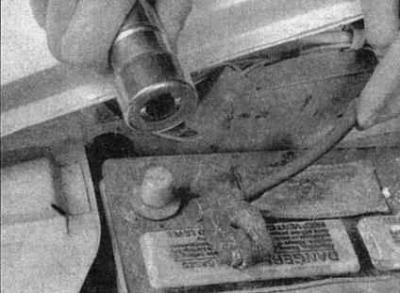
Regardless of the type of stripping tool, the result should always be a clean, shiny terminal surface
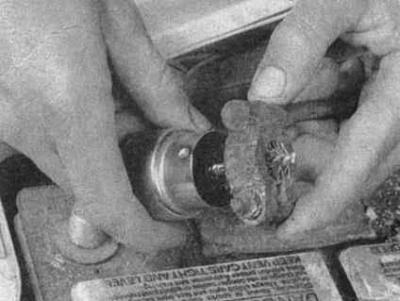
When stripping wire ends, it is necessary to remove all traces of corrosion (the inside of the tip is tapered to match the shape of the battery terminal, so don't remove too much material)
10. If traces of corrosion are detected (usually presenting as a loose white coating) disconnect the wires from the terminals, clean them with a special brush, and reconnect them. The occurrence of corrosion can be minimized by installing specially treated washers, which are available from auto parts stores, or by coating the terminals and wire clamps with a layer of acid-free petroleum jelly or a suitable lubricant after they are connected.
11. Make sure the battery tray is in good condition and the clamp bolt is securely tightened. If the battery has been removed from the tray, make sure there are no parts or other objects on it during installation. When tightening the clamp bolt, do not tighten it too tightly.
12. Traces of corrosion from the tray, battery case and surrounding surfaces can be removed using a solution of baking soda and water. Apply the mixture with a small brush, let it sit and then rinse with plenty of clean water.
13. Corroded metal surfaces of the vehicle should be coated with a zinc-based primer and then painted.
Charger
Warning: Manufacturers recommend removing the battery from the vehicle to charge it, as gas released during this procedure may damage the vehicle's paintwork or interior, depending on the battery's location. Rapid charging with battery cables connected may cause damage to the vehicle's electrical system.
14. Remove all caps from the battery jars (if they exist) and cover the holes with a clean rag to prevent electrolyte from spilling. Disconnect the negative battery cable and connect the charger cables to its terminals (positive to positive, negative to negative), then plug the charger into the power outlet. If it has a switch, make sure it is set to "12 volts".
Warning: If your vehicle's radio is equipped with an anti-theft system, make sure you enter the correct code before disconnecting the battery.
15. If you are using a charger with a current greater than two amps, check the battery regularly while charging to ensure that it has not overheated. If you are using a slow charger, you can safely leave the battery to charge overnight after checking regularly for the first two hours. Certain precautions may be required when charging maintenance-free batteries (for example, using a very low current charger). There may be a warning label on such a battery, but if there is none, consult an AUDI dealer or an electrician at a car repair shop.
16. If the battery jars have removable caps, check the specific gravity of the electrolyte with a hydrometer every hour during the last few hours of the charge cycle. Inexpensive hydrometers are available at auto parts stores - follow the instructions on the package when using them. The battery is considered charged if the specific gravity of the electrolyte does not change for two hours and the electrolyte in the jars bubbles freely. The specific gravity of the electrolyte in the individual jars should be nearly the same. If this is not the case, one or more of the battery jars is bad and should be replaced.
17. Some maintenance-free batteries have a built-in hydrometer at the top that has a window - a color indicator of the battery's charge level. Usually, a brightly colored window means the battery is fully charged, and a dark color indicates that additional charging is needed. More precise information is provided in the battery manufacturer's instructions.
18. If the battery is sealed and does not have a built-in hydrometer, you can check the charge level by connecting a digital voltmeter to the battery terminals. A fully charged battery will show 12.6 volts or more.