
Steering rods and tie rod ends
Warning: Use only original clamps for the protective boot. Open clamps using cutting pliers.
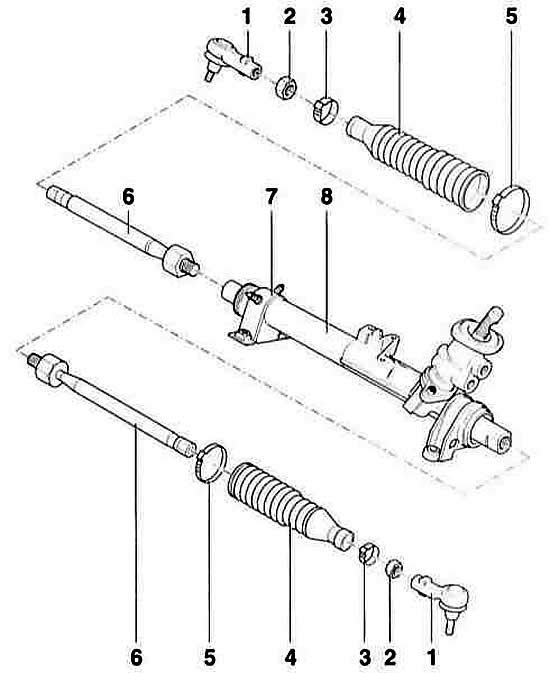
- 1 - tie rod end. There are left and right versions.
- 2 - locknut, 50 Nm
- 3 - collar
- 4 - protective cover
- 5 - clamp
- 6 - steering rod. Fix on the gear rack with a torque of 75 Nm.
At the same time, hold the gear rack by the flats against turning with a wrench.
- 7 - clamp with rubber insert
- 8 - power steering mechanism. To remove, you must first lower the beam of the unit (service station work).
The toe-in adjustment is made by turning the steering rods on both sides of the vehicle. Tie rod ends must not have play. The dust caps must not be damaged, otherwise they must be replaced immediately. The tie rod ends on the right and left have a different bend. Pay attention to this when using spare parts.
Withdrawal
1. Mark with paint the position of the corresponding front wheel relative to the hub. This will allow the assembly to install the balanced wheel in its original position. Loosen the wheel bolts with the vehicle on the ground. Raise the front of the car, put it on stands and remove the front wheel.
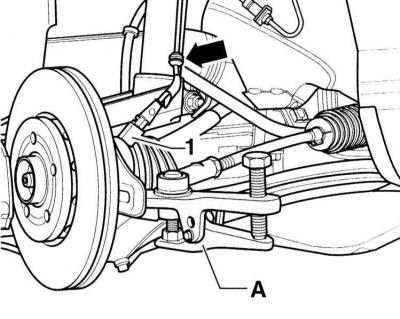
2. Loosen the tie rod end nut and turn it to the end of the thread. It serves as a support for the puller. -1- - ABS speed sensor connector.
3. Press the tie rod end pin off the swing arm with a standard puller (A), for example, Hazet 779.
4. Loosen the locknut -2- of the tie rod end, refer to illustration Tie rods and tie rod ends.
5. Loosen the tie rod end, counting the number of turns required for subsequent assembly.
6. Cut the clamps on the protective cover. Do not damage the case while doing this.
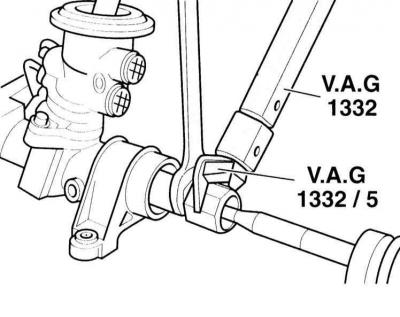
7. Remove the protective cover as far outward as possible and unscrew the tie rod. The service station uses the special tool VAG-1332 shown in the illustration, complete with 1332/5. A suitable wrench may also be used.
Warning: Hold the gear rack from turning with a 21 mm wrench by the flats.
Installation
1. Replace tie rod or tip.
2. Screw the tie rod end to the number of revolutions recorded during removal and secure by hand with a lock nut.
3. Fasten the steering rod with a torque of 75 Nm to the steering mechanism, holding it from turning with a wrench.
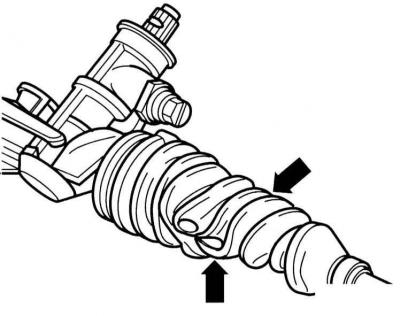
4. Place the protective cover in working position. It must not be twisted in any way, as shown in the illustration, and must not be damaged.
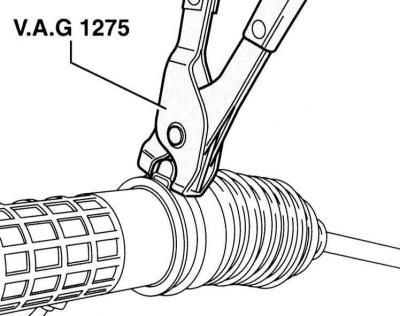
5. Fix the protective cover with new clamps. Tighten the clamps with pliers VAG 1275 or other suitable tool, eg HAZET 1847-1.
6. Insert the tie rod into the swing arm on the wheel bearing housing and tighten with a new self-locking nut to 45 Nm.
7. Tighten the tie rod end locknut to 50 Nm.
8. Reinstall the front wheel so that the markings made during removal match. Pre-lubricate with a thin layer of bearing grease the centering belt of the wheel disk on the hub. Do not grease wheel bolts. Replace rusty bolts. Wrap bolts. Lower the vehicle onto the wheels and tighten the bolts crosswise to 120 Nm.
9. Check wheel alignment.
Visitor comments