
Table of contents: Removal and installation the lock… ↓ Installing the pressure spring ↓
Lubricate the bearing and sliding surfaces with consistent grease "G 052 142 A2".
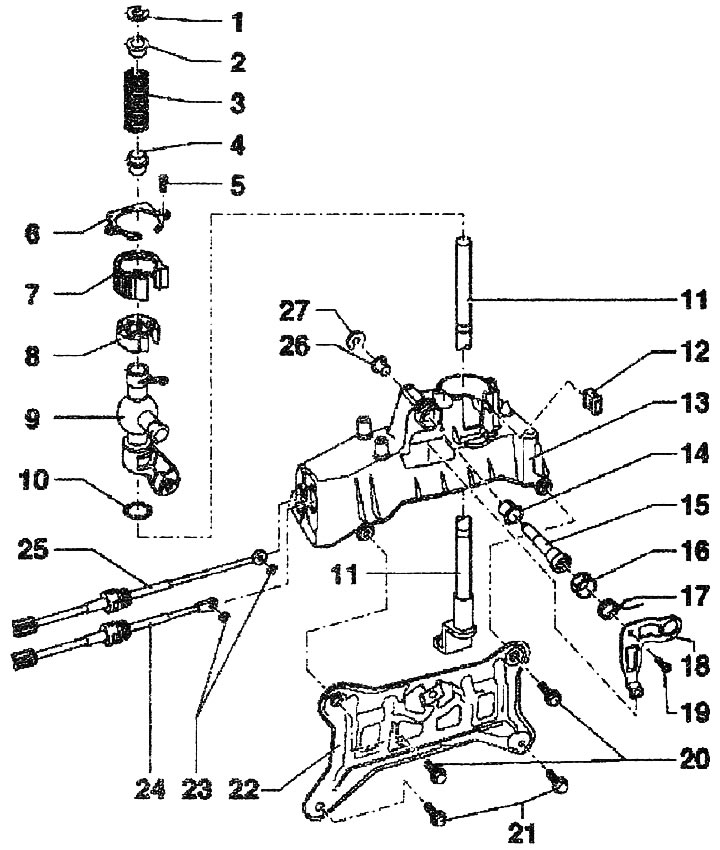
1. Lock washer
2. Bushing
3. Pressure spring
4. Bushing
5. Screw, 6 Nm
6. Lid
7. Soundproofing
8. Bearing insert, clip into sound insulation
9. Selector guide
10. Shock absorbing washer
11. Selector
12. Soundproofing. Install on the gearshift mechanism housing
13. Backstage housing
14. The support sleeve is installed in only one position
15. Bearing cap bolt
16. Install the guide sleeve onto the gearshift mechanism housing
17. Pressure spring
18. Selector corner
19. Screw, 6 Nm
20/21. Bolt, 9 Nm
22. Mounting plate
23. Lock washer
24. Cable drive of the selector to the selector corner
25. Place the shift cable onto the selector guide
26. The support sleeve is installed in only one position
27. Lock washer
Removal and installation the lock washer
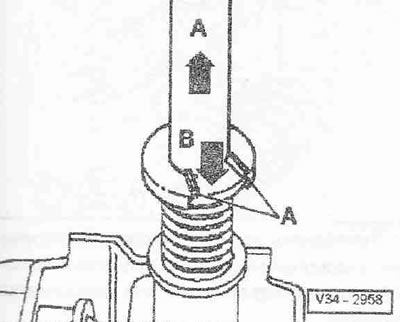
To remove and install the lock washer "A", move the gearshift lever "in the direction of arrow A" and at the same time move the spacer sleeve down to the stop with a screwdriver "in the direction of arrow B".
Instructions. When pressing on the spacer sleeve, it must not be tilted. Carefully loosen the seat for the lock washer on the gearshift lever.
Installing the pressure spring
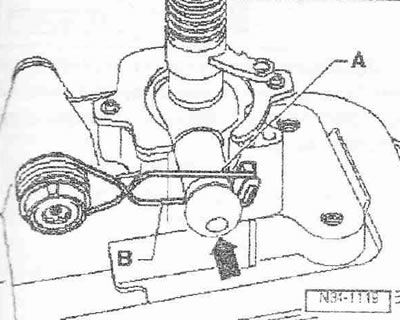
Install the pressure spring so that the bridge "A" is adjacent to the upper side of the trunnion "arrow". Lower the spacer "B" so that it is adjacent to the lower side of the trunnion "arrow".