
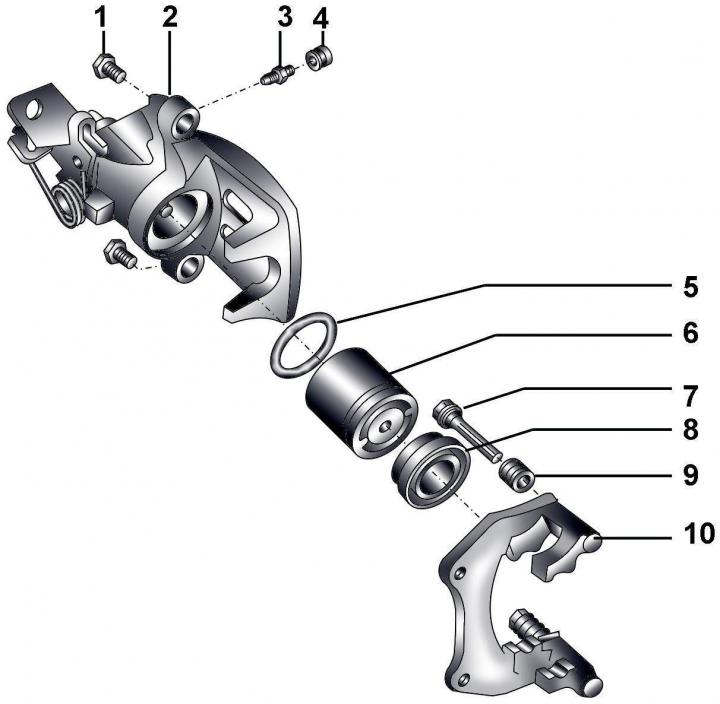
Fig. 15–30. Rear caliper: 1 – self-locking bolts, 35 Nm; 2 – support with lever for parking brake cable; 3 – bleed nipple; 4 – protective cap; 5 – sealing ring; 6 – piston; 7 guide pin; 8, 9 – protective covers; 10 – caliper holder
The rear caliper parts are shown in Fig. 15–30.
Clean the caliper from dust and dirt, using respiratory protection.
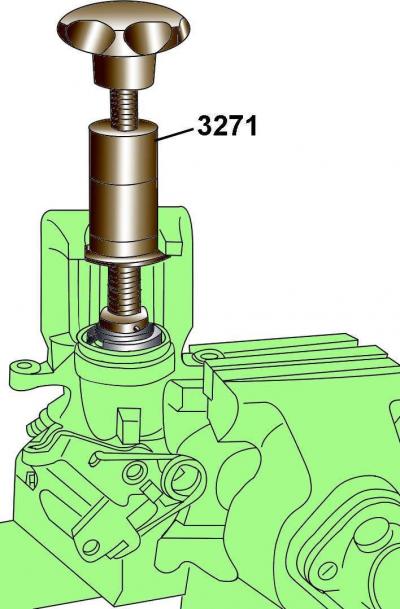
Fig. 15–31 Using Tool 3272 to Unscrew the Piston from the Caliper
Unscrew the piston from the caliper using tool 3272 (Fig. 15–31). To unscrew the piston, position the tool so that the tool shoulder fits into the grooves of the piston. Rotate the tool body counterclockwise until it stops. Rotate the tool handle counterclockwise to unscrew the piston from the caliper.
Carefully pry the seal out of the caliper cylinder groove using a wedge or flathead screwdriver blade as a lever.
Check the condition of all caliper parts, replace worn or damaged parts. Pay special attention to the cylinder and piston. If there are scratches, marks, wear or pitting, replace the piston and cylinder. Regardless of the condition, replace the rubber seals.
Wash all parts in methylated spirits or clean brake fluid and wipe them dry. Blow out tubes and holes with compressed air.

Fig. 15–21. Location of installation of the protective cover on the caliper piston
Apply a thin layer of grease G 052 150 A2 to the sealing ring and piston (see Fig. 15–21).
Install the dust boot onto the piston so that the inner diameter of the boot fits into the piston groove.
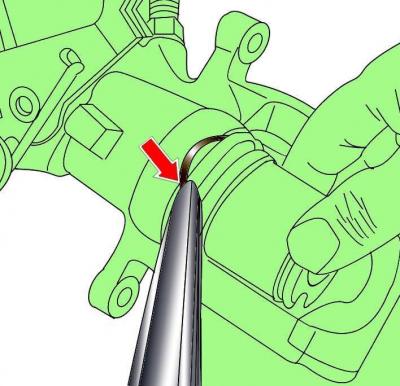
Fig. 15–32. Using a special device to install the working edge of the dust cover into the support
Place the piston opposite the caliper cylinder and, using a special device, insert the working edge of the dust cover into the caliper until it locks into place (Fig. 15–32).
Screw the piston into the caliper using tool 3272. To screw in the piston, position the tool so that its flange enters the grooves of the piston. Rotate the body of the tool counterclockwise until it stops. Rotate the handle of the tool clockwise to screw the piston into the caliper (see Fig. 15-31).
After installing the piston, it is necessary to blow out the cylinder with air and fill it with fresh brake fluid.