
Table of contents: Removal ↓ Installation ↓
Removal
Attention! Since there is no hole for draining fuel in the fuel tank, it is advisable to remove the tank after the fuel has been used up.
1. Remove all available fuel from the tank if it has not been used up.
2. Disconnect the negative (-) battery terminal from the battery.
3. Remove the rear seat.
4. Unscrew the screws (see arrows in the illustration) covers on the bottom, which cover the fuel pump and fuel level sensor.
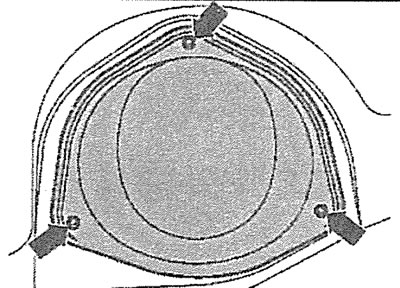
2.4. Unscrew the screws (see arrows) the cover on the bottom, which covers the fuel pump and the fuel gauge sensor
5. Disconnect plugs 1 and 2 of the fuel pump and fuel gauge sensor (see illustration).
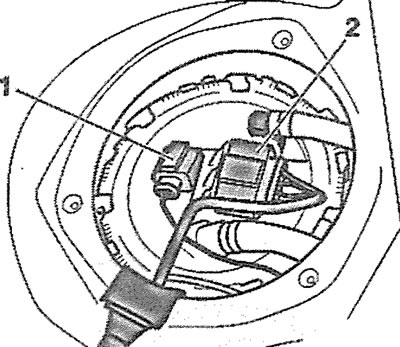
2.5. Disconnect plugs 1 and 2 of the fuel pump and fuel gauge sensor
6. Open the filler cap. Clean the area around the filler cap thoroughly.
7. Remove the retaining ring (see arrow in illustration), carefully prying it off with a screwdriver.
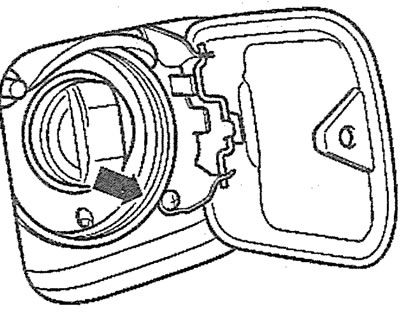
2.7. Remove the retaining ring (see arrow), carefully prying it off with a screwdriver
8. Remove the main and additional mufflers (see the relevant chapters).
9. Remove the heat shield from the filler neck.
10. Remove the rear shock absorbers and rear lower suspension arms.
11. Remove the rear right fender liner.
12. Unscrew the bolts (see arrows in the illustration) fuel tank filler neck fastenings.
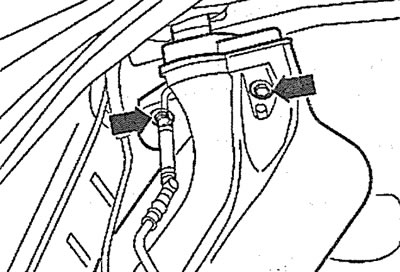
2.12. Unscrew the bolts (see arrows) fuel tank filler neck fastenings
13. Mark and then disconnect the fuel supply and return lines by removing clamps 1 and 2 (see illustration).
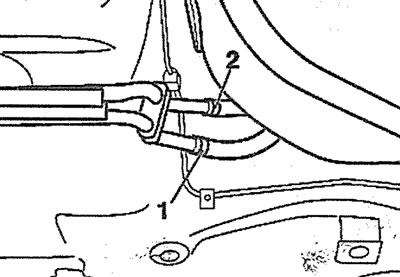
2.13. Mark and then disconnect the fuel supply and return lines by removing clamps 1 and 2
14. Vehicles with parking heater. Disconnect the parking heater fuel line.
15. Place a garage jack under the fuel tank, placing a wooden block on it first, and lift the jack while holding the fuel tank on it.
16. Make sure the fuel tank is securely fastened to the garage jack and remove fuel tank mounting bolts 1-8 (see illustration).
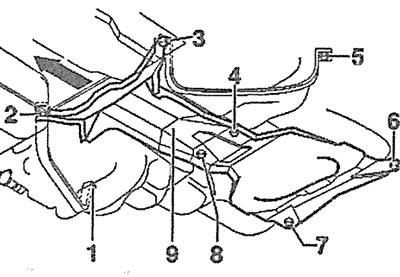
2.16. Unscrew bolts 1-8 of the fuel tank mounting
17. Make sure all wires, hoses and lines are disconnected from the fuel tank and nothing will interfere with its lowering. Then carefully lower the fuel tank (see arrow in illustration 2.16) and remove the tank from under the car.
Installation
The fuel tank is installed in the reverse order of removal.
The article was copied from the website audimanual.ru