
Table of contents: Headlight ↓ Rear light ↓ Fog lights ↓ Side turn signal repeater ↓ Additional brake light ↓
External lighting devices include: headlights, fog lights, tail lights, brake lights, reversing lights, turn signal lights, rear fog lights, and license plate lights.
Headlight
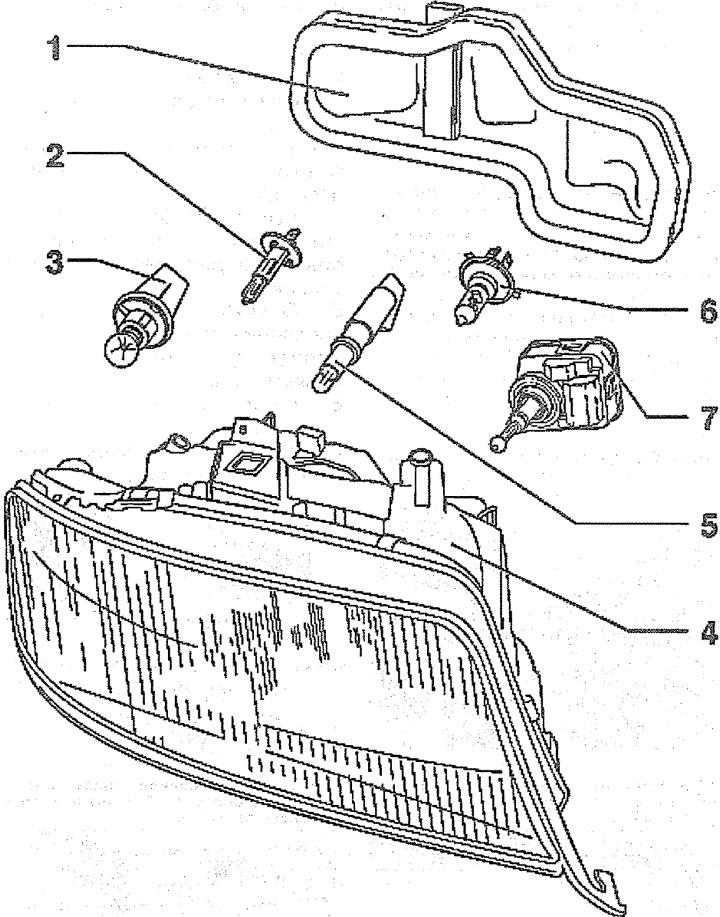
13.0. Headlight:
1 - headlight cover
2 - low beam bulb - H1 (55 W)
3 - orange turn signal bulb (21 W)
4 - headlight housing
5 - parking light bulb (5 W) 6 - high beam bulb - H7 (55 W)
7 - headlight corrector electric motor
Attention! When replacing the headlight with a new one, measure and write down the distance "a" from the head of the plastic bolt to the headlight housing (see illustration 13.6), to adjust the position of the new headlight during installation.
Removal
1. Disconnect the negative (-) battery terminal from the battery.
Attention! When the battery is disconnected, the radio code is deleted. After connecting the battery, the radio can only be turned on after entering the appropriate code or by using the services of an AUDI workshop or the manufacturer of the radio. Therefore, before disconnecting the battery, check and write down the entered code.
2. Remove the front bumper (see the relevant chapter).
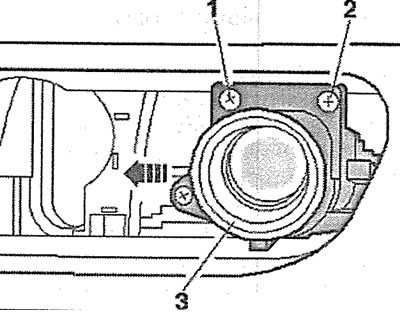
3. Unscrew the two bolts 1 that secure the headlight (see illustration).
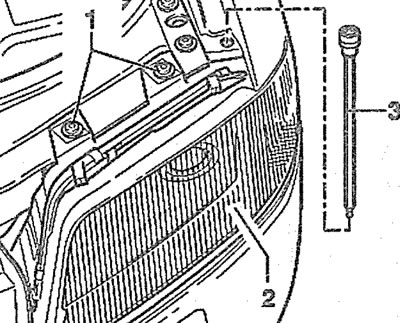
13.3. Unscrew the two bolts 1 that secure the headlight
4. Unscrew another headlight mounting bolt through the hole on the outside using a long screwdriver 3 (see illustration 13.3).
5. Turn the headlight towards the center line of the vehicle (see arrows in the illustration), disconnect the plug from the back of the headlight and carefully remove it from its mounting location.
Installation
The headlight is installed in the reverse order of removal.
6. Screw the plastic bolt to the distance "a" that was before removing the old headlight, thereby adjusting the position of the new headlight (see illustration).
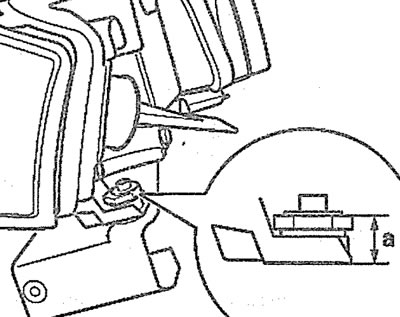
13.6. Screw in the plastic bolt to the distance "a" that was before removing the old headlight, thereby adjusting the position of the new headlight
7. Install the headlight into the opening on the body (see arrow 1 in the illustration), insert the headlight eye into the guide (see arrow 2 in the illustration).

13.7. Install the headlight into the opening on the body (see arrow 1), insert the headlight eye into the guide (see arrow 2)
8. Make sure that the gaps between the headlight housing and the adjacent body parts are the same. If necessary, adjust the position of the headlight.
Rear light
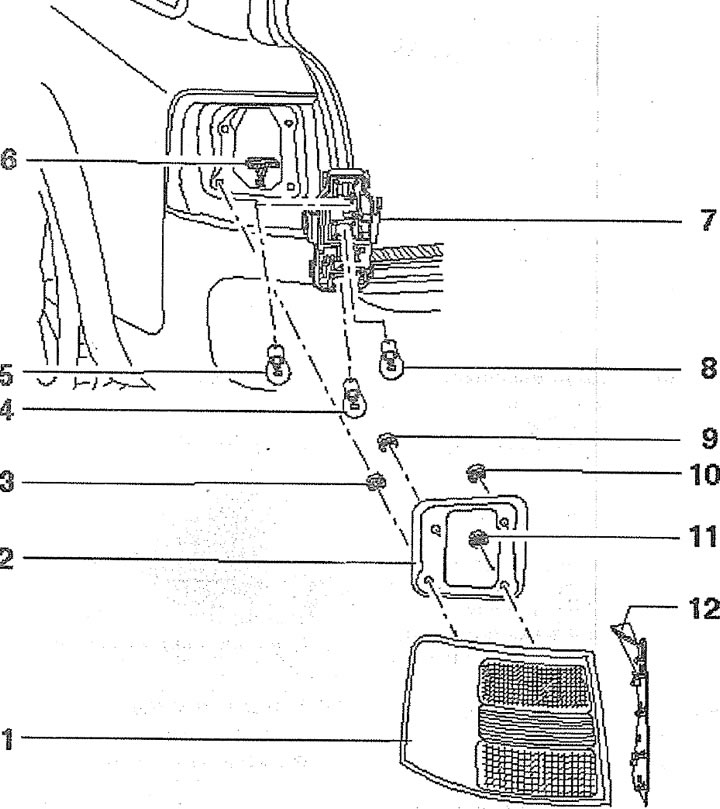
13.0a. Rear light:
1 - flashlight body
2 - sealing gasket
3 - nut. Tightening torque - 4 Nm
4 - brake light/reversing light bulb (21/5 W)
5 - direction indicator bulb (21 W)
6 - plug
7 - light bulb board
8 - Reversing light bulb (21 W)
9 - nut. Tightening torque - 4 Nm
10 - nut. Tightening torque - 4 Nm
11 - nut. Tightening torque - 4 Nm 12 - pad
Removal
9. Turn off the ignition.
10. Set the exterior lighting switch on the instrument panel to the "O" position.
11. Remove the side trim of the trunk.
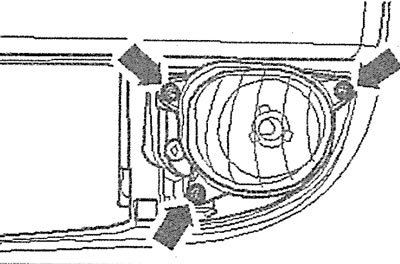
12. Disconnect plug 5, then unscrew nuts 1-4 of the rear light mounting (see illustration).

13.12. Disconnect plug 6, then unscrew nuts 1-4 of the rear light mount. Tightening torque of nuts - 4 Nm
13. Squeeze the clamps (see arrows in illustration 13.12) and carefully remove the tail light.
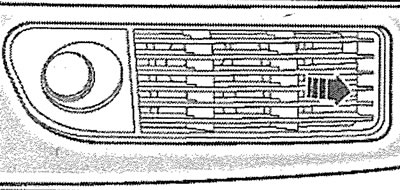
13.13. Remove the ventilation grille at the bottom of the bumper (see arrow)
Installation
The rear light is installed in the reverse order of removal.
14. Inspect the rear light sealing gasket. Replace the gasket if damaged.
Fog lights
Removal
15. Turn off the ignition.
16. Set the exterior lighting switch on the instrument panel to the "O" position.
17. Diesel vehicles: Remove the front bumper (see the relevant chapter).
18. Remove the ventilation grille at the bottom of the bumper (see arrow in illustration).
13.19. Unscrew bolts 1 and 2 securing the fog lamp 3. Cars manufactured before October 2002
19. Cars manufactured before October 2002. Unscrew bolts 1 and 2 securing the fog lamp 3 and remove it from the bumper by pushing it in the direction indicated by the arrow in the illustration.
20. Cars produced since October 2002. Unscrew the bolts (see arrows in the illustration) fog light mounts and carefully remove it from the bumper.
13.20. Unscrew the bolts (see arrows) fog light mounts and carefully remove it from the bumper. Cars produced since October 2002
21. Disconnect the connector on the back of the fog light.
Installation
The fog light is installed in the reverse order of removal.
22. The tightening torque of the fog lamp mounting bolts is 6 Nm.
Side turn signal repeater
Removal
23. Turn off the ignition.
24. Press the side turn signal repeater lens in the direction shown by the arrow in the illustration and carefully remove it from the mounting hole on the wing.
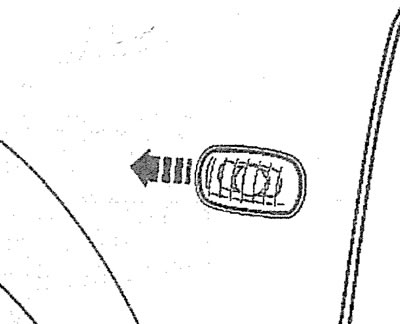
13.24. Press the side turn signal repeater lens in the direction indicated (see arrow) and carefully remove it from the mounting hole on the wing
25. Disconnect the connector on the rear side of the side turn signal repeater.
Installation
The installation of the side turn signal repeater is carried out in the reverse order of removal.
Additional brake light
Removal
26. Remove both plugs 2 from the left and right sides of the additional brake light 1 by prying them off with a small screwdriver (see illustration).
27. Unscrew two screws 3 (see illustration 13.26).
28. Remove the additional brake light from the mounting hole by pressing the locking tabs 4 (see illustration 13.26), disconnect the plug.
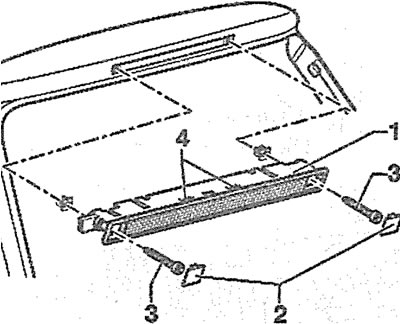
13.26. Using a small screwdriver, remove both plugs 2 from the left and right sides of the additional brake light 1
Installation
The installation of an additional brake light is carried out in the reverse order of removal.