
Table of contents: Removal ↓ Installation ↓
Removal
The illustration shows the removal of the 34 litre fuel tank. To reduce weight, the fuel tank must be empty when removed. If necessary, remove the fuel from the fuel tank.
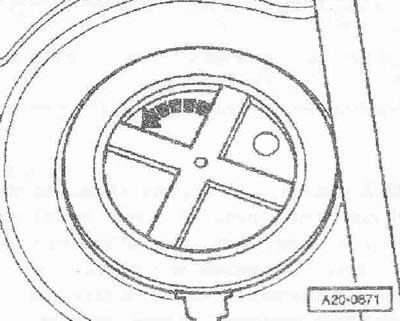
Fold back or remove the rear bench seat. Fold back the trim under the rear seat. Rotate the fuel level indicator sensor cover in the direction of the arrow and remove the cover.
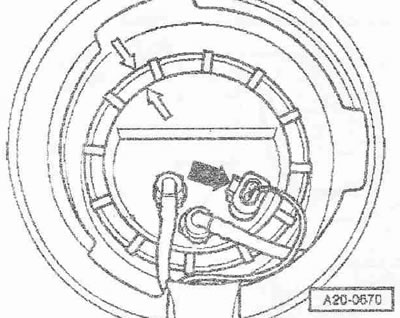
Disconnect the electrical plug connection "arrow" on the blind flange.
A/m since 05.2002
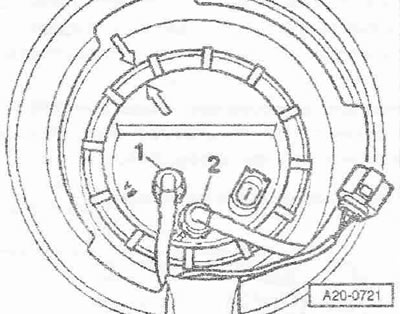
Disconnect the fuel supply line "1" from the protective flange, to do this, press the release buttons. Ignore pos. "2".
All cars
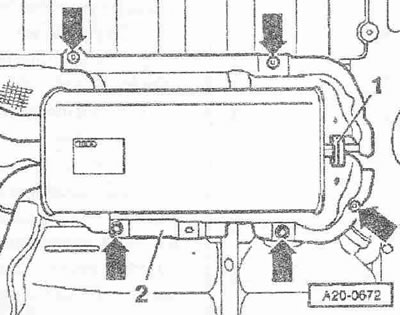
Remove the rear right wheel arch liner. Remove the rear axle. Unscrew the bolts and nuts "arrows". Disconnect the additional muffler from the right mounting loop "1". Remove the heat shield "2". Reinstall the additional muffler. Attach the muffler immediately, do not leave it hanging, risk of damaging the connecting element.
Unscrew the "arrow" cover.
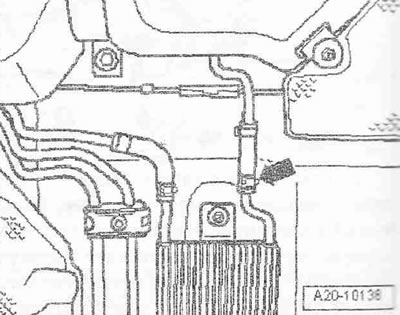
Unscrew the fuel cooler hose outlet cap "arrow".
Unscrew the nuts "arrows" and remove the heat shield "2". Disconnect the additional muffler from both left mounting loops. Remove the heat shield "1". Reinstall the additional muffler.
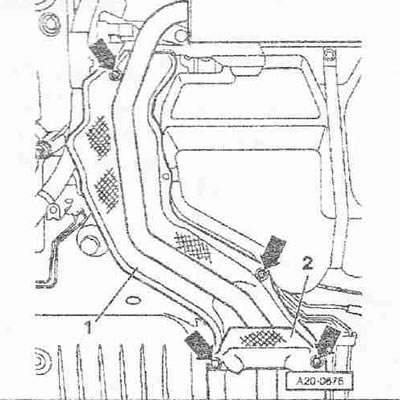
Attach the muffler immediately, do not leave it hanging, there is a risk of damaging the connecting element.
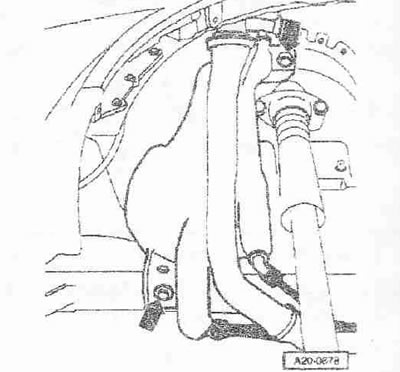
Where available, disconnect the return fuel line "arrow" leading to the right fuel changeover valve on the fuel tank by pressing the release buttons.
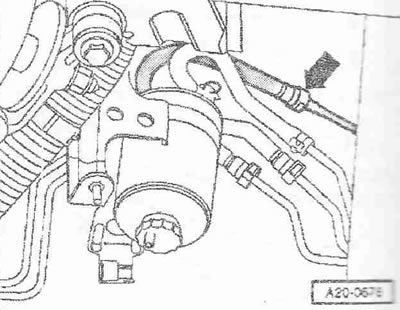
Disconnect the return fuel line "arrow" on the right side of the fuel cooler. On vehicles with an additional heater, disconnect the fuel line leading to the additional heater metering pump.
A/m before 04.2002
Disconnect the supply fuel line "arrow", the leading line and the fuel filter, to do this press the release button.
All cars
Open the fuel tank filler flap. Clean the area around the fuel tank filler neck. Unscrew the fuel tank filler neck cap. Unscrew the fuel tank filler neck "arrow" screws.
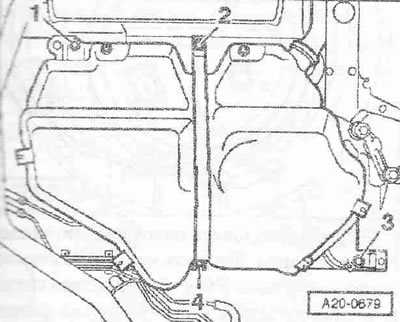
First loosen screw connections "1" and "3". Place the "VAG 1383 A" lift under the fuel tank for support. Unscrew screw connections "2" and "4". Then lower the fuel tank using the "VAG 1383 A" lift.
Installation
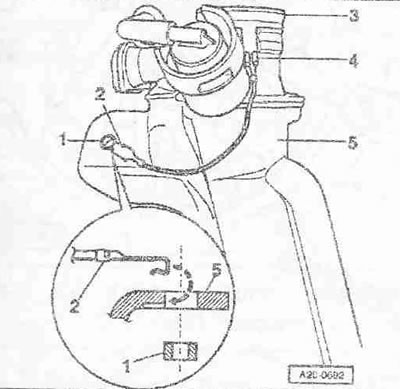
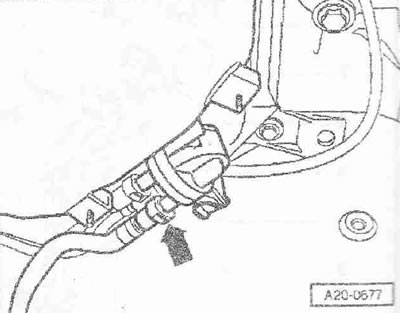
Installation in reverse order, taking into account that for fastening all hose connections use clamps of the corresponding series. Gaskets and sealing rings must be replaced during installation work. Arrows applied to the hose pipe connections must be opposite each other. Check the ground wire for traces of oxidation on both connections. If necessary, remove traces of oxidation. Check the installation position of the ground connection. Plug "4" must sit firmly on the metal ring "3". Contact tongue "2" must be inserted into the fuel tank "5" and secured with spacer sleeve "1". Position the fuel tank with the clamping band using a lift "V. A.G 1383 A" on the bottom of the car. First screw the fuel tank to the attachment points "2" and "4", and then "1" and "3". Screw the fuel tank filler neck with the ground connection in the wheel arch "arrows".
Caution! After installation, check the electrical connection of the metal ring on the filler neck with an open point on the body using an ohmmeter: specified value: about 0 Ohm.
Install the rear axle. Install the rear right mudguard. Install the rear bench seat.
Tightening torques:
- Tie-down strap to body: 21 Nm
- Fuel tank to body: 21 Nm
- Fuel tank filler neck to wheel well: 21 Nm