
Table of contents: Front evaporator ↓ Rear evaporator ↓
Front evaporator
1. Removal of the front evaporator is only possible after removing and disassembling the front housing of the air conditioning system.
Rear evaporator
2. Drain the refrigerant from the refrigeration unit.
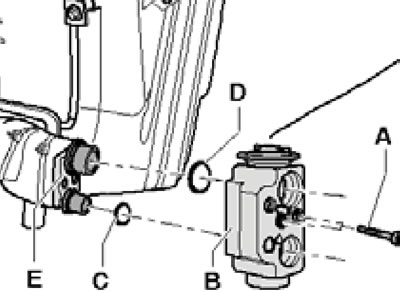
3. Disconnect the refrigerant lines from the rear expansion valve (see illustration).
13.3. Refrigerant line fastening details on the rear expansion valve.
4. Install the rear housing of the climate control system to the service position (see Section 11).
5. Remove the bolts (And in the illustration), release the holders (B) and remove the evaporator housing together with the expansion valve (C) from the rear housing of the air conditioning system.
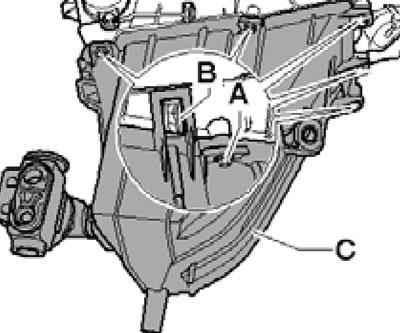
13.5. Fastening the evaporator body.
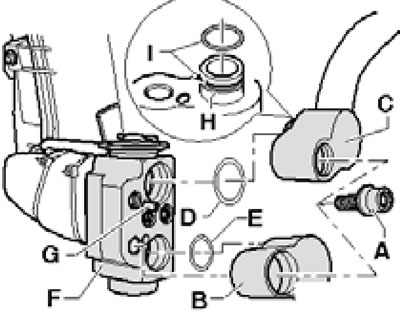
6. If necessary, separate the evaporator from its housing (see Section 15) and/or remove the expansion valve from the evaporator (see illustration).
13.6. Rear expansion valve installation details.
7. Installation is carried out in reverse order. Replace the O-rings (C and D in Illustration 13.6) and (D and E in Illustration 13.3). Tighten the expansion valve fasteners and refrigerant lines to 10 Nm. After installation, clear the fault memory of the front and rear climate control modules and apply the basic settings.