
Table of contents: Fuel level sensor "G" is installed ↓ Fuel level sensor "G" removed ↓ Removal the fuel level sensor "G" ↓ Installation ↓
Fuel level sensor "G" is installed
Sensor on the lower stop: approx. 285 Ohm.
Upper stop sensor: approx. 60 Ohm.
Note: If the measured value is 0, then there is a short circuit; if it is equal, there is a break in the circuit. To check the resistance values "Tank full" or "Tank empty", it is necessary to remove the fuel supply module and swing the sensor float to the upper or lower limit. With the fuel level sensor removed, as a result of a greater deviation of the float, the following values are obtained:
Fuel level sensor "G" removed
Sensor on the lower stop: approx. 285 Ohm.
Sensor on the upper stop: approx. 53 Ohm.
Connect a multimeter to check the resistance between contacts "3" and "4". Fuel level sensor "G" installed or removed: in any position of the sensor: approx. 340 Ohm.
Installation is in reverse order, it is necessary to install the flange cover. Install 1/3 of the rear seat on the right.
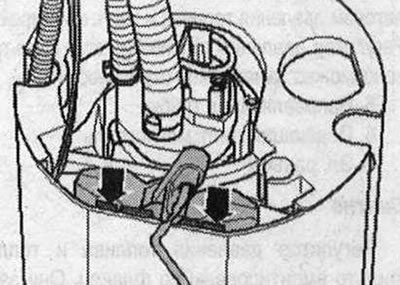
Removal the fuel level sensor "G"
Removing the fuel supply unit. Using a screwdriver, bend the locking tabs "arrows" and pull out the fuel level sensor "G" upwards.
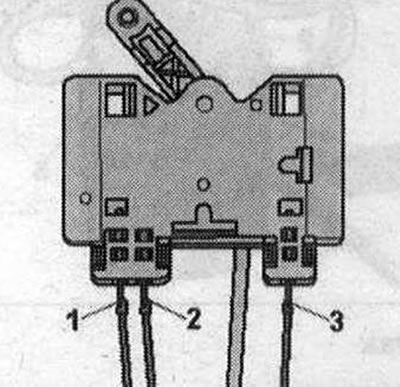
Before disconnecting the plug connectors of the fuel level sensor "G", you must first unlock the connector fastening tabs. Unlock the electrical connectors "1...3" and disconnect them.
Installation
Installation in reverse order: connect plug connectors "1...3" and check the reliability of their fixation. Insert the fuel level sensor "G" into the guides of the fuel supply module and press down until it clicks. Install the fuel supply module, follow the instructions for connecting the battery.
Material republished from the website: Audimanual.ru