
Table of contents: Removal the air humidity sensor… ↓ All ↓ Installation ↓ Removal the air humidity sensor… ↓ All ↓ Installation ↓
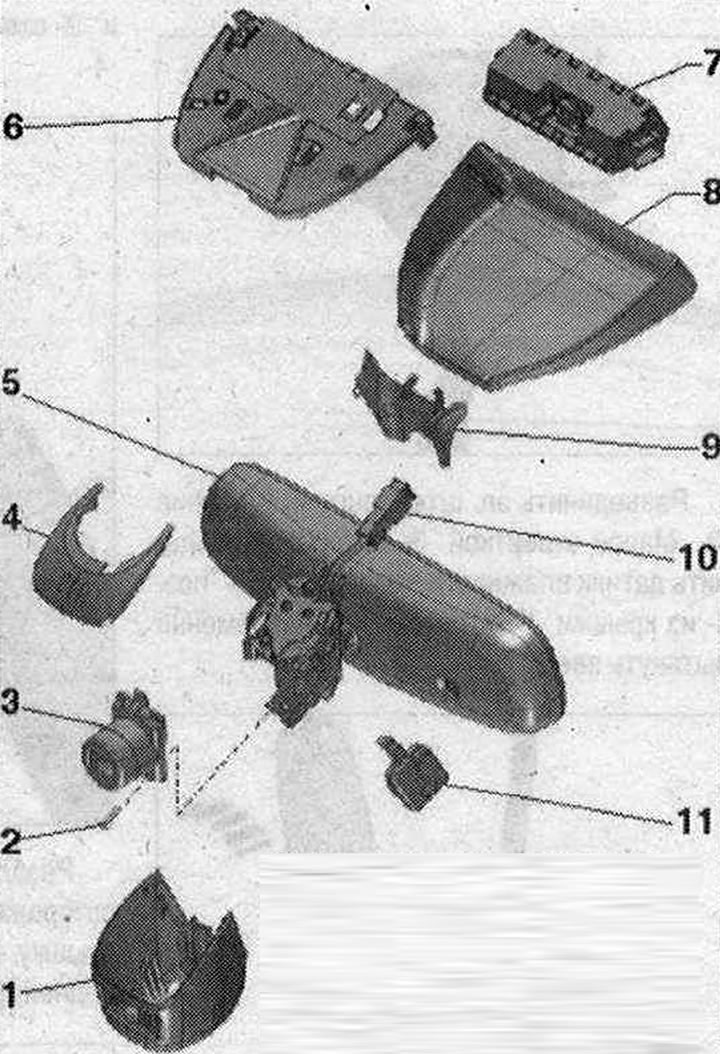 Wiring diagram for high beam assist, air humidity sensor, lane departure assist 1. Front housing cover for used high beam assistant "J844" with rain and light sensor "G399"; 2. Bolt 2.4 Nm; 3. High beam assistant. If the used high beam assistant "J844" with rain and light sensor "G399" is faulty, replacement is not possible. The entire rear view mirror must be replaced; 4. Top cover; 5. Interior rear view mirror; 6. Upper cover used lane assist "J759"; 7. Used lane assist "J759"; 8. Lower trim used lane assist "J759"; 9. Back cover; 10. Central plug connector; 11. Air humidity sensor "G355"
Removal the air humidity sensor "G355". Cars without high beam assist
Turn off the ignition.
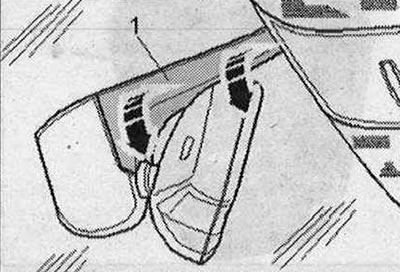
Cars with lane departure warning: Disconnect cover "1" from the top of the "arrow" mirror base. Use a screwdriver to disconnect the cover from the bottom of the mirror base and remove it.
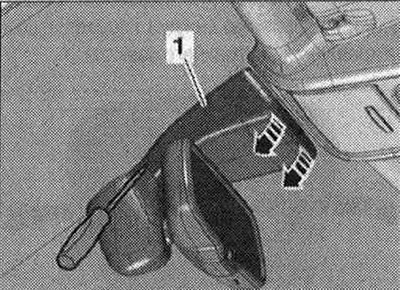
Vehicles without lane assist: Remove the upper trim "1" on the "arrow" mirror bracket.
All
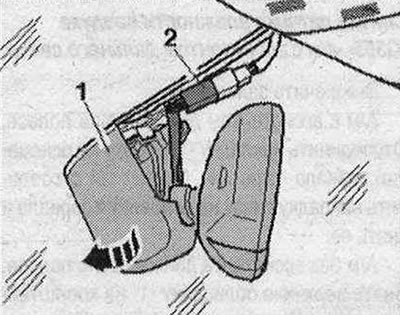
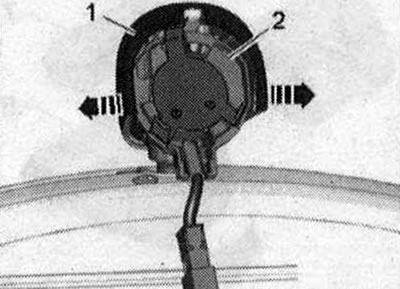
Disconnect and remove connector "2" from the socket. Turn the interior mirror on bracket "1" counterclockwise "arrow" until it stops. Remove the interior mirror from the bracket.
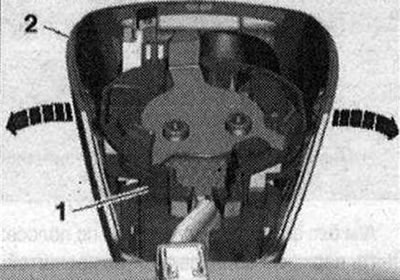
Slightly spread the upholstery "1" of the "arrow" in both directions and remove it from the heel "2" for the interior mirror.
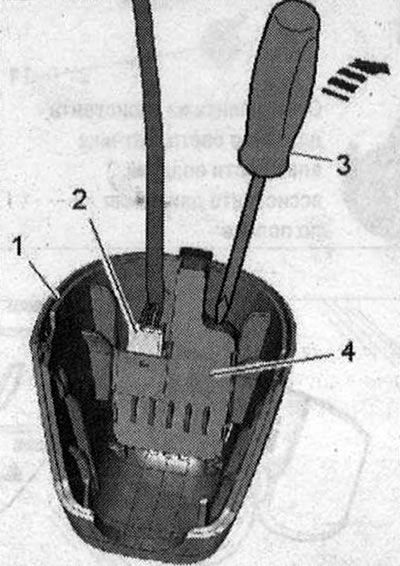
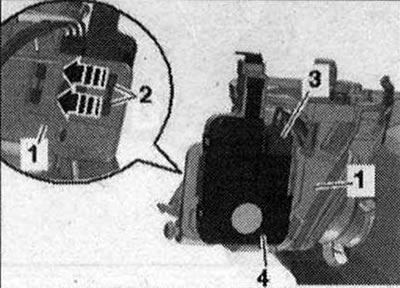
Disconnect the electrical plug connection "2". Using a small screwdriver "3", carefully push the air humidity sensor "G355" "pos. 4" out of the cover "1" "arrow" and simultaneously pull it upwards.
Installation
Installation in reverse order: insert the air humidity sensor "G355" exactly into the side guides. If the air humidity sensor "G355" is not mounted correctly, the cover cannot be installed. Install the interior mirror.
Removal the air humidity sensor "G355" - cars with high beam assist
Turn off the ignition.
Cars with lane departure warning: Disconnect cover "1" from the top of the "arrow" mirror base. Use a screwdriver to disconnect the cover from the bottom of the mirror base and remove it.
Vehicles without lane assist: Remove the upper trim "1" on the "arrow" mirror bracket.
All
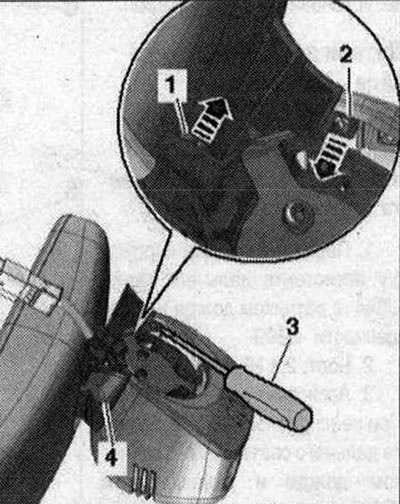
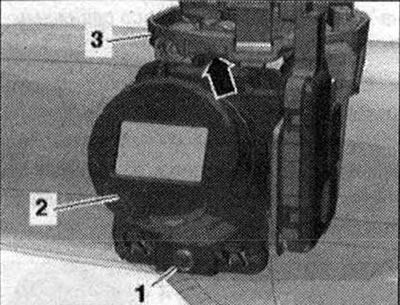
Disconnect and remove connector "2" from the socket. Turn the interior mirror on bracket "1" counterclockwise "arrow" until it stops. Remove the interior mirror from the bracket. Unlock fasteners "1" and "2" with screwdriver "3". Remove the rear cover "4".
Unlock the "arrow" fasteners and carefully slightly bend the top cover "2" upwards. Release the fasteners "1" of the front cover "3". Remove the top cover.
Release the fasteners "in the direction of the arrow" and release the front cover "2" downwards from the guides on the interior mirror fastening "1".
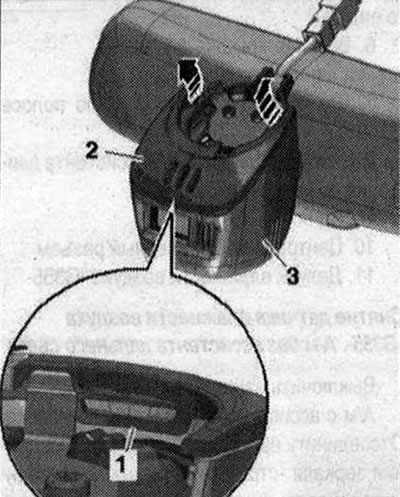
Unscrew bolt "1" and disconnect the high beam assistant control unit "J844" with the rain and light sensor -C399 "pos. 2", to do this, remove the fastening tongue "arrow" from the heel of the mirror "3".
Unlock the fasteners -2 "arrows" and remove the air humidity sensor -C355 "pos. 4" from the interior mirror fastening "1". Disconnect the electrical plug connection "3".
Installation
Installation in reverse order: install the interior mirror.
(The original article is available on the website: audimanual.ru)