
Engines 1.6 l
1. Set the manual transmission to neutral position and apply the parking brake.
2. Open the gear shift boot and pull it upward.
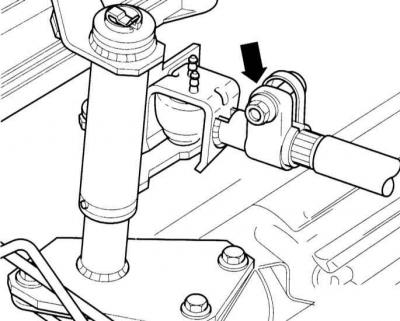
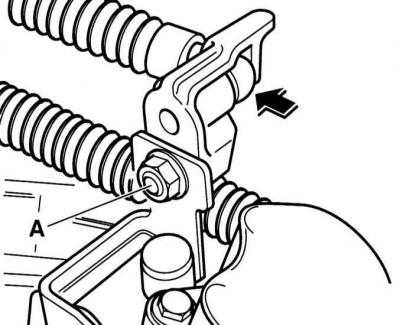
3. Open the clamp (arrow on the illustration) on manual transmission. The connection between the gearshift rod and the selector lever should have an easy movement.
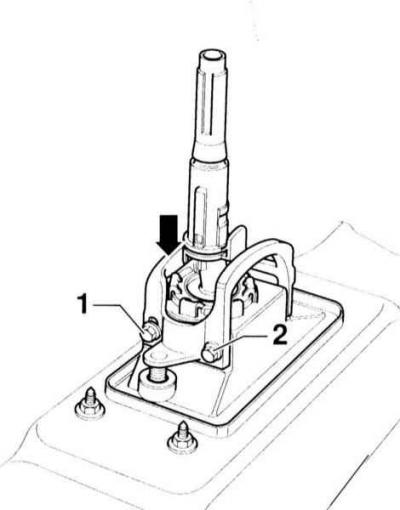
4. Loosen the bolts –1– and –2– on the shift lever and press the stop on the right side down (arrow on the illustration).
5. Retighten bolt –1–.
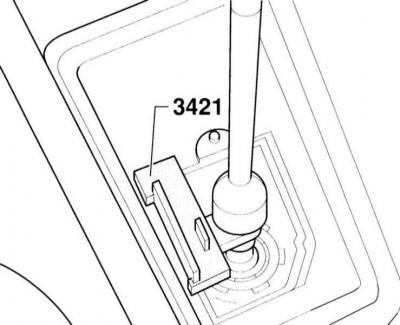
6. Insert the AUDI–3421 gauge.
7. Adjust the shift rod so that no force is applied to it (Manual transmission in neutral position) and tighten the clamp to a torque of 20 Nm.
8. Remove the gauge.
9. Finally, engage reverse gear.
10. Loosen bolt –1–. Note: This presses the left side of the stop.
11. Tighten bolts –1– and –2– to 25 Nm.
12. Turn off reverse gear.
13. Shift all gears; they should shift freely and without jamming. Pay special attention to the operation of the reverse gear lock.
14. Secure the cover and gear shift handle.
Engines 1.8 and 1.9 l
15. Set the manual transmission to neutral position and apply the parking brake.
16. Open the gear shift boot and pull it upward.
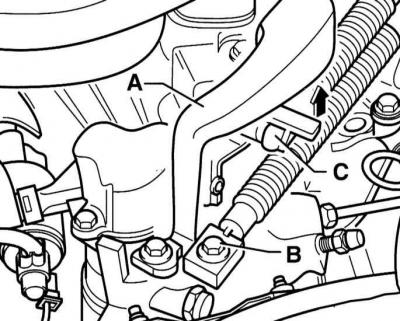
17. Remove the damper on the shift lever, referring to the illustration.
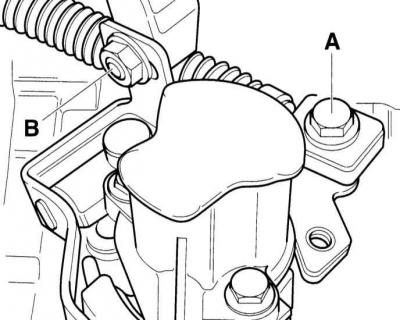
18. Loosen the bolt (A) and nut (B) so that the shift cable and the clutch/selector cable can move freely in the oval holes.

19. Loosen the bolt (C), for which, if necessary, remove the foam seal in the area of the bolt.
20. Install the AUDI–3422 shift lever gauge.
21. Turn the hook for fixing the gauge under the support plate and tighten the nut (D).
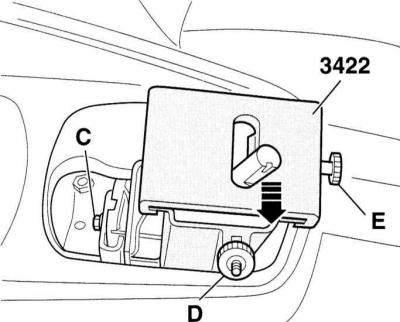
22. Fix the shift lever to the left side of the sliding element, arrow in the illustration.
23. Press the shift lever with the sliding element to the left, in the direction of the arrow, until it stops, and secure the sliding element with the screw (E).
24. Press the lever to the right, against the direction of the arrow, and lock it.
25. Tighten bolt (C) to 15 Nm.
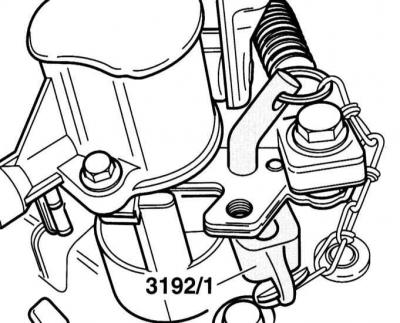
26. Insert the wedge and the AUDI–3192/1 locking pin. Insert the wedge between the shift lever and the cover so that there is no gap.
Warning: The shift lever must not be lifted by the wedge.

27. In this position, tighten the flange bolt (A) to 25 Nm and the mounting nut (B) to 15 Nm.
28. Remove the wedge securing the pin and the lever gauge.
29. Replace the lever handle and boot.
30. Tighten the damper to the gearshift lever with a torque of 25 Nm.
Checking the adjustment
31. The gear shift lever should be in neutral position in the slot for third and fourth gear.
32. Engage the clutch, start the engine, wait about 3-6 seconds for the gearbox shaft to stop. Then shift through all gears several times. Pay special attention to engaging reverse.
33. If the drive still sticks when the gear is re-engaged, it is necessary to check the lever shaft travel as follows:
34. Shift into first gear.
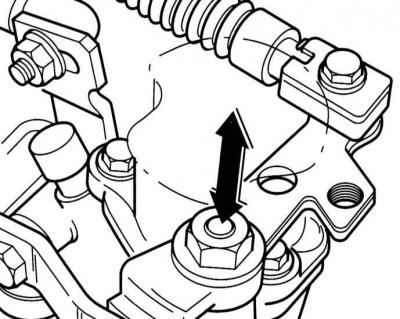
35. Press the shift lever to the left with first gear engaged. At the same time, ask an assistant to check the lever shaft. The lever shaft should have a stroke of about 1 mm in the direction when moving the lever (arrows in the illustration).
36. If this does not happen, disengage first gear and loosen the selector lever cable/cable pin retaining nut (A) again. The selector lever cable has some play at the pin due to the transmission element.
37. Eliminate the play in the shift lever cable by pressing it with the pin slightly towards the rear of the car (arrow on the illustration). In this position, tighten the nut (A) to a torque of 15 Nm.
38. Secure the cover and handle.
(The article is a reprint of material from: «AudiManual»)