



Warning: Description of operations and instructions that apply to both manual and automatic transmissions are given in the subsection Removal and installation of manual transmission for turbodiesel engines (TDI).
This subsection describes only the differences that are relevant to AT.
1. Suspend the engine by the cylinder head using a crane.
2. Disconnect the plug connection at the AT, disconnect the cable guide.
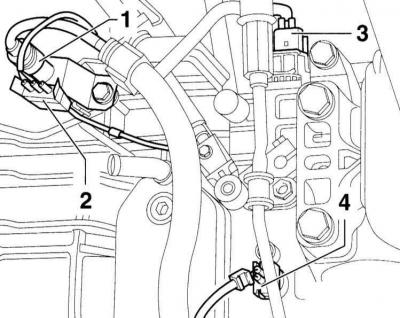
- 1 solenoid valve sensor (10-pin)
- 2 speed sensor
- 3 multifunctional switch
- 4 gearbox speed sensor
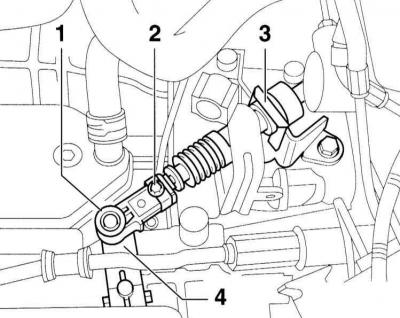
3. Press the gear shift rod (1) at the lever (4) with a screwdriver. Remove the locking bracket (3) at the support. Remove the gear shift rod at the box and move it to the side.
Warning: Do not loosen the bolt (2).
4. Loosen the mounting bolts and remove the power steering pump feed line holder.
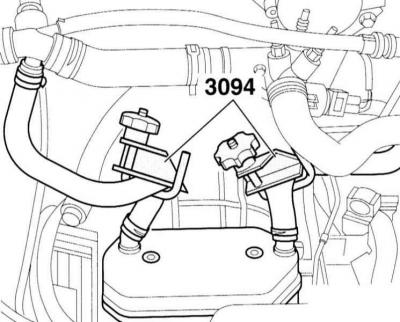
5. Clamp the ATF cooler hoses, for example with the VW–3094 or HAZET–4590 tool. Loosen the clamps and remove the hoses.
Warning: Collect any spilled oil with a rag.
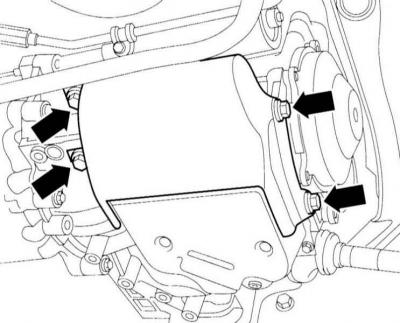
6. Loosen the mounting bolts and remove the shield (arrows in the illustration).
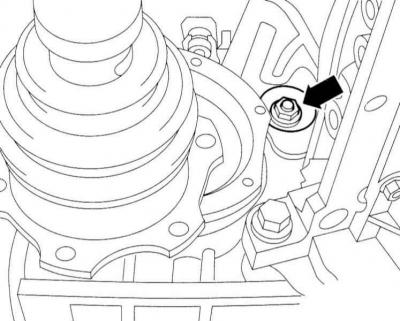
7. Remove the plug from the torque converter cover hole. Unscrew the 3 nuts and disconnect (arrow on the accompanying illustration) converter from the driven clutch disc. Turn the engine with the head for the crankshaft pulley to the right so that the nuts are in the hole.
Warning: The torque converter is located between the engine and the transmission and is a fluid coupling.
8. Remove the AT in the same way as the manual transmission (Removal and installation of manual transmission).
Warning: When removing the AT from the engine, press the converter out of the driven disk. Protect the converter in the AT from falling out by installing a clamping device near the box casing and clamping it. If such a device is not installed, when removing the box, make sure that the converter does not slip out of the box.
Installation
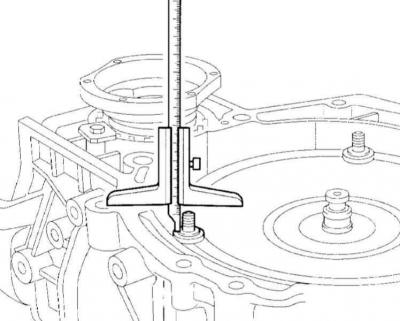
9. Before installing the AT, measure the distance between the box flange and the stop surface at the bottom of the threaded pin. It should be about 22 mm. If the specified distance is 10 mm, the converter is not inserted correctly. In this case, carefully turn the converter so that it slides down.
Warning: If the converter is installed incorrectly, the driven disk will be destroyed when the box is installed.
10. Further installation is carried out in the reverse order of removal. Additionally, please note the following.
11. Use only original nuts to secure the converter. The converter is secured to the driven disk with a torque of 60 Nm.
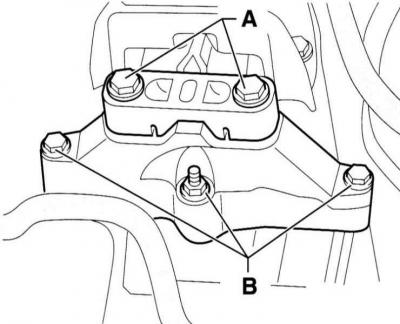
12. Replace the transmission support mounting bolts. Tighten the bolts to the torques shown in the illustration.
13. Adjust the gear shift rod.
14. Check the ATF level in the final drive and in the gearbox.