
Table of contents: Removal ↓ Installation ↓
Engine mount without engine mount cover
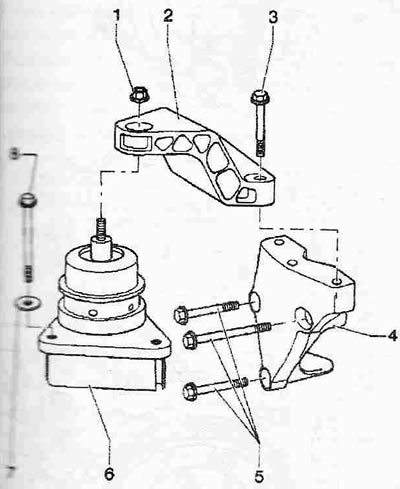
1. Nut, can be loosened only for engine mount replacement. Replace, 40 Nm + tighten by + 90°
2. Engine bracket
3. Bolt. Replace, 60 Nm + turn further by + 90°
4. Bracket
5. Bolt, 45 Nm
6. Engine mount
7. Washer
8. Bolt. Replace, 23 Nm + turn further by + 90°
Removal
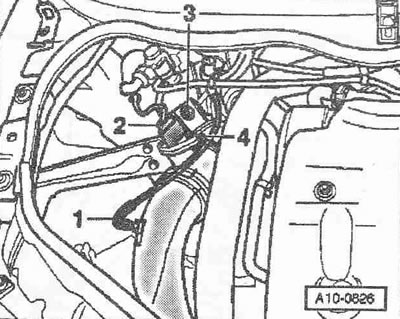
Remove the hood. Remove the resonator (where it is). Disconnect the plug connector of the air flow meter "G70". Remove the vacuum hose. Loosen the hose clamp "4" and put the air guide pipe with the air flow meter "G70" forward.
Install the crossmember "10.222 A" with adapters "10.222 A/13" and adapter "T40093/6" on the edges of the bolted joints of the wings. At the same time, insert the adapter "10.222 A/13" into the hood catches "arrow".
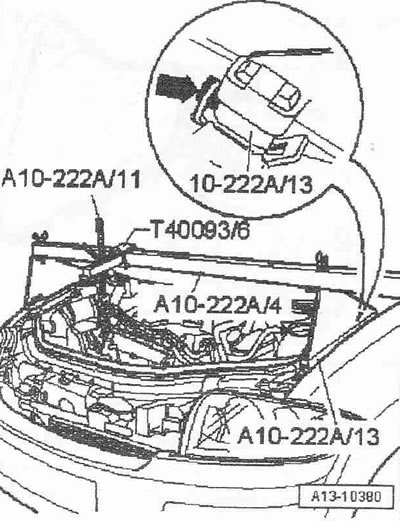
The clamping bolt in the adapter "T40093/6" must be unscrewed. The adapter "T40093/6" is installed so that its bracket is facing upwards. Hook the hook of the lead screw carabiner "10.222 A/11" to the engine eye. Tighten the engine with the lead screw, but do not lift it. Nut "3" can only be loosened to replace the engine mount.
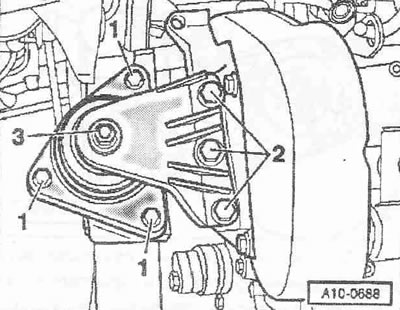
Unscrew bolts "1 and 2" and remove the bracket with the engine mount.
Installation
Installation is carried out in the reverse order, in this case it is necessary to replace the bolts, which are additionally tightened to the appropriate angle. The hoses and hose nipple of the air boost system must be cleaned of oils and grease before installation. Do not use lubricants under any circumstances. Use clamps of the appropriate series to secure all hose connections. When assembling, install all cable clamps in their original places. Install the air ducts in the clamps.
Tightening torques:
- Engine mount to body: 23 + 90° 1)
- Bracket to engine support: 60 + 90° 1)
- Engine mount: 40 + 90° 1)
1) Replace the bolts.
A link to the original source is available on the website AudiManual