
Table of contents: Headlight cleaning device ↓ Replacing windshield wiper blades ↓ Replacing Windshield Wipers on… ↓
The windshield wiper handle turns on the windshield wiper, as well as the automatic windshield wiper and washer mode.
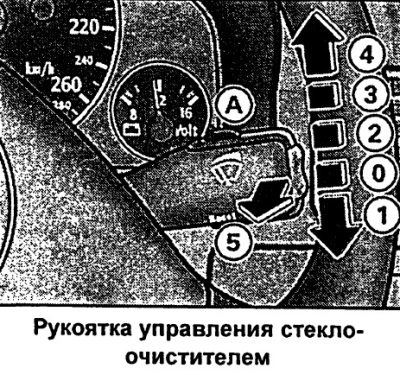
Windscreen wiper handle positions:
Start-stop mode
- To turn on the windshield wiper briefly, press the handle down to position 1.
Intermittent mode
- Move the handle up to the fixed position 2.
- Regulator A changes the duration of the intermittent switching intervals of the windscreen wiper.
Slow mode
- Move the handle up to the fixed position 3.
Fast track mode
- Move the handle up to the fixed position 4.
Automatic operation of windshield wiper and windshield washer
- Pull the handle to position 5.
- Release the handle. The windshield washer turns off, and the wipers work for about 4 seconds.
Shutdown
Set the handle to its original position 0.
The windscreen wiper and washer system operates only when the ignition is on.
The duration of the intermittent mode intervals also depends on the vehicle speed.
The windshield washer jets are heated when the ignition is on.
Caution. In frosty weather, before turning on the windshield wiper for the first time, check whether the brushes are frozen! Otherwise, you can damage not only the brushes, but also the windshield wiper motor!
Headlight cleaning device
The headlight cleaning device is designed for cleaning headlights.
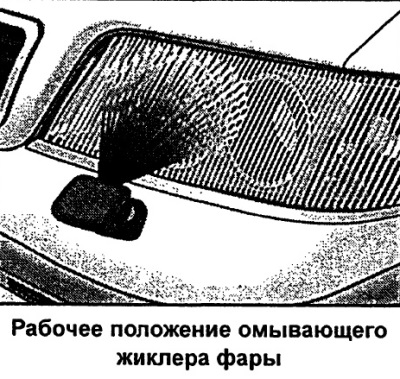
With the light on, pull the handle to position 5 (joint operation of the windshield wiper and windshield washer in automatic mode) and hold the handle in this position for more than 1 s.
For cleaning, the headlight washer jets are pushed outward under water pressure.
Regularly, for example when refueling, remove any dirt that cannot be washed off from the headlights (insect marks).
To maintain the system's functionality in winter conditions, clean the washer jet sockets from snow and remove ice from there using an aerosol deicer.
Replacing windshield wiper blades
Except for a car with a 4-cylinder engine
Reliable operation of windshield wipers is essential for good visibility.

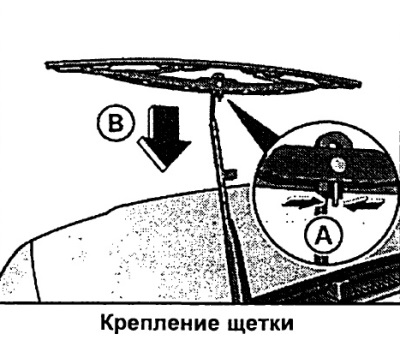
Removing the brush
- Move the wiper arm away from the glass.
- Move the brush spring stopper in the direction of arrow A.
- Remove brush B from the wiper arm socket.
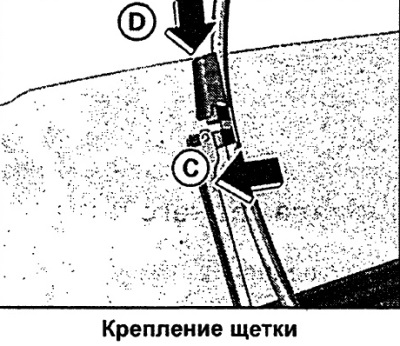
Installing the brush
- Move the spring stopper of the new brush back. The brush socket is visible.
- Install the new blade into the wiper arm socket C.
- Move the spring lock of the wiper blade in the direction of arrow D. You should hear the spring lock click into place on the wiper arm.
Attention
- Clean your wipers regularly with glass cleaner to avoid streaking (glass defects). In case of heavy contamination, such as insect residue, it is recommended to clean the brushes with a sponge or cloth.
- For safety reasons, change the brushes once or twice a year.
Replacing Windshield Wipers on 8-Cylinder Vehicles
Reliable operation of windshield wipers is essential for good visibility.
Removing the brush
- Move the windshield wiper arm away from the glass.
- Set the brush at a right angle to the lever.
- Compress spring A
- Release the brush by moving it in the direction of arrow B.
- Remove the brush from the lever in the opposite direction to arrow B.
Installing the brush
- Place the new brush on the lever in the direction of arrow B.
- Move the brush in the direction opposite to the arrow upward until you hear the spring lock onto the lever.
When installing brushes with an air duct blade, ensure that the blade points downwards.