
Table of contents: Removal ↓ Installation ↓
Damaged injectors can cause strong shocks during engine operation, reminiscent of an engine with damaged bearings. If such phenomena occur, run the engine at idle speed and loosen the union nuts of the high-pressure pipes one by one. If the shocks disappear when unscrewing any nut, this indicates a defect in the corresponding injector.
A defective injector can also be detected by unscrewing the union nuts while the engine is running at fast idle speed. If the engine speed does not change when any nut is unscrewed, this indicates a defect in the corresponding injector. The injector is checked using a pressure gauge (work of the service station).
Warning: Damaged injectors must be replaced as they cannot be adjusted or repaired.
The first signs of a faulty injector are as follows:
- Defective ignition;
- Knocking in one or more cylinders;
- Engine overheating;
- Engine power loss;
- Excessively black exhaust gases;
- High fuel consumption;
- Thick blue smoke on cold start.
Removal
1. Clean high pressure lines with cold cleaner.
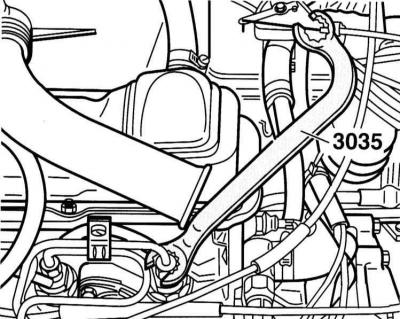
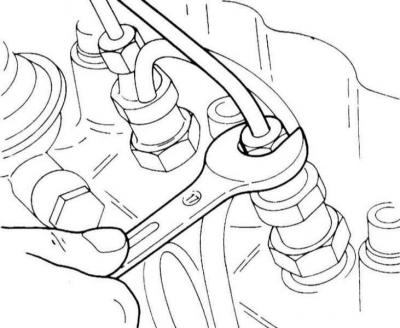
2. Remove the high-pressure pipes as a set by loosening the union nuts with an open-end spanner, such as HAZET 4560 or VW–3035.
Warning: Do not bend high pressure pipes. Always remove the pipe as a set.
3. Loosen the injector mounting bolt, remove the clamp and take out the injector.
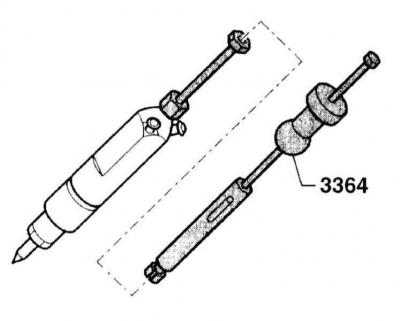
Warning: If you have difficulty removing the injector, you can use an impact puller, such as the VW–3364 or HAZET 1966. To install the impact puller, you need an auxiliary tool that screws onto the injector.
An auxiliary tool can be made as follows. Cut off the old high-pressure pipe behind the union nut at a distance of about 5 cm. Solder an M6 nut to the cut end.
Warning: Clean the tool thoroughly. Dirt will cause the nozzle to fail!
4. Screw the auxiliary tool onto the injector in place and install the impact puller onto the soldered nut. Pull out the injector.
5. Remove the heat shield.
Installation

6. Be sure to install new heat seals between the cylinder head and the injector. The seal recess must be facing upwards, the arrow in the illustration points towards the cylinder head.
7. Insert the nozzle into place.
8. Install the injector mounting clamp, making sure the support is in the correct position.
9. Insert the bolt with the spherical washer and tighten to a torque of 20 Nm.
10. Tighten the high pressure pipes to a torque of 25 Nm.