
Repair Chevrolet Repair Toyota Repair Honda Repair AvtoVAZ Repair Mercedes-Benz Repair BMW Repair Opel
Home  |  Contacts  |  Sitemap  |    
English Русский
Български
Беларускі
Український
Српски
Hrvatski
Română
Polski
Slovenský
Magyar
AudiManual.ru


  • AUDI 80
  • AUDI 100
  • AUDI A3
  • AUDI A4
  • AUDI A6
  • AUDI A8
  • AUDI Q
  • OTHER
  • ARTICLES
A2 (1999-2005)

Removal and installation the radiator (Audi A2)

  • Home
  • Audi
  • A2 (1999-2005)
  • Engine 1.4 l (diesel)
  • Cooling system
  • Removal and installation the radiator
            0
Table of contents: Removal ↓ Installation ↓

Removal


Remove the hood. Open the expansion tank cap "arrow". Remove the noise insulation "arrow". Remove the front bumper panel. Place the tray for the service cranes "VAS 6208" under the engine. Remove the lower coolant supply hose "arrow" from the radiator and drain the coolant. Ignore pos. "1".
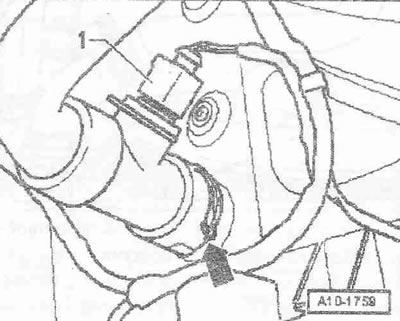
Remove the lower air duct hose from the «arrow» intercooler.


Remove the lower air duct hose from the "arrow" intercooler.
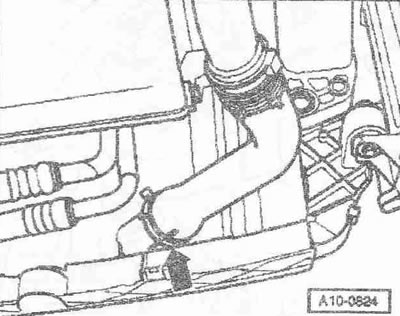
Unscrew bolts «1 and 4» of the lower radiator mount on the fan frame.


Unscrew bolts "1 and 4" of the lower radiator mount on the fan frame.

Cars with AMF, BHC engines


Disconnect plug connector "1" of intake manifold pressure sensor "G71" and loosen the electrical wire.
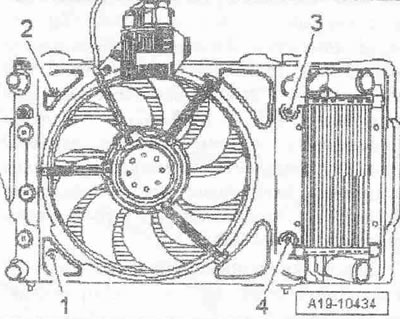
Unscrew bolts «1 and 4» of the lower radiator mount on the fan frame.


All


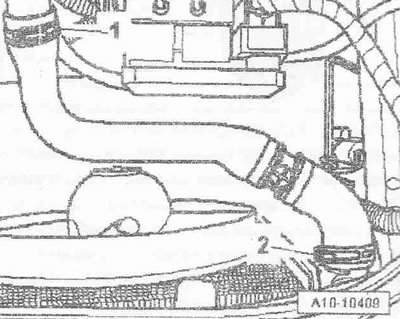
Remove the air duct hose "2" from the intercooler.


Remove the left upper coolant supply hose from the radiator, Item «2».


Remove the left upper coolant supply hose from the radiator, Item "2".
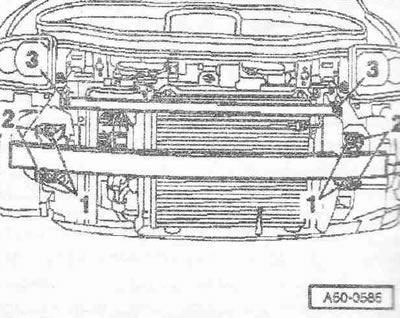
Ignore pos. «1». Unscrew bolts «2 and 3» of the upper radiator mount on the fan frame. Disconnect…


Ignore pos. "1". Unscrew bolts "2 and 3" of the upper radiator mount on the fan frame. Disconnect the horn connector. Unscrew 2 bolts "3" on the left and right and remove the reinforcement bar. Lift the lock washers "2". Unscrew the left and right bolts "1" and remove the bumper safety bar.
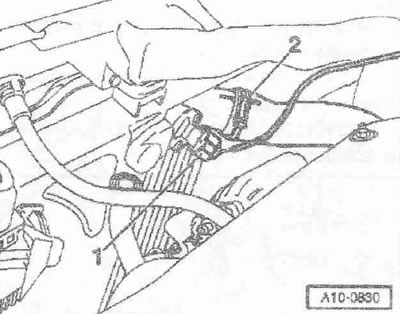
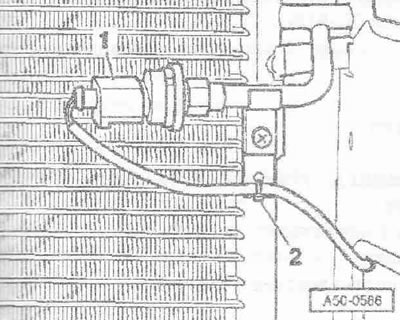
Disconnect plug connector «1» of high pressure sensor «G65». Cut cable tie «2».


Disconnect plug connector "1" of high pressure sensor "G65". Cut cable tie "2".


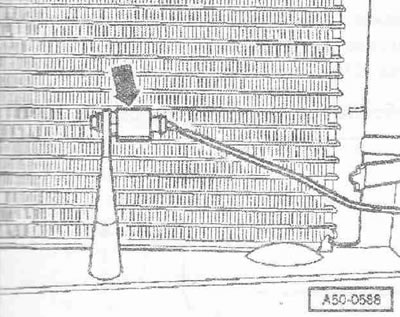
Remove the outside air temperature sensor «G17» «arrow» from the bracket.


Remove the outside air temperature sensor "G17" "arrow" from the bracket.
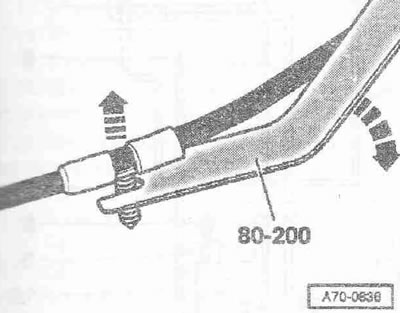
Press the electrical wiring harness to the high pressure sensor «G65» and the outside air…


Press the electrical wiring harness to the high pressure sensor "G65" and the outside air temperature sensor "G17" of the left air duct, for this use the lever "80.200".
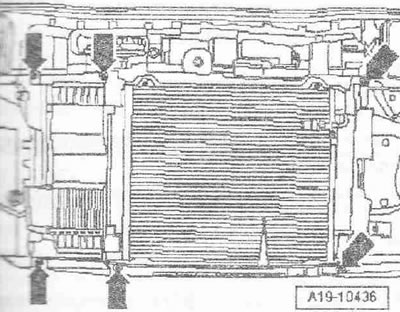
Unscrew the air ducts from the radiator frame «arrows». It is prohibited to open the air…


Unscrew the air ducts from the radiator frame "arrows". It is prohibited to open the air conditioning system circuit of the air conditioning system.


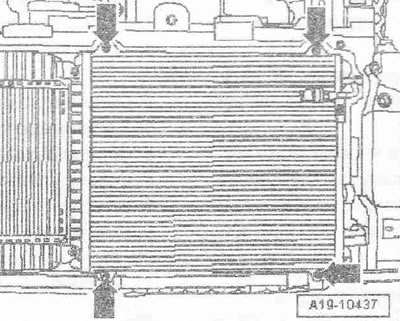
Unscrew the bolts of the «arrow» capacitor.


Unscrew the bolts of the "arrow" capacitor.

Instructions: To avoid damage to the refrigerant supply lines and hoses, when handling the condenser, ensure that the lines and hoses are laid without tension, kinks, or breaks.

Turn the condenser slightly forward towards the right side of the car «arrow 1». Move the radiator…


Turn the condenser slightly forward towards the right side of the car "arrow 1". Move the radiator with the intercooler as far as possible towards the left side of the car "arrow 2".
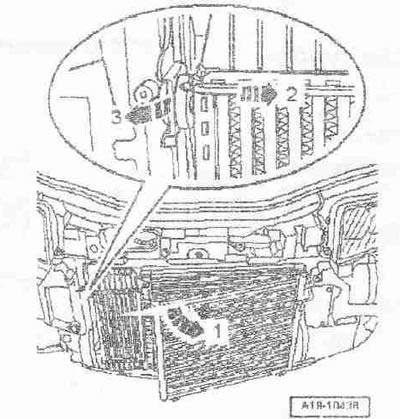
Lubricate the rubber bushings of the intercooler mount with silicone-free grease. Remove the…


Lubricate the rubber bushings of the intercooler mount with silicone-free grease. Remove the intercooler mounting tabs from the rubber bushings in the radiator frame; to do this, move the radiator frame lugs slightly to the right "arrow 3". Carefully push the condenser with the intercooler forward along the connecting side (left) to the maximum possible distance. Pull the radiator connections out of the fan frame one by one, while turning the radiator up or down. Remove the radiator with the intercooler, pushing it to the left.
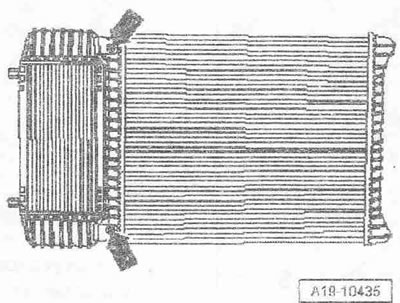


Unscrew all 4 bolts connecting the intercooler to the «arrow» radiator.


Unscrew all 4 bolts connecting the intercooler to the "arrow" radiator.

Installation


Installation, in reverse order, it is necessary to install the safety bar and the reinforcement bar, Install the front bumper panel, install the air ducts in the clamps. Fill with coolant.

Tightening torques:
  • Intercooler to radiator: 6 Nm
  • Radiator to fan frame: 6 Nm
  • Capacitor to fan frame: 6 Nm
  • Air ducts to fan frame: 1.5 Nm
The article was checked by auto expert Daniil Ushakov
This article is available at russian, bulgarian, belarusian, ukrainian, serbian, croatian, romanian, polish, slovak, hungarian

Share information:
Previous articles
Audi A2: Cooling system
Next articles

Removal and installation the thermostat
Removal and installation the cooling system pump
Draining and filling the coolant
Coolant supply hose connection diagram
Removal and installation the radiator fan


Similar articles on other Audi car models:
Radiator — removal, inspection, cleaning and installation Audi 80 B3 (1986-1991, petrol)
Radiator — removal, inspection, cleaning and installation Audi 100 C3 (1982-1990, diesel)
Removal and installation the radiator and fan Audi A3 Type 8L (1996-2003)
Charge air radiator Audi A4 B5 (1994-2001, petrol)
Radiator check Audi A6 C5 (1997-2004)
Radiator check Audi A8 D2 (1994-2002)
Radiator and radiator fan Audi Q5 Type 8R (2008-2017)
Link to this page in different formats


Visitor comments

No comments yet


How much will 10 + 20 =


Audi A2(1999-2005) 
  • General information
  • Introduction to the guide
  • Maintenance
  • Engine 1.4 l (gasoline)
  • Engine repair
  • Lubrication system
  • Cooling system
  • Exhaust system
  • Engine 1.6 l (gasoline)
  • Engine repair
  • Lubrication system
  • Cooling system
  • Exhaust system
  • Engine 1.2 l (diesel)
  • Engine repair
  • Lubrication system
  • Cooling system
  • Injection and turbocharging
  • Engine 1.4 l (diesel)
  • Engine repair
  • Lubrication system
  • Cooling system
  • Turbocharging system
  • Supply system
  • Fuel injection system
  • Exhaust system
  • Transmission
  • Mechanical gearbox 02J
  • Mechanical gearbox 02T
  • Mechanical gearbox 085 DS
  • Chassis
  • Car suspension
  • Steering
  • Brake system
  • Body
  • Exterior
  • Interior
  • Seats
  • Doors, locks and windows
  • Safety system
  • Heating and air conditioning
  • Electrical equipment
  • Power devices
  • Equipment and devices
  • Wipers and washers
  • Lighting and lamps
  • Breakers and switches
  • Electrical circuits
 
AudiManual.ru © 2017-2026 · Mobile version · Feedback · Sitemap: EN BG BY UA RS HR RO PL SK HU · Site search · News and articles
80 B2 · 80 B3 petrol · 80 B3 · 80 B4 · 100 C3 diesel · 100 C3 petrol · 100 C3 · 100 C4 petrol · 100 C4 · A3 Type 8L · A4 B5 petrol · A4 B5 · A4 B6 petrol · A4 B6 · A4 B7 · A4 B8 · A6 C4 · A6 C5 · A6 C5 Allroad · A8 D2 · Q5 Type 8R · Q7 Typ 4L · Audi A2 ·
This site uses cookies 🍪. Click the button to accept this fact.