
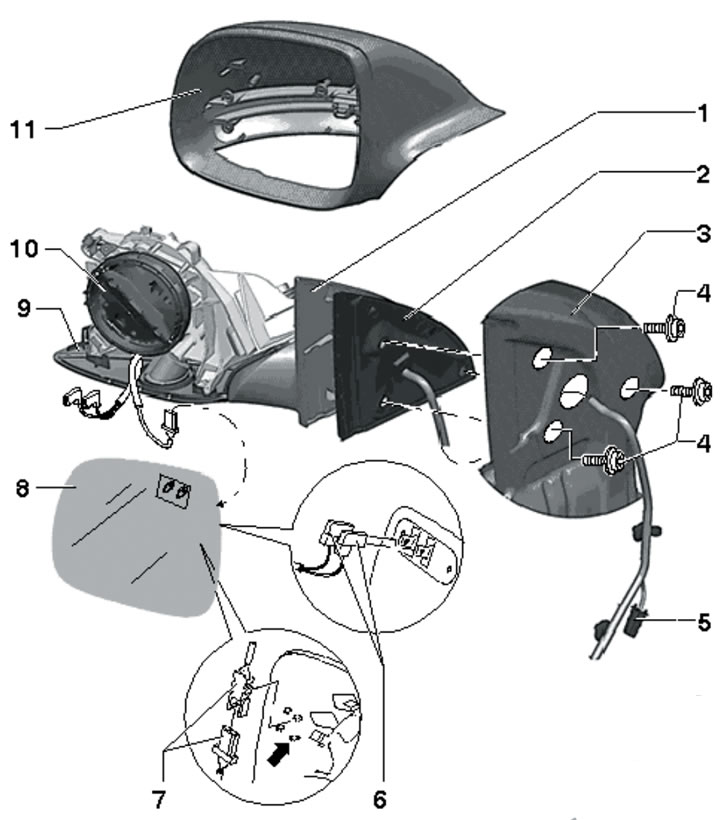
11.1. Assembly details of the outside rearview mirror:
1 - Mirror base;
2 - Seal;
3 - Front door;
4 - Bolts with washers, 15 Nm;
5 - Adjustment actuator connector;
6 - Heating element connector;
7 - Additional connector, if present, is fixed on the reflective element;
8 - Reflective element;
9 - Support;
10 - Control unit;
11 - Mirror housing, secured with clamps in the front part of support 9.
Always wear gloves when handling the reflective element.
2. To remove the reflective element, press it out of the motor using a suitable lever, first from below and then from above. To avoid damaging the mirror housing, apply adhesive tape to it.
3. To remove the mirror assembly, remove the door trim, disconnect the mirror wiring connector, release the wiring bushing from the door and unscrew the bolts (4 in illustration 11.1).
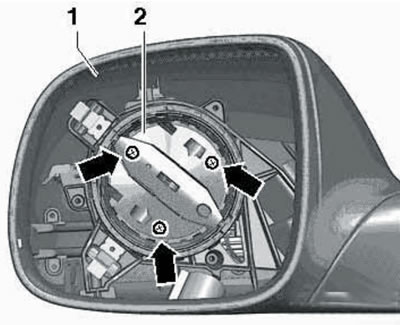
4. Removing the control unit (2 in the illustration) possible after removing the reflective element and unscrewing the screws (arrows).
11.4. Removing the adjustment block.
5. Removing the indicator repeater (2 in the illustration) rotation is possible after removing the mirror housing (1).
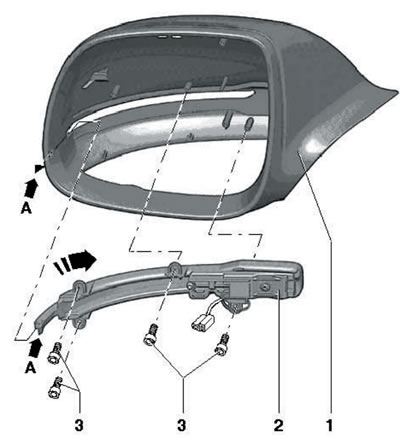
11.5. Fastening of the turn signal repeater.
Loosen the bolts (3), detach the repeater (A) from the housing and pull it out in the direction of the arrow.