



Removal
Turn off the ignition and disconnect the ground wire from the battery.
Warnings: Do not open the refrigerant circuit of the air conditioning system.
Before removing, mark the direction of rotation of the poly V-belt with chalk, marker or paint. If the poly V-belt rotates in the opposite direction when installing a used poly V-belt, it will cause its destruction. Make sure the poly V-belt is correctly positioned on the pulleys.
Notes
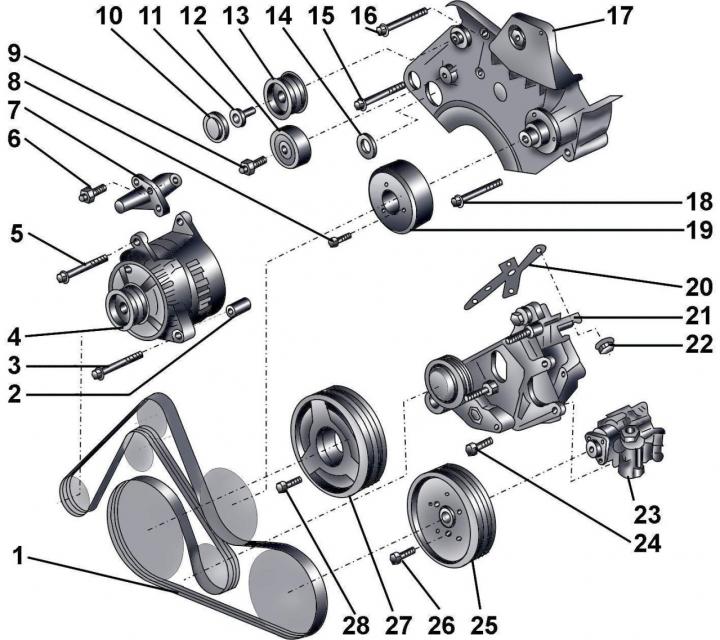
Fig. 3.3–22. Units driven by a poly V-belt: 1 – poly V-belt; 2 – mounting sleeve; 3 – bolt, 22 Nm; 4 – generator; 5 – bolt, 45 Nm; 6 – bolt, 22 Nm; 7 – generator bracket; 8 – bolt, 10 Nm; 9 – bolt, 22 Nm; 10 – protective cover; 11 – bolt, 22 Nm; 12 – guide roller; 13 – guide roller; 14 – plug; 15 – bolt M10, 45 Nm; 16 – bolt M6, 10 Nm; 17 – Radiator fan bracket with viscous coupling; 18 – bolt M8, 22 Nm; 19 – fan pulley; 20 – gasket; 21 – bracket; 22 – bolt, 22 Nm; 23 – Power steering pump; 24 – bolt, 22 Nm; 25 – Power steering pump pulley; 26 – bolt, 22 Nm; 27 – vibration damper with poly V-belt pulley; 28 – bolt, 22 Nm
To facilitate access to the timing belt tension roller, it is necessary to remove plug 14 (Fig. 3.3–22).
When installing, it is necessary to use a new gasket 20.
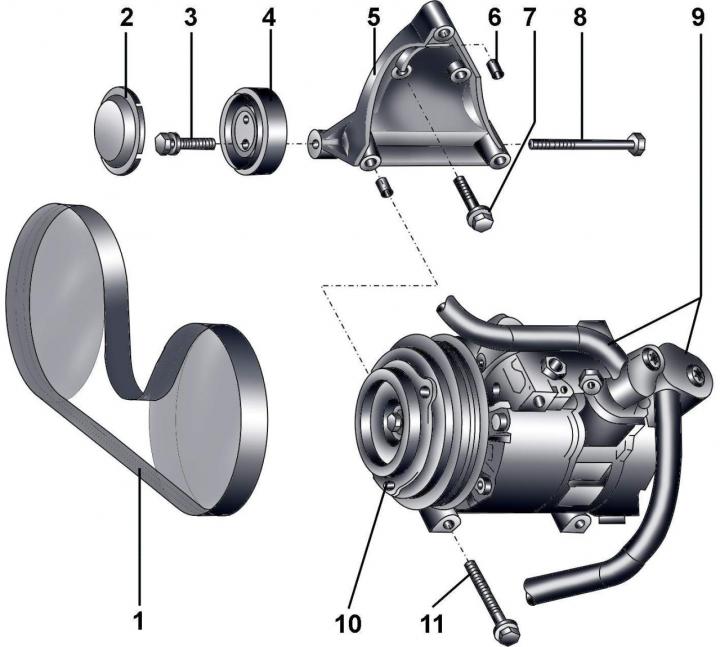
Fig. 3.3–23. Poly V-belt of the air conditioner drive: 1 – poly V-belt; 2 – protective cover; 3 – bolt, 22 Nm; 4 – poly V-belt tensioning mechanism; 5 – air conditioning compressor bracket; 6 – mounting sleeve; 7 – bolt, 22 Nm; 8 – bolt, 22 Nm; 9 – pipelines; 10 – air conditioning compressor; 11 – bolt, 22 Nm
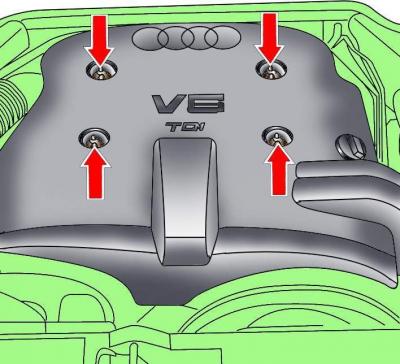
Fig. 3.3–24. Location of engine casing mounting screws
Remove the screws and remove the engine casing (Fig. 3.3–24).
Remove the right and left timing belt covers.
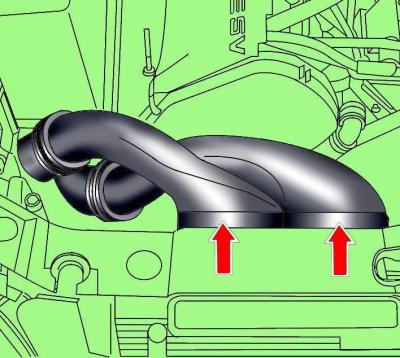
Fig. 3.3–25. Front air duct locations
Remove the front air ducts (Fig. 3.3–25).
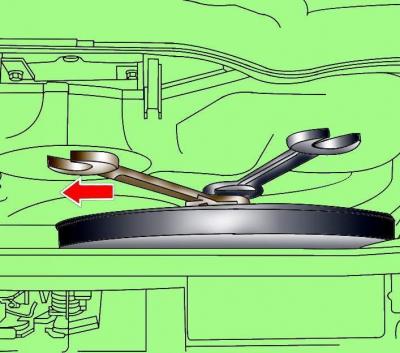
Fig. 3.3–26. Unscrewing the mounting bolt of the radiator fan with a viscous coupling
Unscrew the radiator fan mounting bolt with a viscous coupling, holding the fan shaft from turning with another wrench (Fig. 3.3–26).
Remove the bolts located at the top in front of the radiator and remove the radiator fan shroud.
Remove the viscous coupling fan together with the casing.
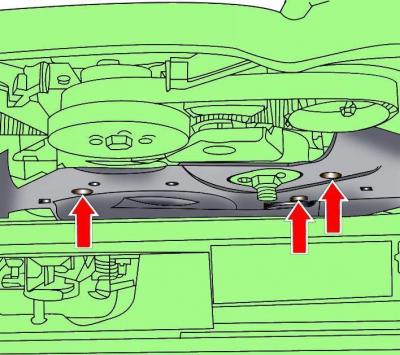
Fig. 3.3–27. Location of the poly V-belt cover mounting screws
Loosen the screws and remove the poly V-belt cover (Fig. 3.3–27).
Separate the housing from the tension roller of the air conditioning compressor poly V-belt.
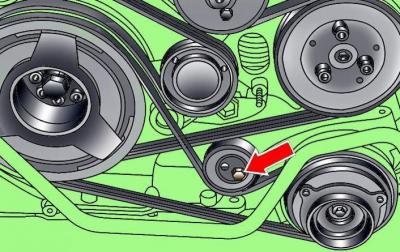
Fig. 3.3–28. Location of the bolt securing the tension roller of the poly V-belt of the air conditioner compressor
Loosen the bolt securing the tension roller of the air conditioner compressor poly V-belt (Fig. 3.3–28) and remove the belt.
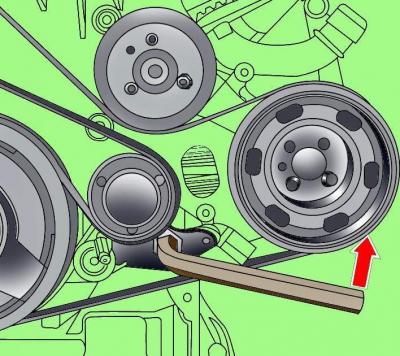
Fig. 3.3–29. Releasing the tension of the main poly V-belt
Using a socket wrench, turn the tensioning mechanism of the main poly V-belt counterclockwise, thereby loosening the belt tension, fix the tensioning mechanism in this position with a pin (Fig. 3.3–29) and remove the belt.
Installation
Installation is carried out in the reverse order of removal, taking into account the following.
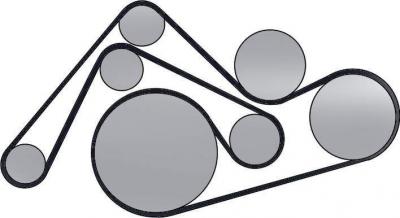
Fig. 3.3–30. Location of the poly V-belt on the pulleys of a diesel engine
Install the poly V-belt first on the crankshaft pulley, then on the idler pulleys and lastly on the tension roller pulley (Fig. 3.3–30).
Using a socket wrench, turn the poly V-belt tensioner counterclockwise, remove the pin and release the wrench, which will cause the belt to tighten (Fig. 33–29).
Install the air conditioning compressor drive poly V-belt.
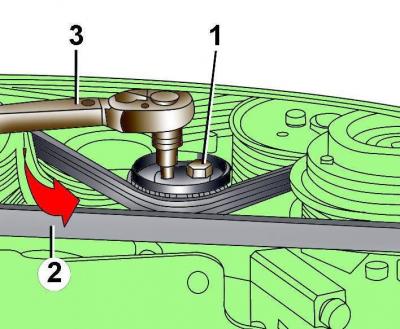
Fig. 3.3–31. Adjusting the tension of the air conditioning compressor poly V-belt: 1 – bolt for fastening the poly V-belt tension roller; 2 – air conditioning compressor poly V-belt; 3 – torque wrench
Using a 6 mm Allen head torque wrench, turn the air conditioning compressor poly V-belt tension roller counterclockwise to a torque of 7 N·m and, holding the torque wrench in this position, tighten the poly V-belt tension roller mounting bolt with a second wrench to a torque of 22 N·m (Fig. 3.3–31).
Install the poly V-belt cover.
Install the radiator fan with viscous coupling.
Start the engine and check that the poly V-belt is working properly.