
Table of contents: Removal ↓ Installation ↓
Removal
Wet the windshield with water.
Turn the windshield wiper on and then off until the wiper arm returns to its original position.
Disconnect the ground cable from the battery.
Attention
- When disconnecting the wires from the battery terminals, the memory units of the control units erase the data on the recorded faults, so before disconnecting the wires, you must contact a workshop to recall the faults recorded in the memory. After connecting the wires to the battery terminals, it is necessary to activate and reprogram the electric windows, as well as the position of the rear-view mirrors and seats.
- If the car has a radio receiver with a code, then before disconnecting the wires from the terminals from the battery, check that there is a code to reactivate the receiver. Otherwise, the radio receiver can only be put into operation at a specialized station.
Remove the wiper blades.
Using a small screwdriver, remove the caps from the base of the wiper arm.
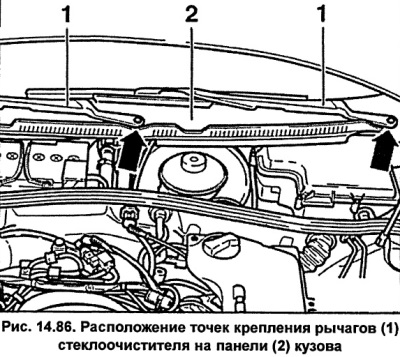
Loosen the windshield wiper arm mounting nut a few turns (see fig. 14.86).
By moving the wiper arm to the sides, loosen its fit on the axle, then unscrew the nut and remove the wiper arm.
Loosen the windshield wiper arm mounting nut and remove it.
Installation
Connect the ground wire to the battery. Repeat the operations for memorizing the position of the seats, mirrors, etc., and also set the time on the clock and enter the code into the radio.
Turn the windshield wiper on and then off until the wiper arm shaft returns to its original position.
Set the windshield wiper arms to a position where the windshield wiper blades are at a distance of a and b (fig. 14.86) from the base of the windshield.
Secure the wiper arm with the nut, tightening it to a torque of 16 Nm.
Turn the windshield wiper on and then off and check the home position of the wiper blades.
Install the cap onto the nut at the base of the wiper arm.