
Table of contents: Removal ↓ Installation ↓
Four-cylinder petrol engines 1.6, 1.8 l.
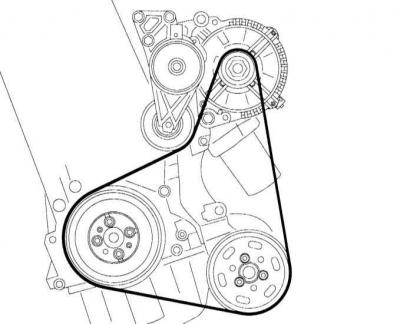
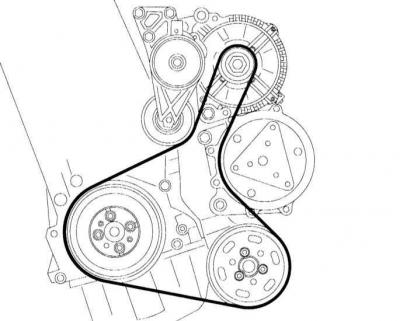
The ribbed V-belt is wider than the regular V-belt and has several longitudinal ribs. The ribbed V-belt drives the generator, power steering oil pump, radiator fan and, depending on the equipment, also the air conditioning compressor.
Removal
1. If the belt is to be installed again, it is necessary to mark the direction of its rotation. To do this, an arrow in the direction of its rotation is applied to the belt with a felt-tip pen. The engine, looking from the right side of the car, rotates to the right, that is, clockwise.
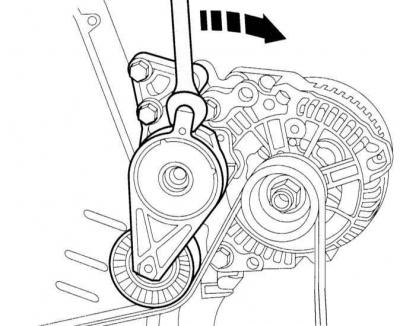
2. Loosen the belt tension by turning the tensioner with a wrench in the direction of the arrow.
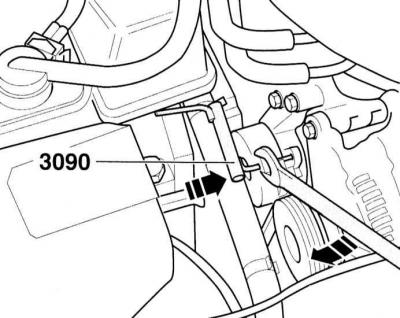
3. In this position, insert the appropriate rod (W 4.5 mm, length 55 mm), for example, AUDI-3090 or a drill rod. This way the tensioner will be fixed.
4. Remove the V-belt.
Installation
1. Place the V-belt on the pulleys.
Warning: When installing a used belt, pay attention to its direction of rotation. The engine, when viewed from the right side of the car, rotates to the right, i.e. clockwise. Installing the belt in the opposite direction will result in increased belt wear.
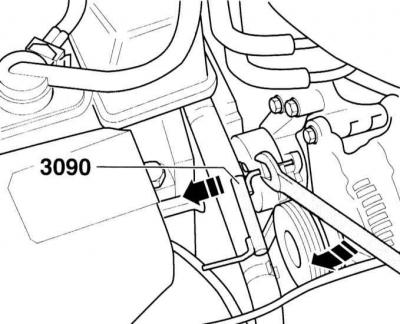
2. Press the tensioner in the direction of the arrow and remove the rod AUDI-3090. Then slowly release the tensioner, while monitoring the correct position of the belt on the pulleys. The belt tension is set automatically.
3. Start the engine and visually check the operation of the belt.