
Table of contents: Removal ↓ Installation ↓
Removal
Instructions. Be sure to disconnect the battery, since the hydraulic pump turns on even when the ignition is off and hydraulic fluid flows out of the system. Risk of damage to electronic components when disconnecting the battery. Carefully monitor the process of removing the battery.
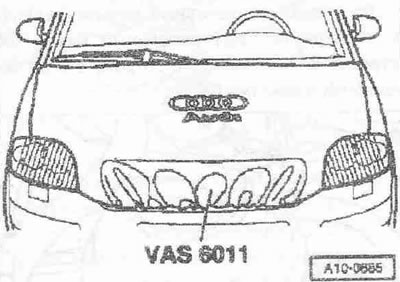
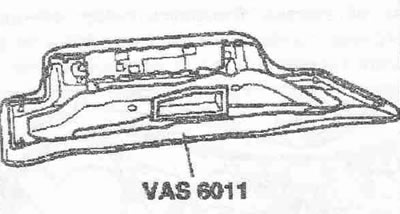
Disconnect the ground cable from the battery. Wash the hood from the outside and cover it with a protective cover. Unlock the service cover from the inside. Unlock the hood and pull it forward a little. Pull the protective cover "VAS 6011" onto the hood. Remove the hood and place it on the protective cover "VAS 6011". Disconnect the plug connector "arrow A". Unscrew the coolant expansion tank "arrow B" and put it aside with the coolant hoses connected.
Loosen the hose clamp -upper arrow- and remove the coolant drain hose from the fairing grille. Unscrew the nut "lower arrow". Remove the coolant drain hose and set it aside.
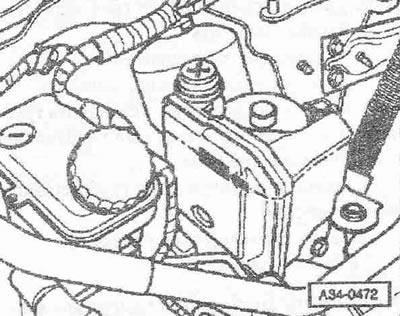
Loosen the vacuum reservoir approx. 1/2 turn. The hydraulic oil level in the reservoir increases.
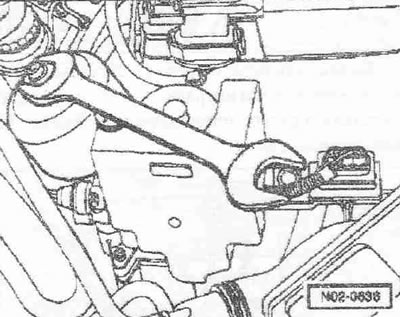
Unscrew the bolt "arrow". Remove the pipe and hose lines "1...3" as a whole from the hydraulic control unit in a downward direction.
Close open lines and pipes with clean plugs from the plug set for the VAS 6122 engine.
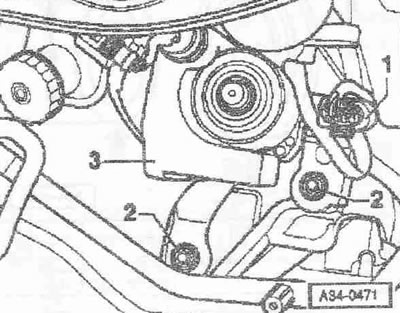
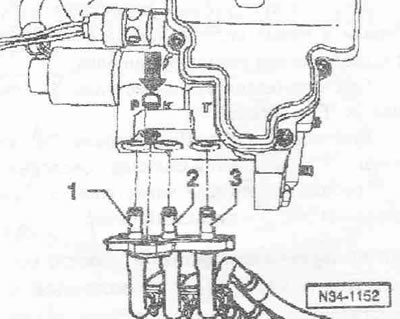
Disconnect the electrical connector "1". Unscrew the bolts "2" and remove the hydraulic control unit "3".
Installation
Installation in reverse order.
Caution! Incorrect installation of the tube-hose lines may result in the gear shifter being destroyed. Install the tube-hose lines "1...3" according to the color marking.
Tighten the screw "arrow". Tighten the receiver. Add hydraulic fluid and check its level.

Pay attention to the work on installing the battery. Turn on the ignition (the hydraulic fluid level in the expansion tank decreases). Press the brake pedal and shift gears several times (turn on Tiptronic track).
Then bleed the entire hydraulic system. Turn off the ignition. Perform a visual check of the hydraulic system and make sure it is tight. Check the hydraulic fluid level and top up. Perform basic setup in the "Car Self-Diagnostics" mode.