
Table of contents: Removal ↓ Installation ↓
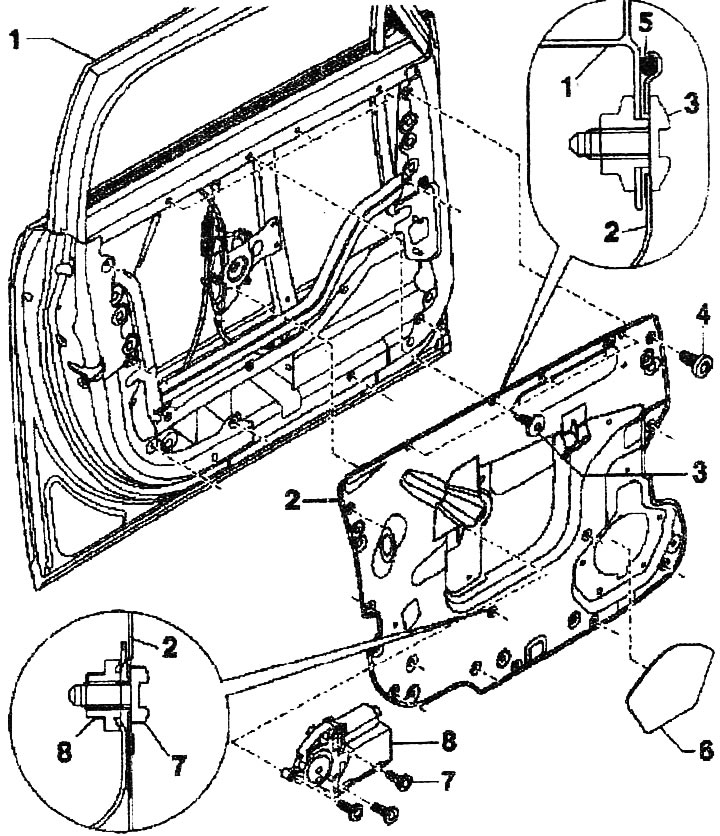
1. Bracket of built-in door parts. After each dismantling of the bracket of built-in door parts, seal the cable guide of the outside mirror with butyl cord "AKL 450 005 05". Use butyl cord for this "AKL 450 005 05" from the set "Fasteners and gaskets for the mounting plate"
2. Mounting bracket (mounting plate)
3. Bolt Torg M6x16, 10 Nm. Consider the different length and diameter of the bolt heads
4. Bolt Togh M6x14.10 Nm
5. Gasket. Ensure correct fit in mounting bracket
6. Cover. Installed only on cars without a radio
7. Bolt Togh, 3.5 Nm
8. Window lift motor. Remove door trim. Disconnect plug connectors, unscrew bolts and remove motor
Removal
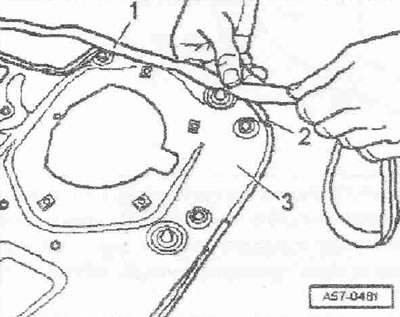
The following procedure is for vehicles with butyl cord attached. Remove the door trim. Unscrew the Torx bolts from the mounting bracket. Record the mounting position of the bolts for reinstallation. Remove the window lift motor. Release the electrical cables.
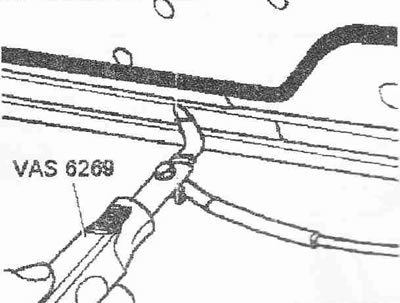
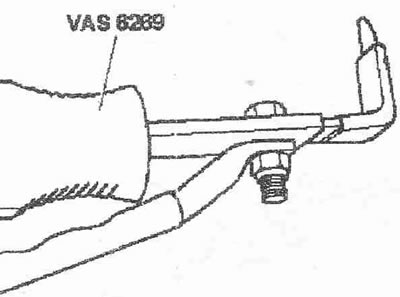
Caution! The adhesive roller of the mounting bracket is covered by the door trim. Avoid damaging the paintwork of the door. Therefore, to detach the sticker, use the corner knife "VAS 6269".
Place the working end of the corner knife "VAS 6269" "1", starting from the front at the bottom, into the glue roller "2" between the mounting bracket "3" and the door leaf.
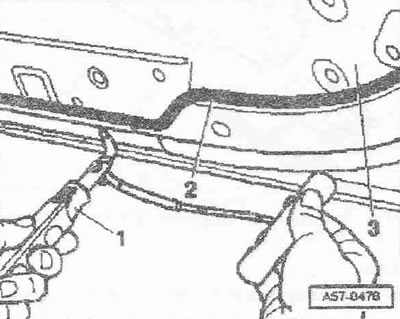
Run the corner knife "VAS 6269" along the glue roller and thus detach the sticker along the entire perimeter.
Installation
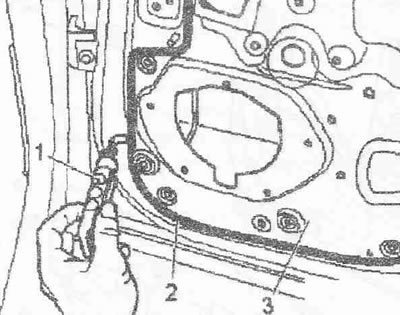
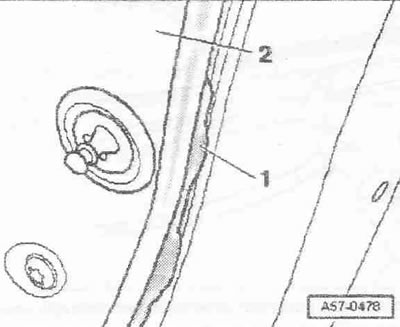
There should be no glue, dust or oil residue on the surface to be glued. Treat the surface to be glued with a cleaner "D 009 401 04" and wipe the surface dry. Place the sealing cord "2" on the outer edge of the mounting bracket "3" along the entire perimeter. Use butyl cord for this "AKL 450 005 05".
Remove the overlapping strip "1".
Observing the accuracy of the fit, install the mounting bracket on the door and tighten the bolts. Take into account the different length and diameter of the bolts. Before tightening the bolts, make sure that the sealant "1" does not protrude from under the mounting bracket "2".
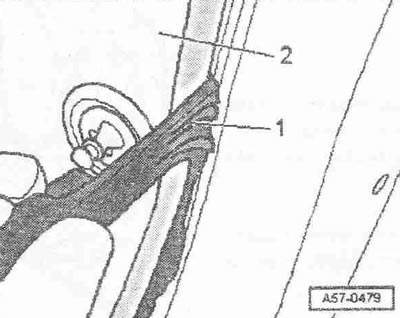
Remove the protruding sealant "1" by pulling it towards the mounting bracket "2".
[The article is a reprint of material from «AUDIMANUAL.ru»]