
Table of contents: Switch/dimmer switch ↓ Switch in the center console ↓ Glove compartment light switch ↓ Window/mirror adjustment mechanism… ↓ Sunroof Sliding Panel… ↓
Switch/dimmer switch
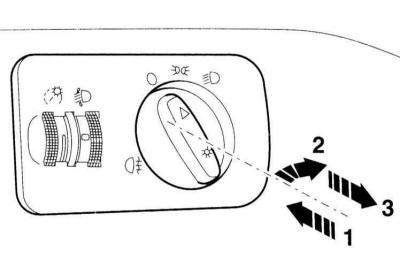
1. Press the light switch –1– and at the same time turn it to the left –2–.
2. Hold the switch in this position and remove the light switch housing from the instrument panel –3–.
3. Disconnect the connector at the switch.
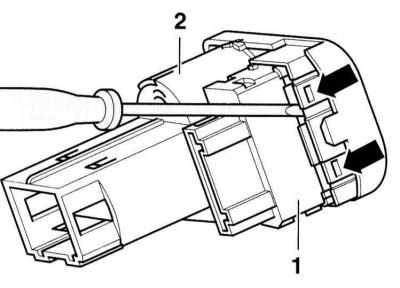
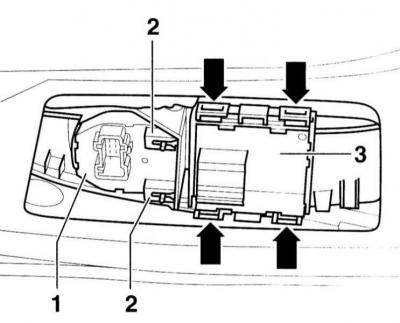
4. Use a flat-head screwdriver or plastic wedge to lift up the side stoppers (arrows in the illustration) at the regulator –1– and thus release the stoppers.
5. Pull the regulator –1– back out of the light switch housing.
6. Insert the regulator into the guide on the light switch –2– and press it into the light switch housing.
7. Connect the connector.
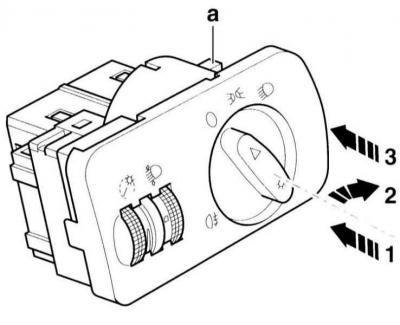
8. To install, press the light switch –1– and simultaneously turn it to the right –2–. This will press in both locking hooks.
9. In this position, press the light switch into the instrument panel opening –3– and lock it in place.
Switch in the center console
1. Remove the radio, refer to subsection Removal, installation and coding of the radio receiver.
2. Open the ashtray and remove the insert.
3. Remove the Phillips head screw –1– and remove the ashtray –2–.
4. Disconnect the connector of the ashtray lamp and cigarette lighter.
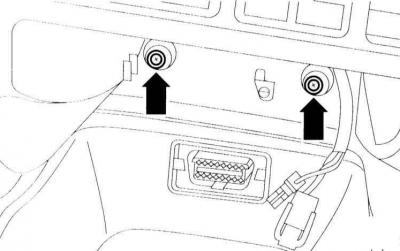
5. Remove 2 Phillips head screws (arrows in the illustration).
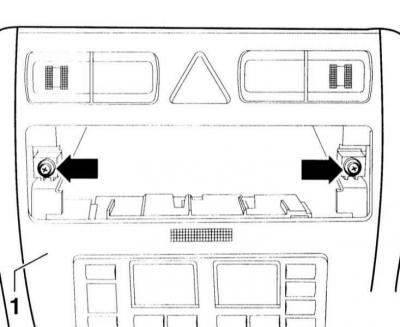
6. Remove 2 Phillips head screws (arrows in the illustration) in the opening of the radio receiver.
7. Carefully lift off the trim –1–.
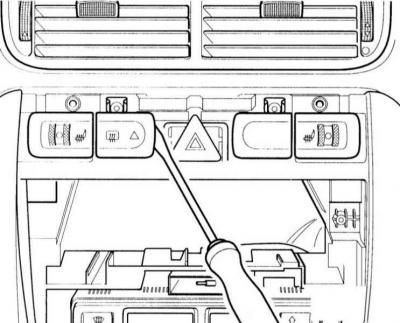
8. Push the corresponding switch forward from the rear through the radio opening with your hand. At the same time, carefully press the brackets between the switch and the center console with a small screwdriver.
9. Finally, remove the switch completely and disconnect the connector.
10. Installation is performed in the reverse order of removal.
Glove compartment light switch
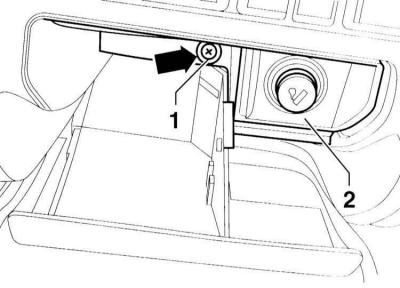
1. Carefully pry up the instrument panel side cover on the front passenger side.
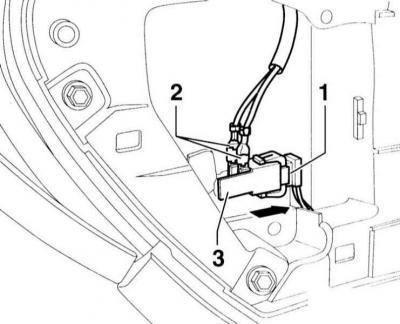
2. Disconnect the plug connections –1– and remove the cable lugs –2–.
3. Pull the switch –3– out of the instrument panel holder in the direction of the arrow.
4. Installation is performed in the reverse order of removal.
Window/mirror adjustment mechanism switch
1. Remove the door trim, refer to subsection Removal and installation door trim.
2. Carefully peel off the insulating mat from the back of the paneling.
3. Disconnect the connector of the window lift switch –3– and/or the mirror adjustment mechanism –1–.
4. Remove switch –1– from the door trim. To do this, open the stoppers –2–.
5. Installation is performed in the reverse order of removal.
Sunroof Sliding Panel Switch/Interior Light
The sliding panel controller cannot be replaced separately. If there are any faults, the control unit and interior light must be replaced as a set.
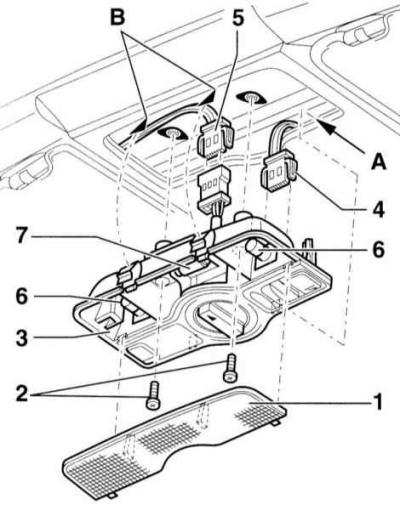
1. Pull the diffuser –1– forward with your fingers and detach it from the rear.
2. Loosen the mounting screws –2– and remove the sliding panel/interior light switch –3–.
3. Press the hooks (B) with a screwdriver and pull the sliding panel switch forward, disconnect it from the rear (A).
4. Disconnect plug connections –4– and –5–. 6 – reading light bulb, 7 – interior light bulb.
5. Connect the plug connections at the sliding panel/interior light switch.
6. Attach the sliding panel/interior light switch to position (A) and (B) and lock it in place.
7. Secure the switch/indoor light with two screws.
8. Attach the diffuser to the back and insert it into the hole from the front.