
Table of contents: Removal ↓ Installation ↓
Door trim
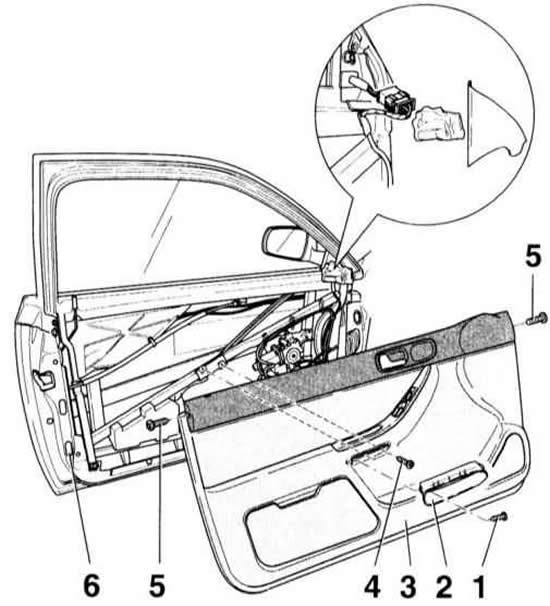
Removal
1. Open the door.
2. Remove screw –1– from handle –2–.
3. Remove the handle trim downwards from the door trim –3–.
4. Remove 2 screws –4–.
5. Remove 2 screws –5–.
6. Pull the door trim up about 20 cm from the door frame. 6 - Stopper lining.
7. Remove the sheathing insulation.
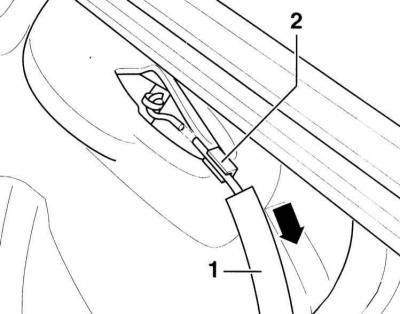
8. Remove the inner drive cable –1– from the guide –2– and disconnect.
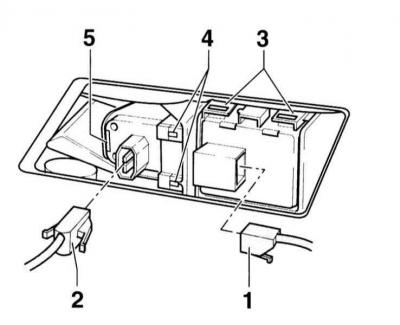
9. Disconnect the connector –1– of the window lifter switch. 3 – locking strips.
10. Disconnect connector –2– of the mirror adjustment mechanism drive switch. 4 – lever, 5 – bar.
11. Remove the door trim –3–.
Installation
1. Install the door trim.
2. If necessary, connect the hook backings –6–.
3. Connect the window lift switch and the mirror adjustment mechanism.

4. Connect the cable of the inner door drive and insert it into the guide, contact to the illustration. Insert the foam sealing element.
5. Press the trim against the door frame and secure it at the top with screws –5–.
6. Tighten screws –4– to 2.5 Nm.
7. Insert the handle trim –2– into the door trim from below and secure with screw –1– to a torque of 1.5 Nm.
(The original version is on the portal «audimanual»)