
Table of contents: Adjusting the door's installation… ↓ Adjusting the door height using door… ↓
Adjusting the door lock element
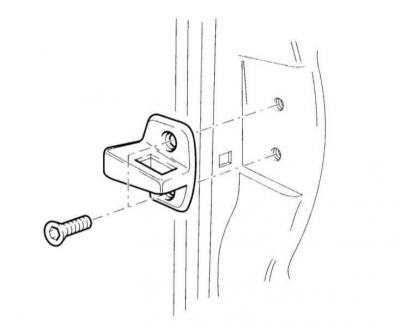
Adjusting the door's installation depth with a locking element
1. Loosen the lock element screws slightly.
2. Close the door.
3. By moving the door, the locking element is pressed in so that the door becomes flush with the adjacent body elements.
Warning: The door lock element should only be adjusted in the direction of rotation of the door hinges, but not in height.
4. Carefully open the door without changing the position of the lock element.
5. Tighten the screws to a torque of 20 Nm.
Adjusting the door height using door wedge elements
1. The door must first be adjusted with a locking element.
2. Remove the door trim, refer to subsection Removal and installation door trim.
3. Align the door in the longitudinal direction by moving the adjusting wedge –4–, having first loosened the bolt –3– (refer to the illustration Front door in the subsection Removal and installation the front door and adjusting element holder).
4. By moving the adjusting wedge –7– with the bolt –6– slightly loosened (refer to the illustration Front door in the subsection Removal and installation the front door and adjusting element holder) the tilt of the holder in relation to the stand B changes.
5. Adjust the holder to achieve the correct clearances and obtain a uniform gap in relation to adjacent body elements. The clearance values are given in the Specifications.
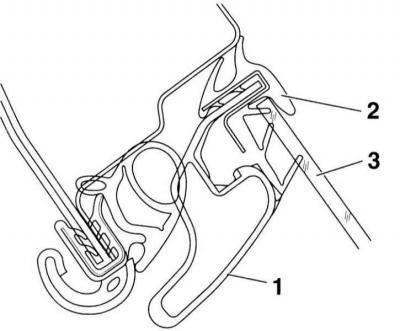
6. Make sure that the working edges of the seal –2– are evenly adjacent to the A-pillar and the roof frame. In doing so, tighten the holder –1– slightly more than is necessary to prevent the rubber seal from returning. 3 – door window.
7. Tighten bolts –3– and –6– (refer to illustration Front door in the subsection Removal and installation the front door and adjusting element holder) with a torque of 30 Nm.
8. Install the door trim, refer to the subsection Removal and installation door trim.