
Table of contents: Removal ↓ Installation ↓
Rear door, beam of adjustment elements
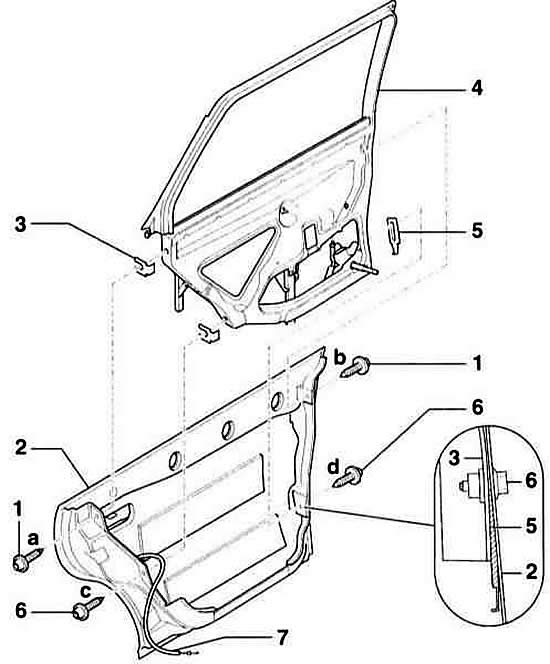
- 1 - bolt, 30 Nm
- 2 - rear door
- 3 - lining. Installed if necessary. Before removing, record the number and thickness of the linings. When assembling, install the same linings in the same place.
- 4 - beam of adjustment elements
- 5 - adjusting wedge. By moving the wedge, the door tilt in the area of the C pillar can be changed. Adjustment is performed in the same way as for the front door
- 6 - bolt, 30 Nm
- 7 - cable. Connects to the door lock.
Upper door hinge
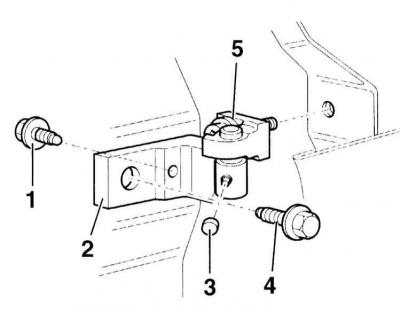
- 1 - bolt, installed from the inside, 30 Nm
- 2 - upper door hinge
- 3 - cover, 23 Nm
- 4 - bolt, 30 Nm
- 5 - Torx screw, 30 Nm
Bottom door hinge
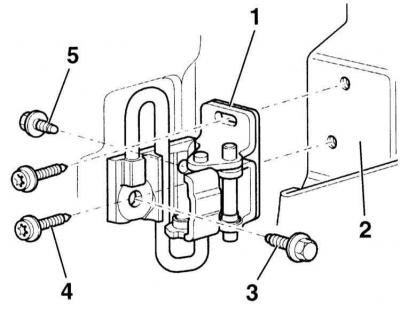
- 1 - lower loop
- 2 - front door
- 3 - bolt, 30 Nm
- 4 - Torx screw, 30 Nm
- 5 - bolt, 30 Nm
Removal
1. Remove the door trim.
2. Remove screws –1– and –5–.
3. Pull the beam up.
4. Disconnect the door lock cable.
5. Disconnect the housing at the B-pillar and disconnect the electrical and pneumatic connections.
Installation
1. Insert the beam into the door and secure it lightly with screws –1– and –6– and adjusting wedge –5–.
2. Tighten the mounting screws –1– and –6– in the sequence a, b, c d.
3. Insert the door wedge element. Adjust the wedge element in the same way as the front door.