
Bench seat upholstery and cushion
The instructions apply to the left rear seat 2/3; they are the same for the right rear seat 1/3.
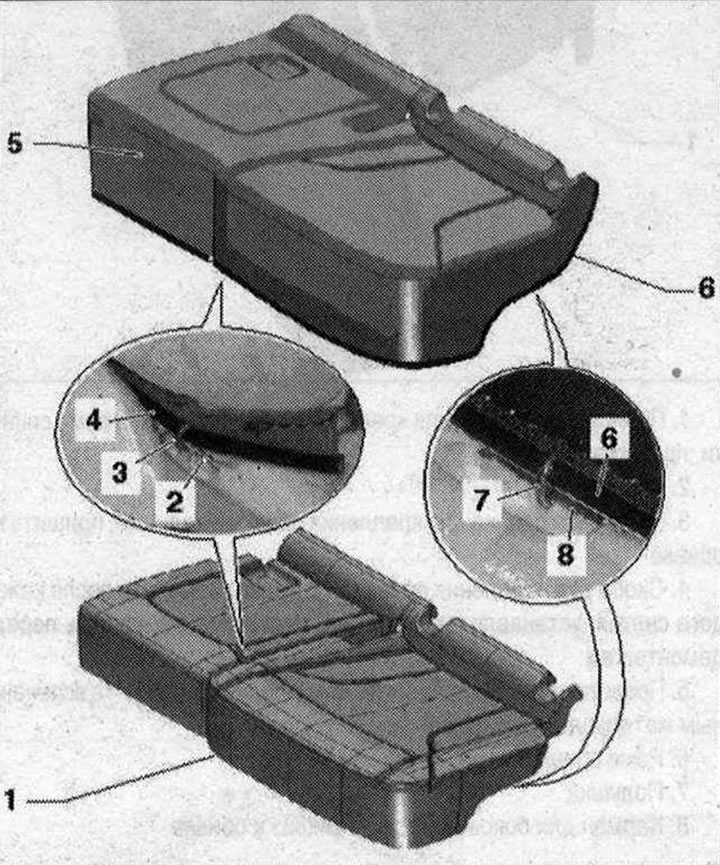 1. Pillow; 2. Wire for attaching the upholstery to the pillow, covered with foam material in the pillow; 3. Bracket for attaching the upholstery to the pillow. Replace after each removal, install in the same place where it was before dismantling; 4. Contour strip for attaching the upholstery to the pillow, sewn to the upholstery; 5. Upholstery; 6. Edging for attaching the upholstery to the pillow, sewn to the upholstery; 7. Bracket for attaching the upholstery to the pillow from the outside. Replace after each removal, install in the same place where it was before dismantling. The ends of the cushion brackets after installation must be directed in the direction of the cushion and be correctly bent, otherwise there is a risk of injury; 8. Wire for attaching the upholstery to the pillow, covered with foam material in the pillow
Removal
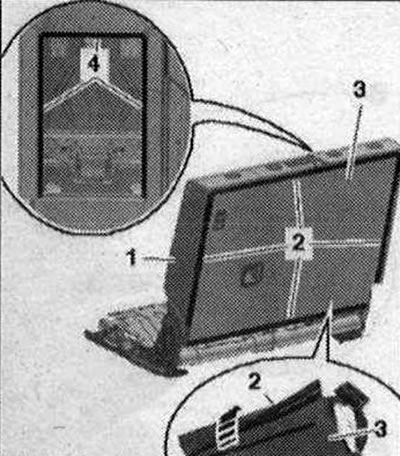
The procedure applies to the backrest of the rear left 2/3 seat; for the backrest of the right rear seat 1/3 it is similar. Remove the rear seat. Remove the rear seat head restraints. Remove the rear seat headrest guides. Remove the rear armrest. Remove the rear center seat belt cover. Remove the rear center seat belt hardware. Press the retaining plate -2- on the rear side from the backrest frame -3- and remove it along the perimeter -arrow-. Release the clamping bar -4- on the front side of the backrest frame. Remove upholstery with cushion -1- from below between seat frame and backrest frame and remove.
Installation
Install in the reverse order, making sure that the clamping strips are properly secured and that there are no wrinkles in the upholstery.
Visitor comments