
Table of contents: Removal ↓ Installation ↓
Removal
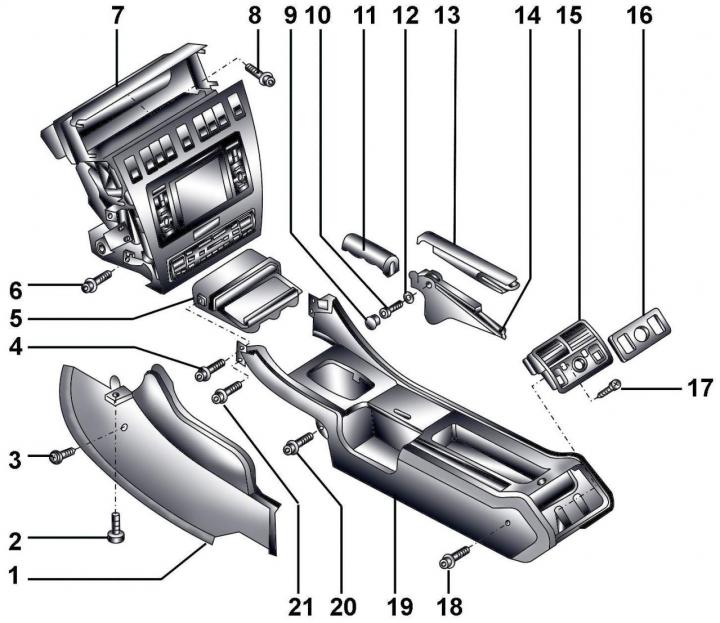
Fig. 16–48. Center console: 1 – left center console trim; 2, 4, 6, 8, 18, 20, 21 – bolts, 2.5 Nm; 3 – screw, 2.5 Nm; 5 – ashtray; 7 – central section of the instrument panel; 9 – cap; 10 – clamp bolt, 1 Nm; 11 – Parking brake lever handle; 12 – washer; 13 – decorative overlay; 14 – Parking brake trim; 15 – rear ventilation grille; 16 – decorative trim panel of the rear ventilation grille; 17 – bolt, 1.5 Nm; 19 – center console
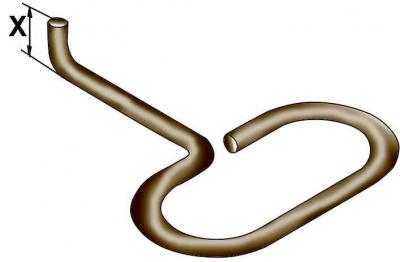
Fig. 16–49. Tool made of 3 mm diameter wire for removing the ventilation grille from the central section of the instrument panel: X = 6 mm
Make a tool from 3 mm diameter steel wire to remove the ventilation grille from the central section of the instrument panel (Fig. 16–49).
Remove the phone holder.
Move the front seats all the way back.
Take it off carpeting on both sides of the center console.
Turn the accelerator pedal 90° counterclockwise.
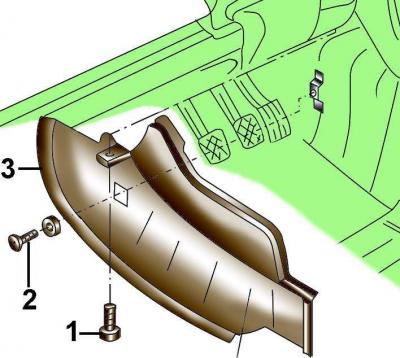
Fig. 16–50. Location of bolts (1, 2) for fastening the left trim (3) of the center console
Unscrew bolts 1 and 2 securing the left trim of the center console (Fig. 16–50).
Remove the left trim from the center console by moving it forward and detaching the rear portion of the trim.
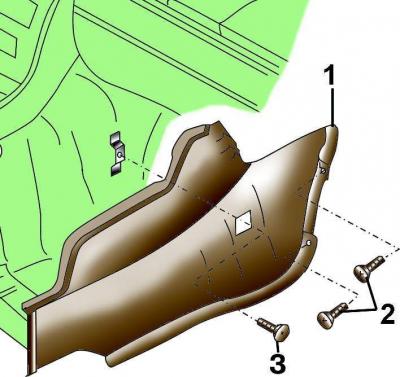
Fig. 16–51. Location of bolts (2, 3) for fastening the right trim (1) of the center console
Unscrew bolts 2 and 3 securing the right-hand center console trim (Fig. 16–51). Access to the front bolts is gained after removing the floor carpet.
Remove the right trim from the center console by moving it forward and detaching the rear portion of the trim.
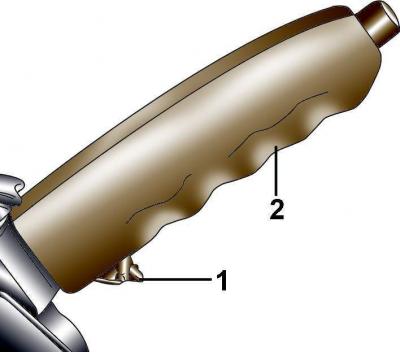
Fig. 16–52. Location of the lock (1) of the handle (2) of the parking brake lever
Raise the parking brake handle as far as possible. Press down the lock 1 (Fig. 16–52) of the handle 2 of the parking brake lever and, by pulling, remove the handle from the lever.

Fig. 16–53. Location of the cap (1) of the clamp bolt and the decorative cover (2) of the parking brake lever trim
Using a screwdriver blade as a lever, remove decorative cover 2 (Fig. 16–53) from the parking brake lever trim.
Remove the cap, loosen the clamp bolt two turns and, moving it forward, release the latch at the rear, remove the parking brake lever trim (see Fig. 16-53).
On vehicles with a manual transmission, unscrew the knob from the gear shift lever and engage fourth gear
Remove the center armrest.

Fig. 16–54. Location of rear ventilation grille (1), screws (3) and decorative cover (2)
Remove the decorative trim panel of the rear ventilation grille (Fig. 16–54).
Remove two screws 3 and remove the ventilation grille from the rear of the center console.
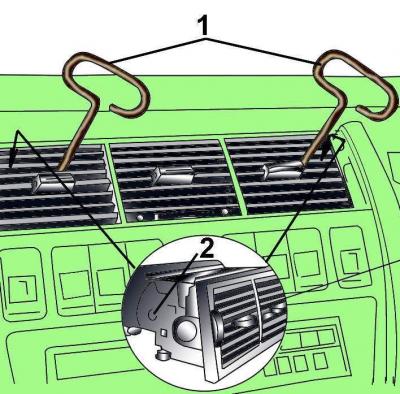
Fig. 16–55. Using a wire tool (1) installed in the holes (2) to remove the ventilation grille from the center section of the instrument panel
Attach the wire tool through the ventilation grille into the openings in the instrument panel center section ventilation grille housing (Fig. 16–55). Carefully remove the ventilation grille from the instrument panel center section.
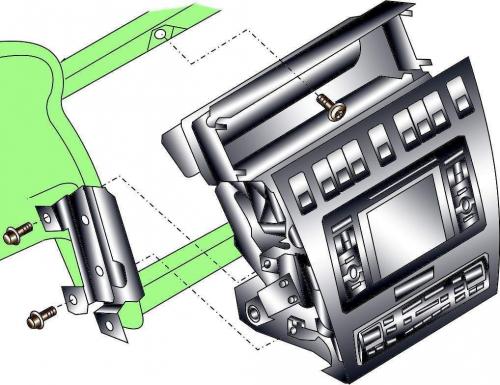
Fig. 16–56. Location of screws securing the center section to the instrument panel
Remove the five screws and remove the center section from the instrument panel (Fig. 16–56).
Disconnect the electrical connectors and remove the center section of the instrument panel.
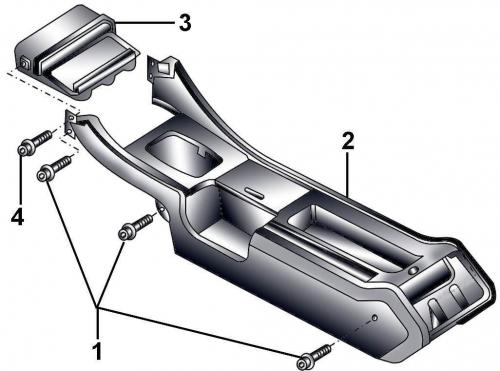
Fig. 16–57. Location of bolts (1) for fastening the center console (2) and bolt (4) for fastening the ashtray (3)
Unscrew bolts 4 (Fig. 16–57) and, moving forward, remove ashtray 3 from center console 2.
Unscrew the bolts 1 securing the center console; by sliding and lifting the rear part of the console forward, remove it along the parking brake lever.
Installation
Installation is carried out in the reverse order of removal.