
Table of contents: Removal and installation the rear… ↓ Removal and installation the rear… ↓ Removal and installation the cylinder ↓ Removal and installation stoppers to… ↓ Unlocking the removed rear seat ↓ Removal and installation the lower… ↓ Removal and installation the inner… ↓ Removal and installation the upper… ↓ Removal and installation the upper… ↓ Removal and installation the screen… ↓ Removal and installation the release… ↓ Removal and installation the seat… ↓ Removal and installation the seat… ↓
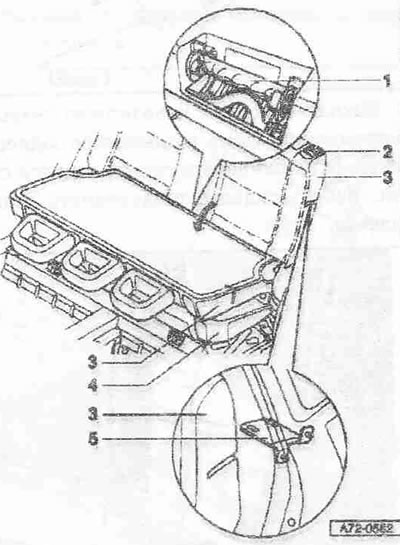
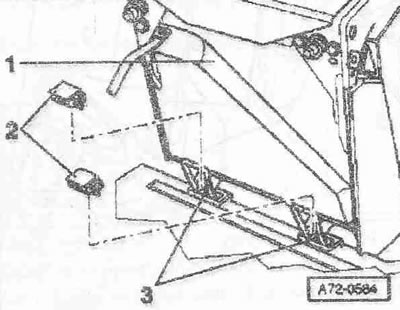
1. Lower release handle
2. Release handle (top, left and right)
3. Backrest of the rear seat
4. One-piece rear seat. Unlock the rear seat backrest "3" on the left and right sides by pulling the release handle "2". Fold the rear seat backrest forward "3". Pull the release handle "1" and lift the rear seat. Remove the stoppers blocking the removal
5. Left and right larvae
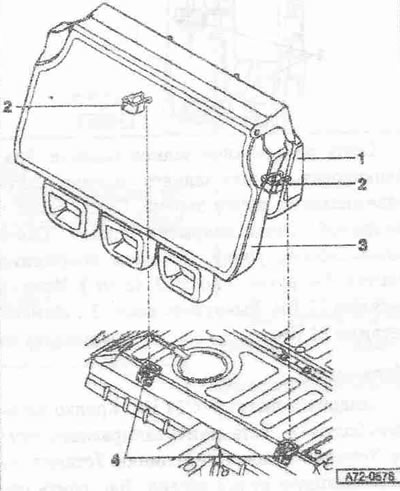
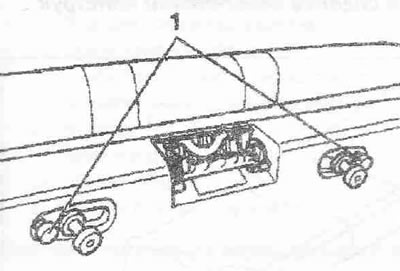
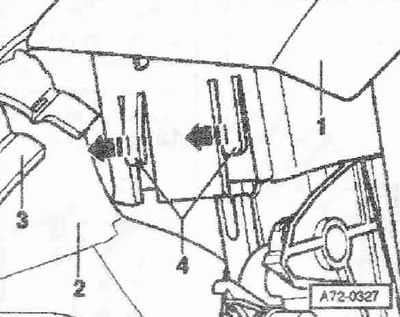
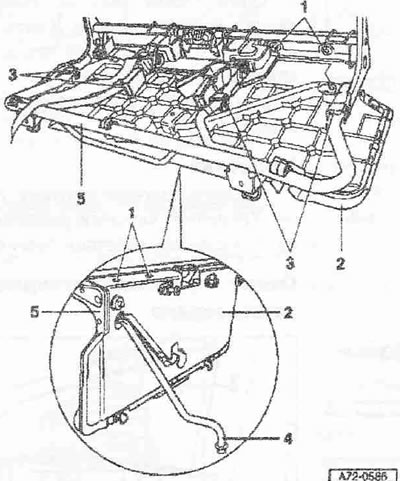
1. Rear bench seat. Remove rear bench seat "1" by grab handles "2" (2x) from floor anchors "4" (2x). Remove rear seat from vehicle with the help of a second mechanic. Unlock rear seat back. To prevent damage to upholstery linings, rear seat back in disassembled condition should not be folded further than it is when installed
2. Handrails (2x)
3. Backrest of the rear seat
4. Floor bindings (2x)
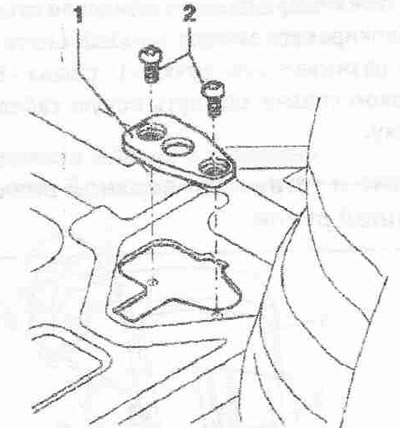
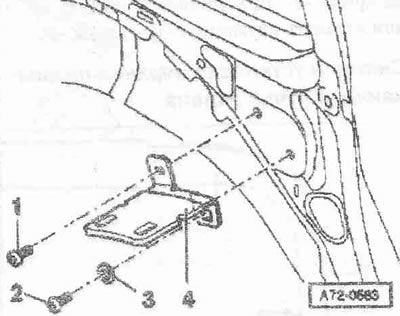
Removal and installation the rear seat floor anchorage
Remove the rear seat.
Unscrew screws "2" (2 pcs.), tightening torque 23 Nm. Remove the front floor tie-down.
Installation
Install the front floor tie-down "1" in the opposite order of removal.
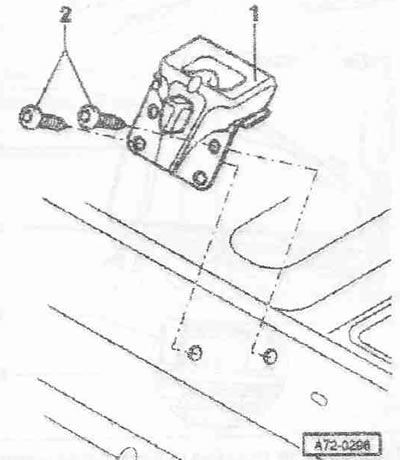
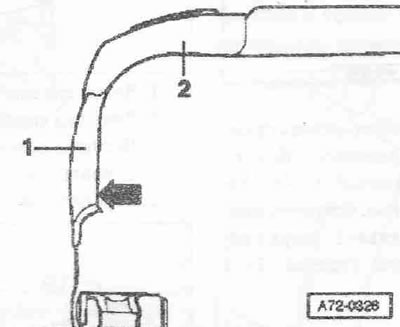
Removal and installation the rear seat floor anchor
Remove the rear seat.
Unscrew screws "2" (2 pcs.), tightening torque 23 Nm. Remove the rear floor tie-down.
Installation
Install the rear floor tie down "1" in the opposite order of removal.
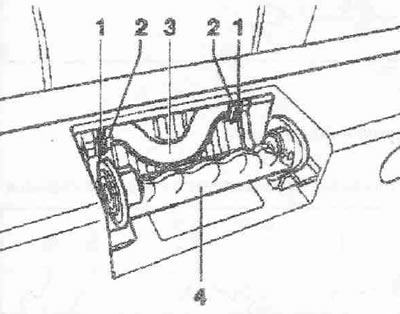
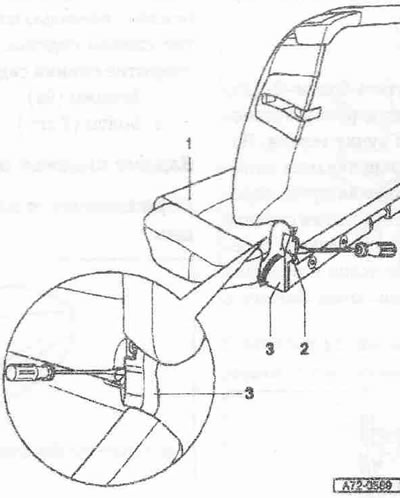
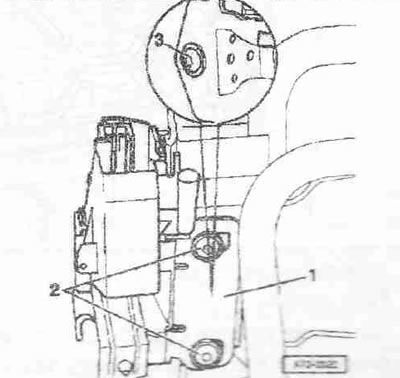
Removal and installation the cylinder
Unlock the rear seat back by pulling the right and left release handles and fold the rear seat back forward.
Unscrew screws "1" and "2" (tightening torque 23 Nm). Remove the face "4".
Installation
Install the cylinder "4" in the reverse order of removal. Tighten the screw "2" with the washer "3".
Removal and installation stoppers to prevent dismantling
Remove the stoppers preventing dismantling of "2" (2x).
Installation
Make sure that the stoppers preventing dismantling "2" (2x) are fixed in the floor ties "3" (2x).
Unlocking the removed rear seat
Press the plates "1" (2x) on both sides against the spring force until the backrest unlocks with a click. To prevent damage to the upholstery pads, the rear seat backrest should not be folded back further when disassembled than when installed.
Removal and installation the lower release handle
The lower release handle "4" cannot be removed without damaging it.
Cut the cable binders "1" (2 pcs.). Using a slotted screwdriver, unlock the locks "2" (2x). Remove the lower release handle "4" from the shaft "3".
Installation
Install the lower release handle "4" in the reverse order of removal. Secure the locks "2" (2x) with cable ties "1" (2x). Do not tighten the cable ties too much.
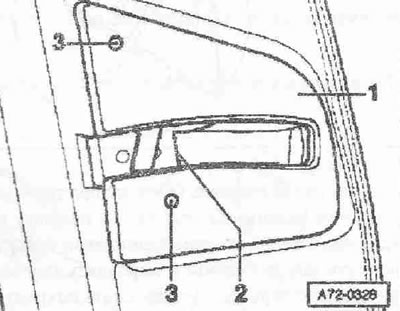
Removal and installation the inner and outer trim
The upholstery trims have defects after removal.
1. Back seat
2. Inner lining upholstery
3. Outer trim panel
Remove the rear seat. Unlock the rear seat back. From the rear of the rear seat "1" use a slotted screwdriver to separate the trim pads "2" and "3". From the front of the rear seat "1" use a slotted screwdriver to separate the trim pads inside "21" and outside "2". Remove the outer trim pad "3" in the direction of the arrow from the seat back cover. Pull the outer trim pad "3" rearward from the one-piece rear seat.
Installation
Install trim panels "2" and "3" in reverse order.
Removal and installation the upper screen release handle
Remove the rear seat. Unlock the back of the rear seat. Remove the screen release lock. Remove the cover -1. at the screen release handle "2" "Arrow". Pull out the cover "1" under the screen release handle "2".
Fold the cushion "2" with the cover "3" forward. Using a slotted screwdriver, unlock the locking latches "4" (2x) in the direction of the arrow. Remove the screen "1" upwards.
Removal and installation the upper release handle

Remove the rear seat. Unlock the back of the rear seat. Remove the screen release handle. Remove the cover and backrest cushion. Remove the backrest cover. Remove the spring "2". Remove the release handle "1" on the hook "3".
Installation
Pull the spring "2" from the sleeve "4" with a hook. Install the upper release handle "1" in the reverse order of removal.
Removal and installation the screen unlocking lock
Press pins "3" (2x) inward. Apply a slotted screwdriver to latch "2" and remove screen "1" from the seat back frame.
Installation
Replace pins "3" (4x). Install screen release lock "1" in the opposite order of removal.
Removal and installation the release lock
Remove the rear seat. Unlock the rear seat back. Remove the screen release handle. Remove the screen release lock on both sides. Remove the rear seat back cover and cushion. Remove the seat back cover. Remove the upper release handle.
Mark the position of the screws. Unscrew screws "2" (2 pcs.). Unscrew bolt "3". Remove the release lock "1".
Installation
Screw in bolt "3", tightening torque 21 Nm. Screw in bolts "2" (2x) and tighten securely. Install the upper locking handle. Install the backrest cover. Install the screen release handle. Adjust the release lock "1" (by turning the release lock "1") so that the release handle moves freely (knock with a hammer). Install the rear seat in the car. Align the locking lock relative to the cylinder and the seat. Tighten screws "2" (2x) with 21 Nm. Install the cover and cushion of the rear seat back. Install the screen release lock on both sides.
Removal and installation the seat cover
2. Seat cover. Remove the rear seat. Unlock the backrest of the rear seat. Remove the cover and cushion of the undivided rear seat. Press the clamps "3" (4x) with a slotted screwdriver. Slam the rear seat and align the rear seat. Fold back the support -4. Remove the covers "1" (2x). Remove the seat cover "2" upwards from the seat frame "5". Installation: Install the seat cover "2" in the reverse order
3. Clamps (4x)
4. Support
5. Seat frame
Removal and installation the seat back cover
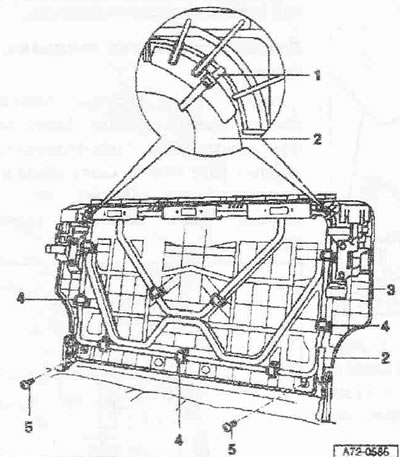
1. Cable binder (2 pcs.)
2. Backrest frame
3. Seat back cover. Remove the rear seat. Unlock the rear seat back. Remove the cover and the rear seat back cushion. Unscrew the screws "5" (2 pcs.). Open the binders "1" (2 pcs.). Press the clamps "4" (9x) with a slotted screwdriver. Remove the seat back cover "3" from the seat back frame "2". Installation: Install the seat back cover "3" in the reverse order
4. Clamps (9x)
5. Bolts (2 pcs.)
The original article is available on the website AudiManual