
Table of contents: Front floor anchorage for rear seat ↓ Rear floor anchor for rear seat ↓ Removal the lock cylinder ↓ Removal and installation the lower… ↓ Removal and installation the upper… ↓ Removal and installation the upper… ↓ Removal and installation the release… ↓ Removal and installation the seat… ↓ Removal and installation the seat… ↓ Removal and installation the inner… ↓ Removal and installation the screen… ↓ Unlocking the removed rear seat ↓
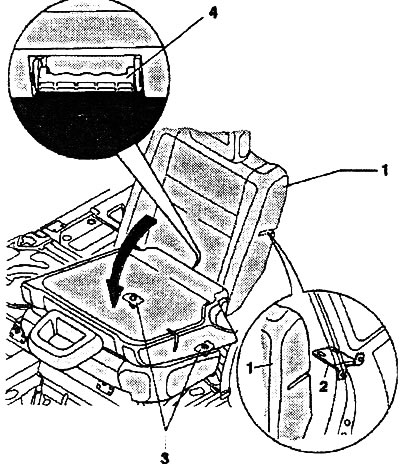
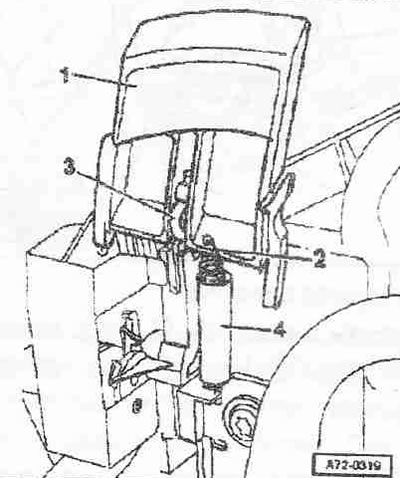
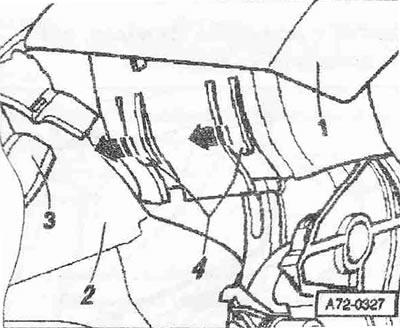
1. Rear seat. For vehicles with an additional rear storage compartment: remove the rear additional compartment. Fold the back of the rear seat forward -1 (direction of the arrow). Pull the release handle "4" and fold the rear seat forward
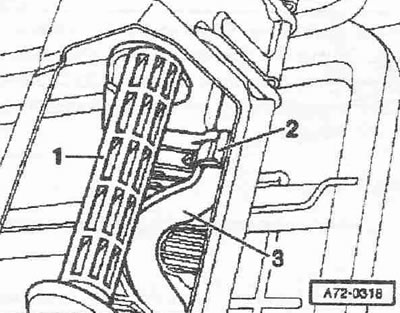
2. Finger
3. Fasteners (2 pcs.)
4. Unlocking lever. If the disc at the locking latches "3" is pushed inward during installation, then pull the release handle "4"
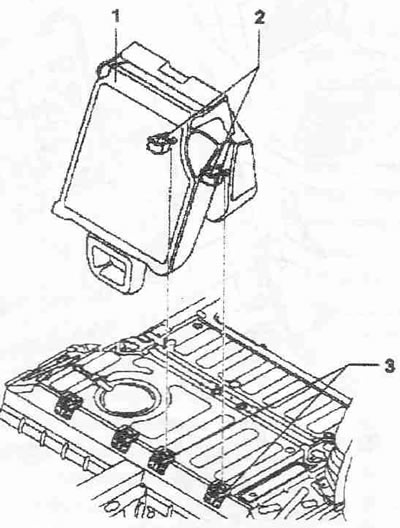
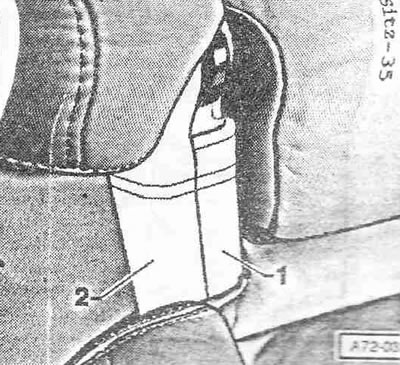
1. Rear seat. Pull the rear seat "1" with the grab handles "2" out of the holders "3". Unlock the backrest. The seat backrest in the disassembled state should not be folded back as it is when installed, otherwise, damage to the upholstery pads may occur
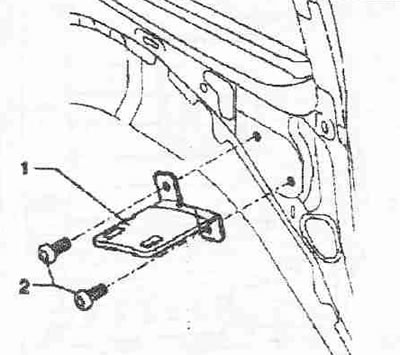
2. Mounting bracket
3. Bracket
Front floor anchorage for rear seat
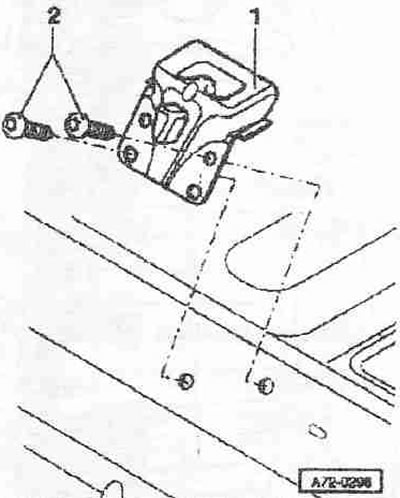
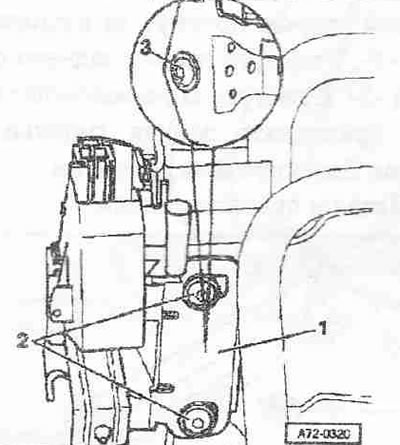
Unscrew screws "2" (2 pcs.). Tightening torque 23 Nm. 1. Front floor tie.
Rear floor anchor for rear seat
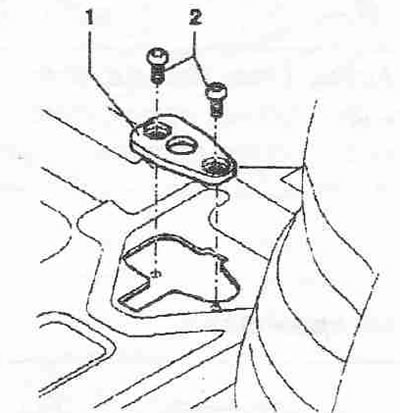
Unscrew screws "2" (2 pcs.). Tightening torque 23 Nm. 1. Rear floor tie..
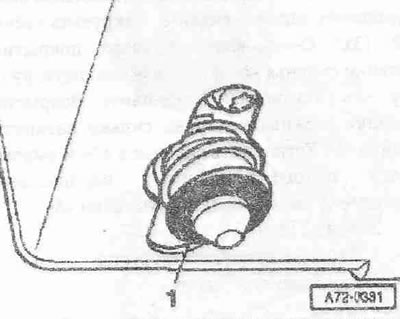
Removal the lock cylinder
Unscrew screws "2" (2 pcs.). Tightening torque 23 Nm. 1. Pin.
Removal and installation the lower release handle
The lower release handle "1" cannot be removed without damaging it. If there is a cable, the cable ties should be cut. Using a slotted screwdriver, unlock the locks "2" (2x). Remove the lower release handle "1" from the shaft "3". Do not tighten the new cable tie too much.
Removal and installation the upper release handle
Remove the split rear seat. Unlock the rear seat back. Remove the screen release handle. Remove the cover with the cushion. Remove the backrest cover. Remove the spring "2". Remove the release handle "1" on the hook "3". When installing, use the hook to pull the spring "2" out of the sleeve "4".
Removal and installation the upper screen release handle
Remove the split rear seat. Unlock the rear seat back. Remove cover -1. at the screen release lever "2" "Arrow". Pull out cover "1" under the screen release lever "2".
Fold the cushion "2" with the cover "3" forward. Using a slotted screwdriver, unlock the locking latches "4" (2x) in the direction of the arrow. Remove the screen "1" upwards.
Removal and installation the release lock
Remove the split rear seat. Unlock the rear seat back. Remove the screen release handle. Remove the cover with the cushion. Remove the backrest cover. Remove the release handle. Mark the position of the screws. Unscrew screws "2" (2 pcs.). Tightening torque 21 Nm. Unscrew screw "3". Tightening torque 21 Nm.
Installation
Tighten screw "3" with 21 Nm. Tighten bolts "2" firmly. Install the locking handle. Install the backrest cover. Install the screen release handle. Adjust the release lock "1" (by turning the release lock "1") so that the release handle moves freely (knock with a hammer). Install the seat in the car and align the backrest cover parallel to the adjacent seat. Align the seat lock relative to the cylinder and the seat. Tighten screws "2" with 21 Nm. Remove the screen release handle. Install the cover with the cushion. Install the screen release handle.
Removal and installation the seat cover
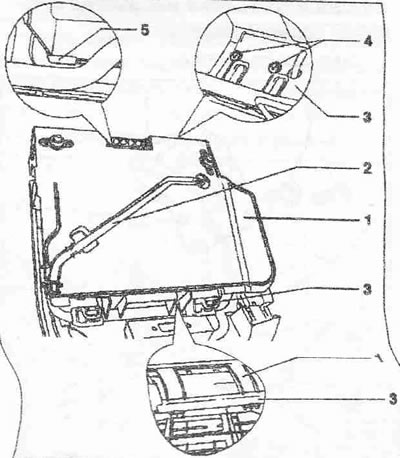
1. Seat cover. Remove the split rear seat. Unlock the rear seat back. Stuff the split rear seat seat. Fold back the support "2". Unhook the crossbars "5". Unlock the locking latches "4" (4x). Remove the front seat cover "1" from the rear seat frame "3".
2. Support
3. Rear seat frame
4. Fixing tabs
Removal and installation the seat back cover
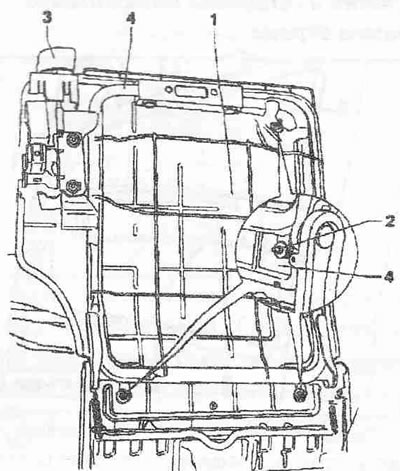
1. Seat back cover. Remove the split rear seat. Unlock the rear seat back. Stuff the seats of the split rear seat. Unscrew the nuts "2" (3x). Remove the seat back cover "1" by pulling it upwards through the release handle "3". Installation: Install the seat back cover, do not tighten the nuts "2" too much. Install the seat in the car and align the back cover parallel to the adjacent seat. Tighten the nuts "A"
2. Bolts (3 pcs.)
3. Upper release lever
4. Rear seat frame
Removal and installation the inner and outer trim

The upholstery pads cannot be removed without damage. Remove the split rear seat. Unlock the rear seat back. Stuff the seat of the split rear seat.
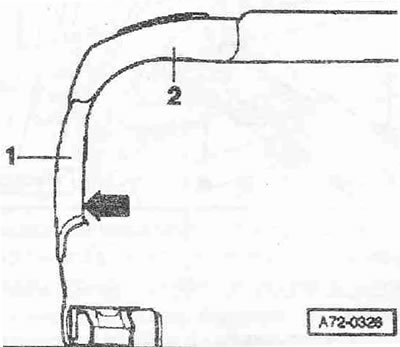
Separate the inner trim panel "1" and the outer trim panel "2" from the back side. Separate the inner trim panel "1" and the outer trim panel "2" from the front side.
Removal and installation the screen unlocking lock
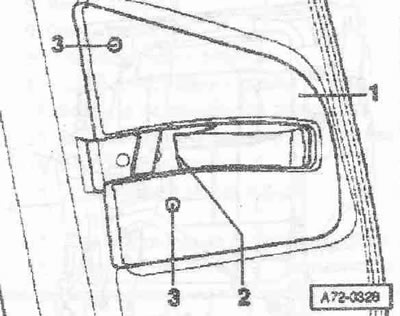
Press pins "3" (2x) inward. Remove screen "1" from latch "2" on seat back frame.
Unlocking the removed rear seat
Press the plates on both sides against the spring force until the backrest unlocks with a click. The rear seat backrest should not be folded back when disassembled, as it is when installed, otherwise the upholstery pads may be damaged.
(The article was copied from the website: AUDImanual.ru)