
Repair Chevrolet Repair Toyota Repair Honda Repair AvtoVAZ Repair Mercedes-Benz Repair BMW Repair Opel
Home  |  Contacts  |  Sitemap  |    
English Русский
Български
Беларускі
Український
Српски
Hrvatski
Română
Polski
Slovenský
Magyar
AudiManual.ru


  • AUDI 80
  • AUDI 100
  • AUDI A3
  • AUDI A4
  • AUDI A6
  • AUDI A8
  • AUDI Q
  • OTHER
  • ARTICLES
A2 (1999-2005)

Removal and installation the central tube of the front panel (Audi A2)

  • Home
  • Audi
  • A2 (1999-2005)
  • Body
  • Interior
  • Removal and installation the central tube of the front panel
            0
Table of contents: Remove the front panel ↓ Air conditioning on the side ↓ Air conditioning system on top ↓ Disconnect the left strut to the… ↓ Disconnect the right strut to the… ↓ Remove the relay block ↓ Unscrew the spacer on the pedals ↓ Disconnecting the driver's side… ↓ Installation ↓
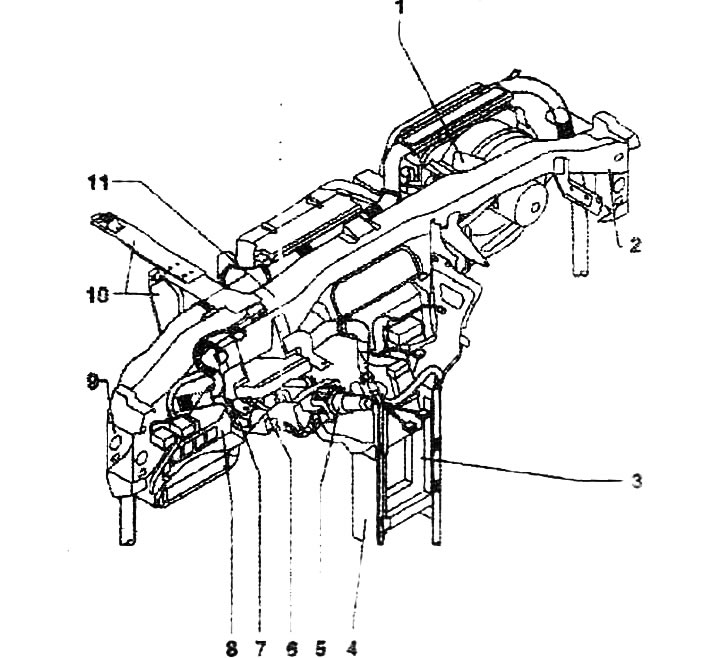
1. Unlock the top of the air conditioning unit

1. Unlock the top of the air conditioning unit
2. Disconnect the center pipe from the front passenger side
3. Remove the right strut
4. Remove the left strut
5. Disconnect the steering column
6. Remove the pedal jack spacer
7. Remove the wiring harness to the steering column switch
8. Remove the relay block
9. Disconnect the center tube on the driver's side
10. Detach the speaker stand
11. Unlock the side part of the air conditioning system


Remove the front panel


Disconnect the acoustic stand. Remove the windshield wiper motor. Remove the tip. Unscrew bolt "2", tightening torque 12 Nm. Unscrew bolt "3", tightening torque 12 Nm.

Remove the air conditioning system.

Air conditioning on the side
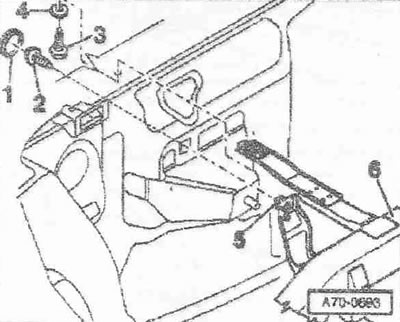


4. Glass

4. Glass
5. Spacer sleeve
6. Central pipe


Unscrew screws "1" (2 pcs.), tightening torque 4 Nm. Pull out pads "3" (2x) from clamps "4" of the air conditioning system "5".

Air conditioning system on top
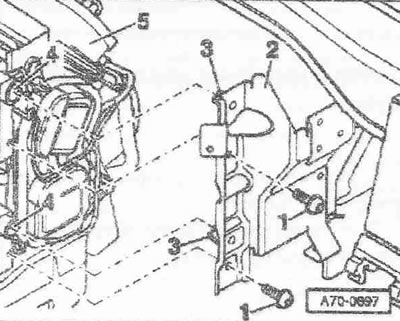


2. Bracket

2. Bracket


Unscrew screws "1" (2 pcs.). Tightening torque 4 Nm.

Disconnect the left strut to the center tube
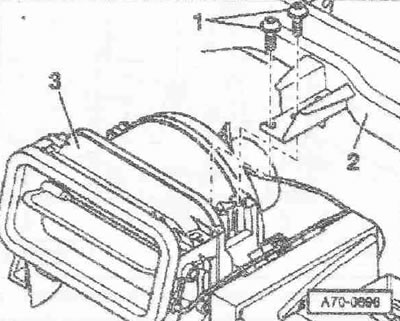


2. Central pipe

2. Central pipe
3. Air conditioning


Unscrew the screw, tightening torque 12 Nm.

Disconnect the right strut to the center tube
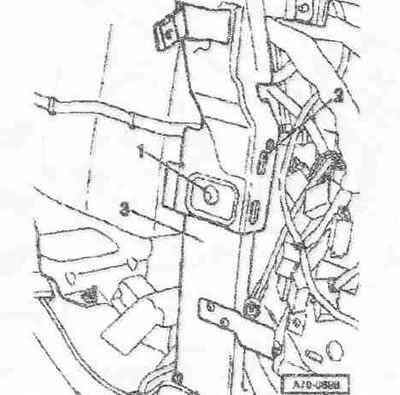


2. Left spacer

2. Left spacer
3. Corner on the left


Unscrew the screws, tightening torque 12 Nm.

Remove the relay block
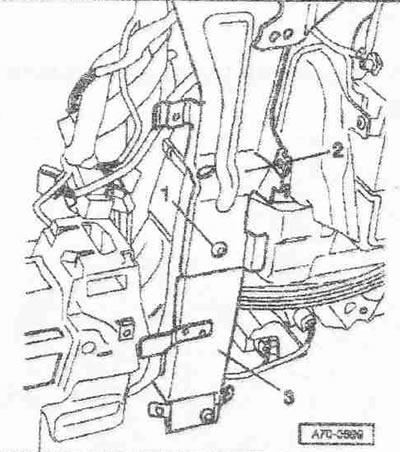


2. Spacer on the right

2. Spacer on the right
3. Right corner


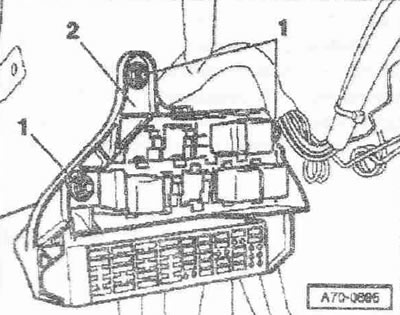
Unscrew nuts "1" (3x) from relay board "2", tightening torque 2 Nm. Leave relay board "2" hanging in the footwell.

Unscrew the spacer on the pedals


Unscrew nut «2» (2 pcs.), tightening torque 28 Nm.


Unscrew nut "2" (2 pcs.), tightening torque 28 Nm.
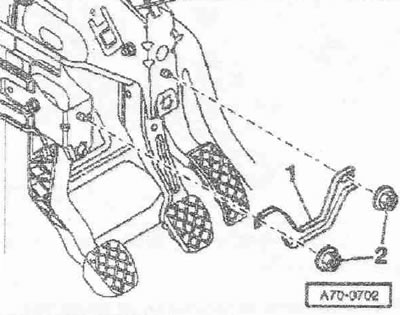
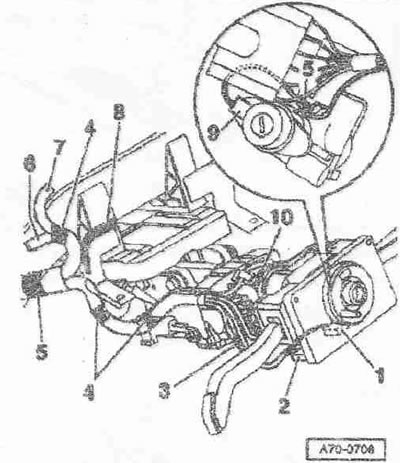
1. Link plate. Disconnect the cable harness to the steering column.

1. Link plate. Disconnect the cable harness to the steering column.


Disconnect connector "9". Cut cable tie "5". Release cable harness leading to steering column switch from clamps "4" (2x). Remove holder "10" from steering column. Disconnect steering column.

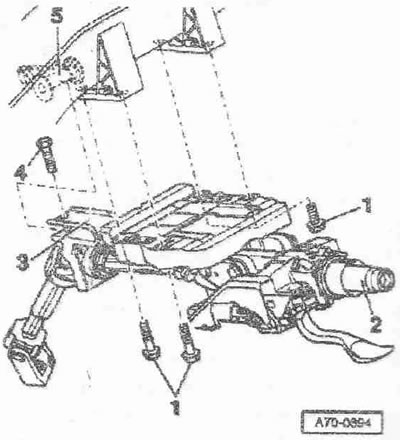
Unscrew screw "4", tightening torque 8 Nm.
Unscrew screws «1» (4 pcs.), tightening torque 25 Nm. Remove steering column «1» with guide «3»…


Unscrew screws "1" (4 pcs.), tightening torque 25 Nm. Remove steering column "1" with guide "3" from mount "5". Remove steering column "1" in the driver's footwell.
Disconnecting the driver's side center tube from the body


Disconnecting the driver's side center tube from the body


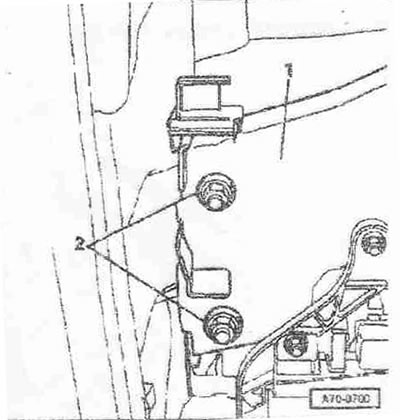
Unscrew nut "2" (2 pcs.), tightening torque 40 Nm.
1. Central pipe

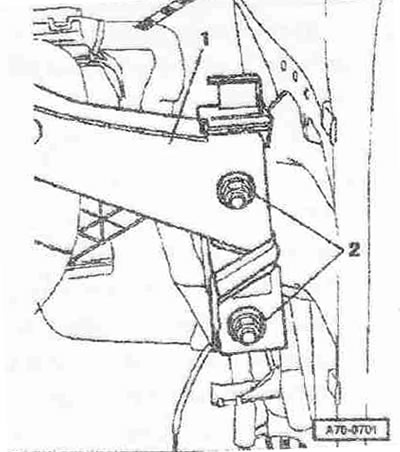
1. Central pipe


Disconnecting the central tube on the front passenger side from the body. Unscrew nut "2" (2 pcs.), tightening torque 40 Nm. Disconnect the remaining cable harness from the central tube. Remove the central tube from the car.
Installation


Installation


Replace cut and damaged cable ties.

(The full version is posted on the resource AudiManual.ru)
The article was checked by auto expert Daniil Ushakov
This article is available at russian, bulgarian, belarusian, ukrainian, serbian, croatian, romanian, polish, slovak, hungarian

Share information:
Previous articles
Audi A2: Interior
Next articles

Remove the front panel deflector, center
Removal and installation the front panel
Front panel — description
Removal the window switch from the screen
Removal and installation the front panel center holder
Removal and installation the spacer and clamping device of the…
Routing the cable to the center tube of the front panel
Ceiling lining


Similar articles on other Audi car models:
Central section of the instrument panel — removal and… Audi 80 B3 (1986-1991, petrol)
Central control panel — removal and installation Audi 100 C3 (1982-1990, diesel)
Lift and slide roof panel Audi A3 Type 8L (1996-2003)
Setting the front panel to the maintenance position Audi A4 B6 (2000-2006)
Installing the front cross panel in the service position Audi A6 C5 (1997-2004)
Checking the front suspension and steering Audi A8 D2 (1994-2002)
Front panel center tube Audi Q5 Type 8R (2008-2017)
Link to this page in different formats


Visitor comments

No comments yet


How much will 19 + 14 =


Audi A2(1999-2005) 
  • General information
  • Introduction to the guide
  • Maintenance
  • Engine 1.4 l (gasoline)
  • Engine repair
  • Lubrication system
  • Cooling system
  • Exhaust system
  • Engine 1.6 l (gasoline)
  • Engine repair
  • Lubrication system
  • Cooling system
  • Exhaust system
  • Engine 1.2 l (diesel)
  • Engine repair
  • Lubrication system
  • Cooling system
  • Injection and turbocharging
  • Engine 1.4 l (diesel)
  • Engine repair
  • Lubrication system
  • Cooling system
  • Turbocharging system
  • Supply system
  • Fuel injection system
  • Exhaust system
  • Transmission
  • Mechanical gearbox 02J
  • Mechanical gearbox 02T
  • Mechanical gearbox 085 DS
  • Chassis
  • Car suspension
  • Steering
  • Brake system
  • Body
  • Exterior
  • Interior
  • Seats
  • Doors, locks and windows
  • Safety system
  • Heating and air conditioning
  • Electrical equipment
  • Power devices
  • Equipment and devices
  • Wipers and washers
  • Lighting and lamps
  • Breakers and switches
  • Electrical circuits
 
AudiManual.ru © 2017-2026 · Mobile version · Feedback · Sitemap: EN BG BY UA RS HR RO PL SK HU · Site search · News and articles
80 B2 · 80 B3 petrol · 80 B3 · 80 B4 · 100 C3 diesel · 100 C3 petrol · 100 C3 · 100 C4 petrol · 100 C4 · A3 Type 8L · A4 B5 petrol · A4 B5 · A4 B6 petrol · A4 B6 · A4 B7 · A4 B8 · A6 C4 · A6 C5 · A6 C5 Allroad · A8 D2 · Q5 Type 8R · Q7 Typ 4L · Audi A2 ·
This site uses cookies 🍪. Click the button to accept this fact.