
Table of contents: Removal ↓ Remove the photo sensor ↓ Central part of the central tube ↓ Front panel mounting ↓ Remove the front passenger airbag… ↓ Disconnect the hazard warning light… ↓ Installation ↓
Removal
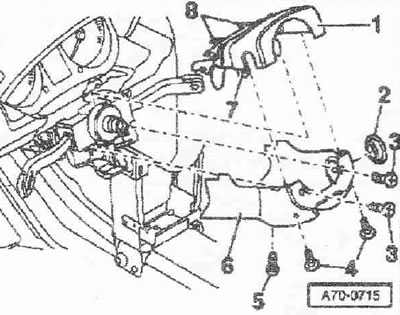
Remove the (-) terminal from the battery. Remove the driver's airbag module. Remove the steering wheel. Remove the instrument cluster. Remove the upper trim of the left and right A-pillars. Remove the upper trim at the rear of the left and right A-pillars. Remove the lower trim of the left and right A-pillars with a spacer. Remove the storage compartment on the driver's side. Remove the glove box. Remove the driver's airbag. Remove the knee indicator at the rear of the center console. Remove the radio. Remove the heater control. Remove the climate control control. Removing the ashtray and storage compartment. Remove the front panel deflector, center. Remove the switch on the steering column. The driver's airbag module and steering wheel have been removed. Completely pull the steering column out and down. Unscrew bolt "4" (2 pcs.), tightening torque 0.6 Nm. Lift up the trim of the switch on the steering column "1" and unlock it at the rear at clamps "8". When installing, it is necessary to insert the hooks "7" of the upper insert into the lower insert, turn it down and screw it with screws.
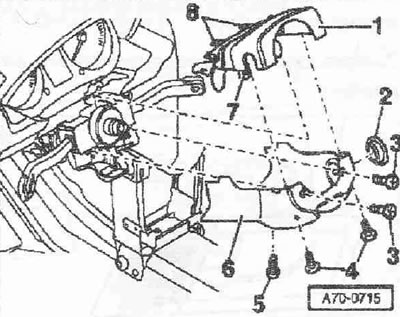
Unscrew bolt "3" (2 pcs.), tightening torque 4.5 Nm. Unscrew bolt with internal hexagon "5". Tightening torque 5 Nm. Open the release lever to change the position of the steering wheel. Remove the lower trim of the steering column switch "3".
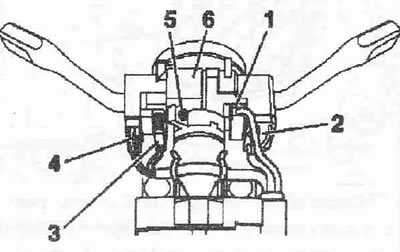
Loosen bolt "5". Pull steering column switch "6" slightly and disconnect plug connectors "2", "2", "3" and "4". Disconnect the plug connector to the return ring with the contact ring. Remove the steering column switch "4". Remove the lighting control switch.
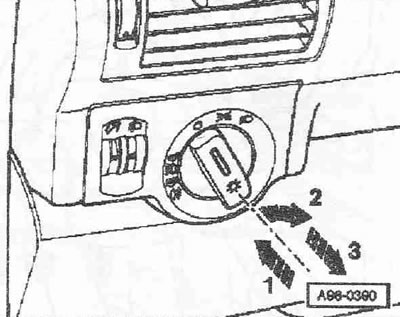
Press the light switch "1" and at the same time turn it to the right "2". Hold the switch in this position and pull the light switch housing back out of the front panel "3". Disconnect the switch electrical connectors.
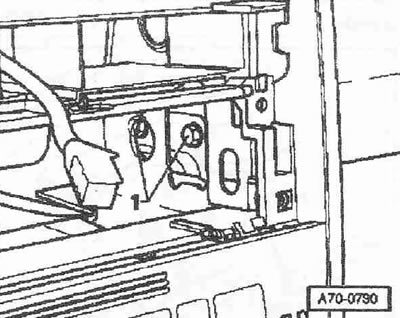
Remove the photo sensor
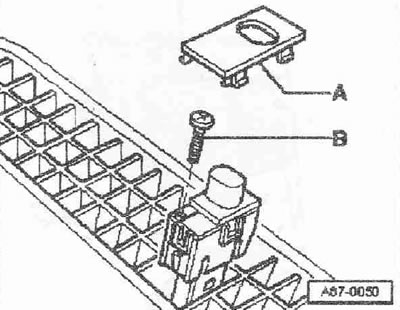
Carefully pry up cover "A". Unscrew screw "B". Press down the photo sensor and secure the connector with a rope or cable binder. Disconnect the cable connector.
Central part of the central tube
Unscrew screws "1" (2 pcs.), tightening torque 4 Nm.
Front panel mounting
 |
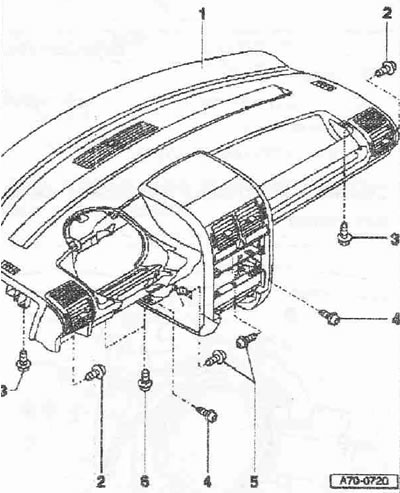 |
1. Front panel. Unscrew screws "2" (2x) under the front panel deflector outward. Unscrew screws "3" (2 pcs.) outward. Unscrew screws "4" (2x) on the left and right side of the front part of the center console. Unscrew screws "5" (2x) on the left and right side of the center console cutout. Unscrew screws "6" (2x) on the left and right side of the steering column.
2-6. Screws (2 pcs.). Tightening torque 4 Nm.
Remove the front passenger airbag guide
Unscrew screws "2" (4 pcs), tightening torque 12 Nm. Unscrew the fastening of the center console holder. Unscrew screws "3" (2 pcs), tightening torque 4 Nm.
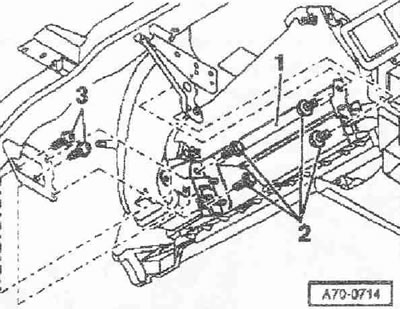
1. Front passenger airbag guide.
Disconnect the hazard warning light switch relay plug
Disconnect the plug connection of the hazard warning light switch relay behind the storage compartment of the center console. Pull the front panel back.
Installation
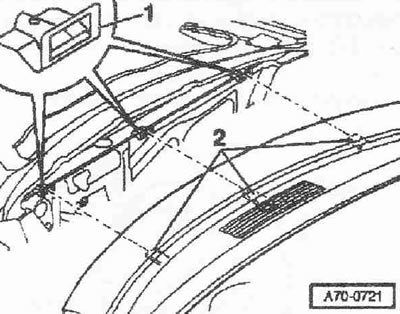
Remove the tips "1" (3x) from the body and insert these tips "1" into the holders "2" of the front panel. Extend the photosensor using a cord or cable tie. Install the front panel and insert the photosensor extension. Insert the front panel, making sure that the air duct of the front panel slides over the air duct of the heater/air conditioning system. In doing so, grasp the cutout of the tip of the front panel and help it move. In doing so, make sure that the holders "2" with the tips "1" click into the body fastenings. Visible through the uniform gap between the front panel and the windshield. Install the switch on the steering column, but do not screw it in. Attach the lower trim of the steering column switch "6". Tighten the screws "3" (2x). Tightening torque 0.6 Nm. Insert screw "5", but do not tighten it. Install the steering wheel.

Pull the steering column switch with the lower trim to a distance of "a" 3 mm to the steering wheel. Tighten the clamp "1" (2.8 Nm). Tighten the Allen bolt "2" (5 Nm). Install the light switch.
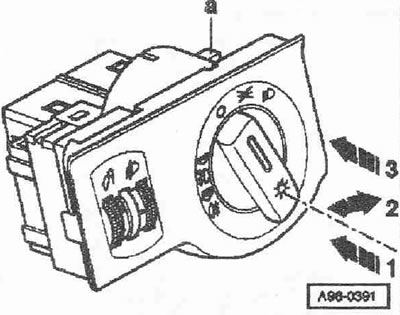
Connect all plug connectors. To install, press the light switch "1" again and simultaneously turn it to the right "2" so that both latches "a" drop. In this position, press the light switch housing into the front panel clamps "3" to secure it. Install in reverse order.