
Table of contents: Removal and installation the front… ↓ Removal and installation the ceiling… ↓ Removal and installation the rear… ↓ Removal and installation a cosmetic… ↓ Remove the roof light bezels of the… ↓ Remove the handle in the roof frame ↓
Instructions. Removing and installing the ceiling on a car with and without an upper Airbag is performed the same way.
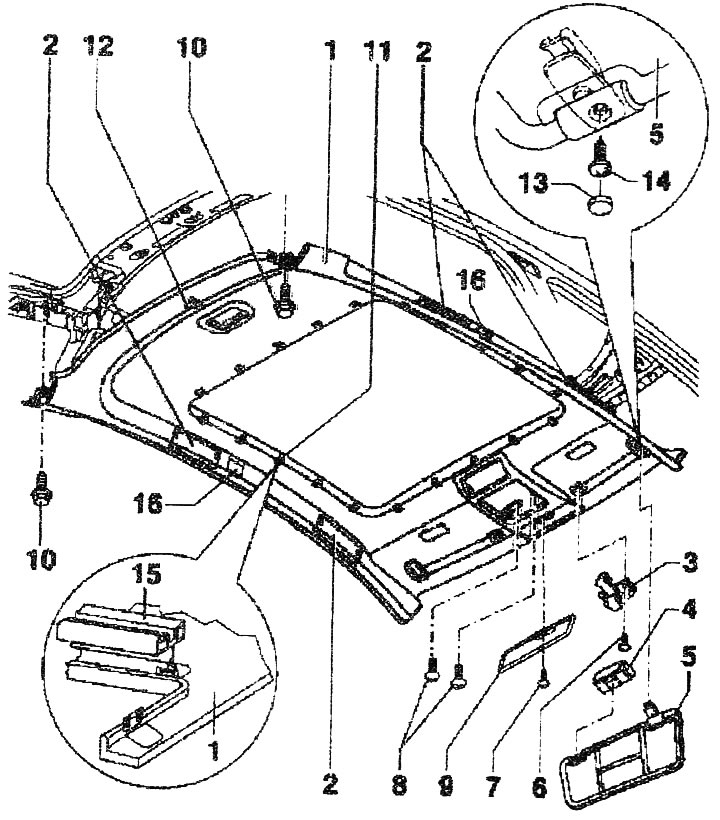
1. Headlining. Remove the headlining. Remove the upper A-pillar trim. Remove the upper B-pillar trim. Remove the rear seats. Remove the lower trunk lid trim. Remove the side trunk trim panel. Remove the upper C-pillar trim. Remove the D-pillar trim. Remove the sun visors "5". Remove the bracket "3" for the sun visors. Remove the central sun visor "9". If the roof is equipped with a double spoiler, remove the headlight bezels "15". Remove the front interior light. Remove the ceiling panel opening cover (with the "PASSENGER AIR BAG OFF" light). On vehicles with a dividing grille: open the screen at the eye of the dividing grille using a slotted screwdriver. Remove the cosmetic lamp. Remove the rear ceiling light. Remove the grab handles on the roof. Unscrew screws "10" (2 pcs.). Remove the rubber door seal in the ceiling panel area. Move the front passenger seat back to the rearmost position. Move the driver's seat back to the rearmost position. The help of a second mechanic is required to secure the ceiling trim. Unscrew screws "8" (2x) on the lamp frame. To dismantle, exit the car and lower the front ceiling panel evenly; clamp "12" will open automatically. Remove the ceiling panel through the rear door of the body (in an inclined form). Installation: When installing, observe the correct sequence, otherwise the headlining will not be centered. Carefully click the rear headlining panel into place to avoid dents. Carefully insert the headlining panel through the boot lid (in a tilted position). The mechanic should hold the ceiling panel "1" at the clamp "12" at the opening near the body without fixing it in the clamps. Install the sun visors "5". Place thick corrugated cardboard under the clamp "12". Fix the front panel in the clamp using light pressure. Fix the rim of the headlights of the roof of the double spoiler "15". Installation in reverse order
2. Struts. None for the upper Airbag.
3. Sun visor bracket. Press the cover "4" with a small slotted screwdriver. Unscrew the screws "6" (2 pcs.)
4. Cap
5. Sun visor. Release sun visor "5" from bracket "3", unclip cover "13" and unscrew screw "14"
6. Screws (2 pcs.), tightening torque 2.5 Nm
7. Bolt, tightening torque 2.5 Nm
8. Screws (2 pcs.), tightening torque 2.5 Nm
9. Central sun visor. Unscrew screw "7"
10. Screws (2 pcs.), tightening torque 2.5 Nm
11. Clamps (20x)
12. Clips. Replace the faulty clip. Mark the position of clip "12" on ceiling panel "1" with a pen. Cut clip "12" off ceiling panel "1" with a knife. Hot glue the new clip "12" to ceiling panel "1" so that the clip's locking latch faces away
13. Cap
14. Bolt, tightening torque 2.5 Nm
15. Protective frame of the sliding sunroof
16. Cutout for divider grille. Replacement ceiling panel without cutout for divider grille "16". Make a cutout-recess in the spare ceiling panel using the factory kit for divider grille "16"
Removal and installation the front ceiling light
Remove the front lamp "1" from the rear side. Disconnect the lamp plug connections
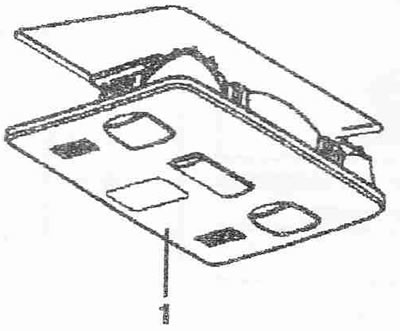
Removal and installation the ceiling panel opening cover (with the "Passenger airbag off" lamp)
Unclip cover "1". Disconnect the plug connector of the interior security system sensor. Disconnect the plug connector of the "PASSENGER SIDE AIR BAG, OFF" light (plug connection with cable length approx. 20 cm).
Removal and installation the rear lamp
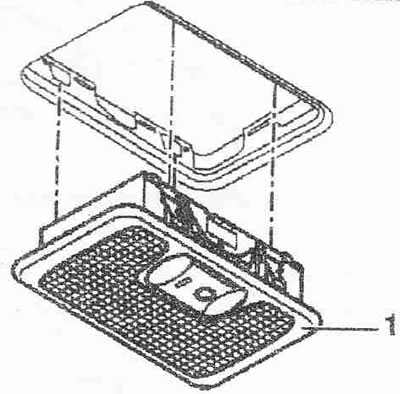
Remove lampshade "1" from the front side. Disconnect the plug connections of lampshade "1".
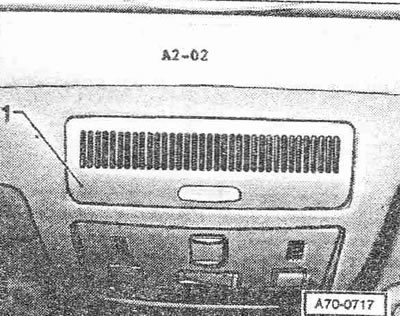
Removal and installation a cosmetic lamp
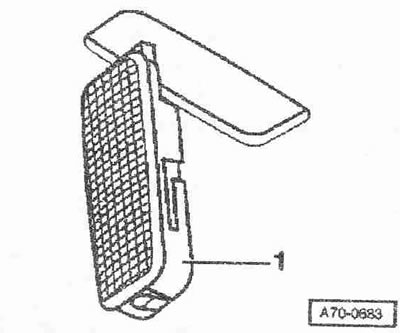
Remove the cosmetic lamp "1" starting from the left side. Disconnect the plug connector to the cosmetic lamp "1".
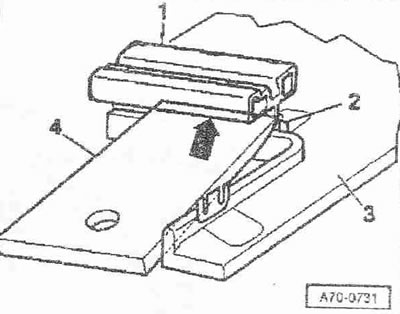
Remove the roof light bezels of the double spoiler
Pass the special tool "T10039/1" "4" at the clamps "2", between the headlight rims 1- and the ceiling panel "3". Tilt the plastic pin "4" (in the direction of the arrow) at the clamps "2" and remove the headlight bezels "1" from the clamps "2". Install the double spoiler roof headlight bezels.
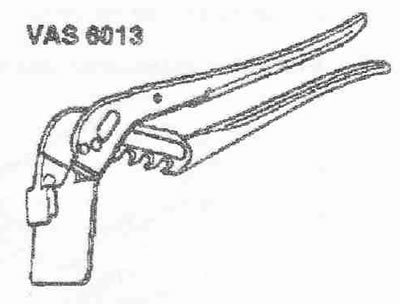
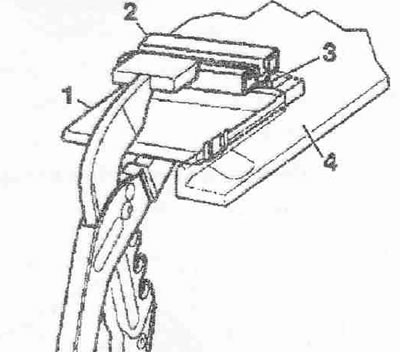
For installation use pliers "VAS 6013".
Press the clamps "3" at the headlight rim "2" and the ceiling panel "4" with pliers "1" and fix the frame rim.
Remove the handle in the roof frame
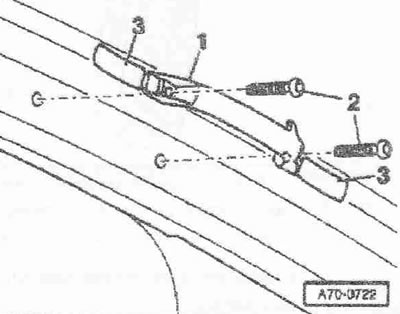
Carefully open the covers "3" with a slotted screwdriver. Unscrew the screws "2" (2 pcs.). Tightening torque 4 Nm. 1. Roof rail.
The original source of the article can be found on the website: audimanual.ru