
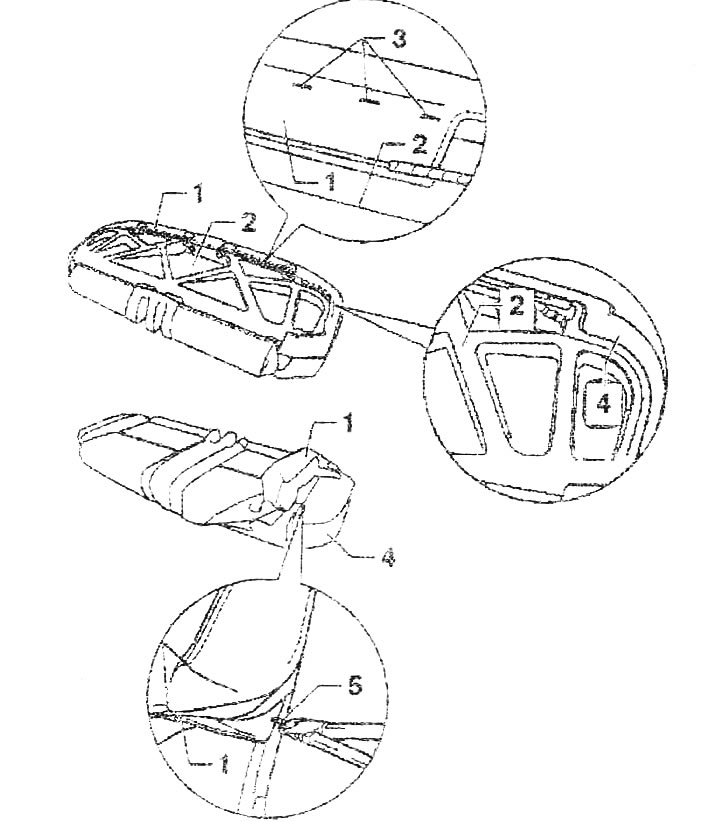
1. Upholstery. Remove rear seat. Detach clips -3- from seat carrier -2-. Remove cushion -4- with upholstery -1- from seat carrier -2-. Cut wire clips -5- and remove upholstery. Installing: Use clip pliers -VAG-1634/- to install new wire clips. For easier installation, move the longitudinal rods back to the first transverse rod. When installing, fasten with clamps first the transverse and then the longitudinal rods. Lay seat support -2- in cushion -4-. Secure upholstery -1- to seat carrier -2- with stapler. To do this, use standard staples -3- in accordance with the instructions of the stapler manufacturer. Install the rear seat back
2. Bearing seats with wire frame
3. Staples. Standard, according to the thaler manufacturer's data. Use only a tacker for pillow staples
4. Pillow
5. Wire staples
Removal and installation of an upholstery and a pillow of a back of a back seat of the facilitated design
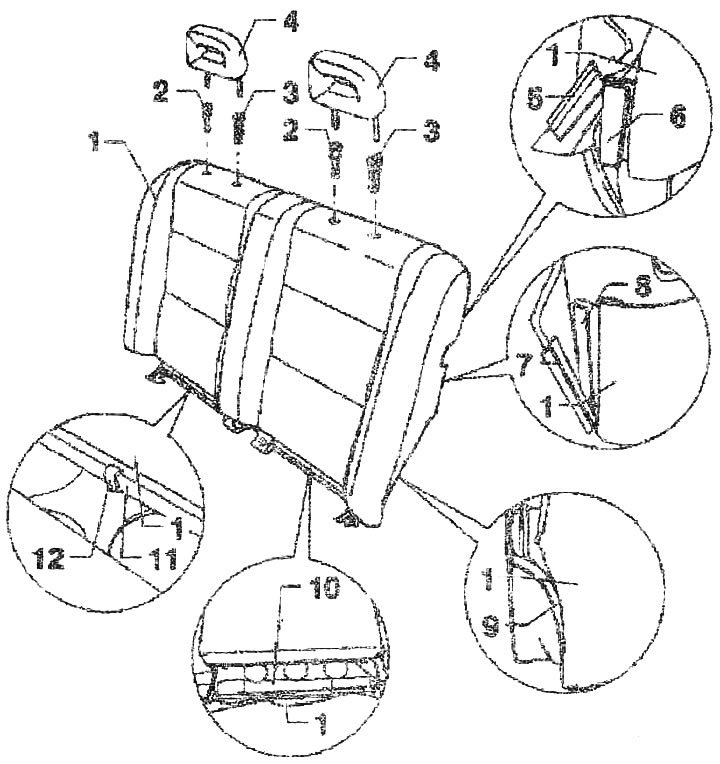
1. Upholstery. Remove rear seat. Remove the rear seat back. Remove the head restraint -4- by pressing the button on the left rail -3-. Remove headrest guide -2- (2x) and -3- (2x). Remove upholstery -1- from microfibre tape -10- located on backrest frame (front and back side). Detach cover -1- from Velcro tape -9- on back of backrest. Remove clamping strip -7- and -5- from one edge of the upholstery from the inlet -8- and -6- on the other side of the upholstery. Remove trim -11- from clip ''butterfly''" -12- (8x). Remove upholstered cushion -1-. Remove upholstery -1- from cushion. Installation: Complete the installation of the upholstery -1- by installing the cushion. Attach the cushion to the seat back frame and pull the upholstery over it. Fix the edging -11- in the clip "butterfly" -12- (8x). Remove clamping strip -5- and -7- from one edge of the upholstery from the inlet -6- and -8- on the other side of the upholstery. Press upholstery -1- against Velcro tape -9-. Press upholstery -1- against microplastic strip -10-. Install the headrest guide. Install headrest. Install the rear seat back. Install the rear seat back
2. Headrest guide without button
3. Headrest guide with button
4. Headrest. The headrest is non-separable, upholstery and cushion. spare part. The rear outer headrest is not identical to the front headrest. When removing any head restraints, mark the head restraints with adhesive tape
5. Clamping bar
6. Input channel
7. Clamping bar
8. Input channel
9. Velcro tape
10. Microplastic tape
11. Edging
12. Clamp "butterfly"
Removing and installing lightweight rear seat back padding
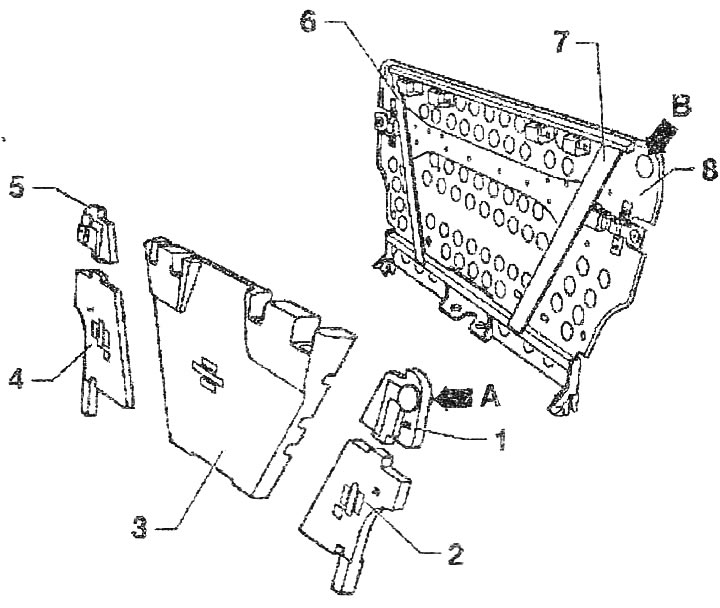
1. Top outer padding. Letter designation "R" and top number. Remove upper outer seal -1- from diagonal profile -7-. Installation: Installation position: the marking must be legible after installation. Clamp the outer top seal -1- under the diagonal profile -7-. Position the clips on the padding -arrow A- in the hole -arrow B- of the seatback frame
2. Bottom outer padding. Letter designation "R" and top number. Remove outer bottom seal -2- from diagonal profile -7-. Installation: Installation position: the marking must be legible after installation.
Clamp the outer bottom seal -2- under the diagonal profile -7-
3. Central padding. Designation Center" and top number. The center padding is applied only to the seatback frame -8-
4. Bottom outer padding. Letter designation "L" and top number
5. Top outer padding. Letter designation "L" and top number
6. Right diagonal profile
7. Left diagonal profile
8. Back frame
Visitor comments