
Table of contents: Removal ↓ Installation ↓
Rear window cleaner
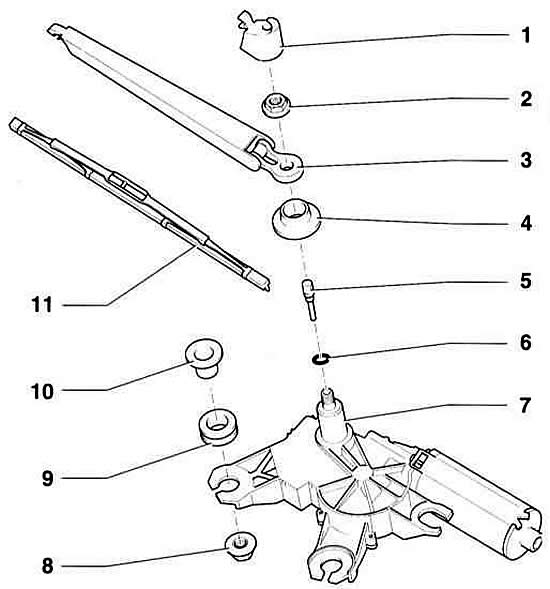
- 1 - lid
- 2 - nut, 15 Nm
- 3 - lever
- 4 - seal
- 5 - jet
- 6 - sealing ring
- 7 - Electric motor
- 8 - nut, 8 Nm
- 9 - rubber ring
- 10 - spacer element
- 11 - brush
Removal
1. Fold the lid up.
2. Unscrew nut –2–.
3. Fold the lever up and move it from side to side. This way the lever is removed from the cone of the electric motor axis.
4. Unscrew the nut and remove the lever.
5. Remove the inner trim of the tailgate, referring to the subsection Removal and installation the tailgate trim.
6. Disconnect connector –1– and remove hose –2– from the jet.
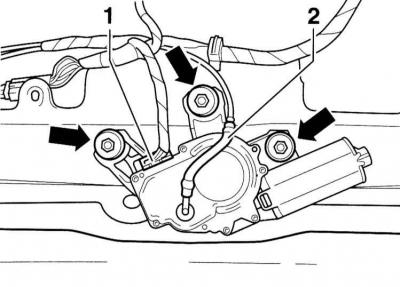
7. Loosen the mounting bolts and remove the electric motor (indicated by arrows) (10mm wrench).
Installation
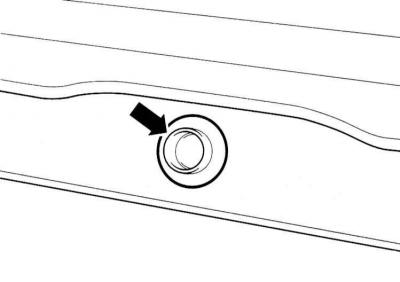
1. Carefully insert the motor through the opening in the rear window, making sure the seal is correctly positioned as shown in the illustration.
2. Tighten the electric motor to a torque of 8 Nm.
3. Connect the connector and put on the jet hose.
4. Install the inner trim of the tailgate, referring to the subsection Removal and installation the tailgate trim.
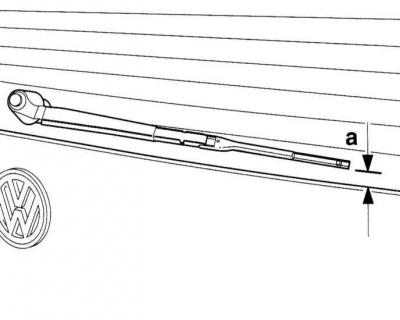
5. Place the lever on the axle so that the distance a is 25 mm. The distance is measured from the bottom edge of the glass to the bottom edge of the brush.
6. Tighten the lever to a torque of 15 Nm.
7. Fold the lid back.
The original article is available on the website AUDIMANUAL