
Table of contents: Disconnecting the flexible cable ↓ Tweeter Plug Connector ↓ Window lifter control unit connector ↓ Door trim fastening clip ↓

1. Door trim. For vehicles with a window lift handle: remove the window lift handle. Using a flat-head screwdriver, pry up the tweeter screen "2". Unscrew the bolt "3". Unscrew the bolts "4" (2 pcs.) from the door trim. Release the door trim "1" from the clamps "7" (8x) of the door base. Press the door trim "1" upwards from the support profile "6". Disconnect the flexible cable of the inner door handle. Disconnect the tweeter plug connector. Disconnect the window lift control unit connector. Installation: Replace damaged clamps "7". Secure the wire sets. Tighten the Bowden cable. Tighten the door trim "1" on the retaining profile "6". Lock the door trim "1". Secure the door trim "1" with screws
2. Tweeter screen
3. Bolt. Tightening torque 2 Nm
4. Screws (2 pcs.). Tightening torque 2 Nm
5. Door body
5. Retaining profile
7. Clamps (7x)
Disconnecting the flexible cable
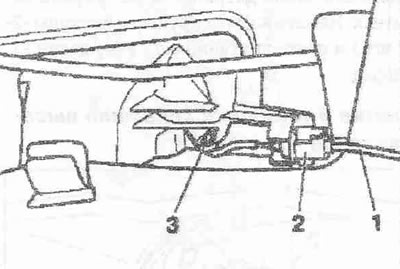
Remove cable "1" from guide "2" and disconnect it. When installing, make sure that hook "3" is facing upwards.
Tweeter Plug Connector
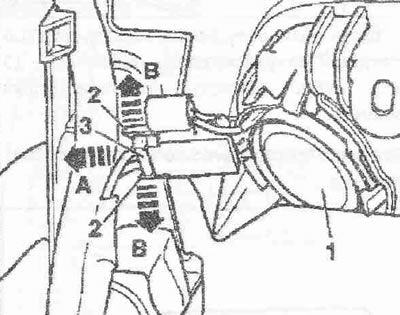
Carefully press the clamps "2" in the direction of arrow "B". Pull the plug connector "3" in the direction of arrow "A" away from the high-frequency speaker "1".
Window lifter control unit connector
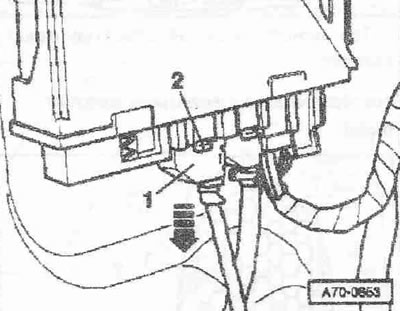
Press the locking latch "2" and pull the plug connection "1" in the direction indicated by the arrow.
Door trim fastening clip
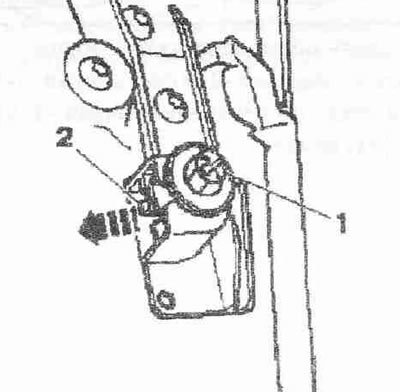
Press the locking tab "2" and remove the clip "1" in the direction of the arrow.
(The original text is available on the website: audimanual.ru)