
Table of contents: Removal ↓ Installation ↓
Removal
Warning: When removing batteries, check that the polarity is indicated on the batteries. If the polarity is not indicated, mark the battery position.
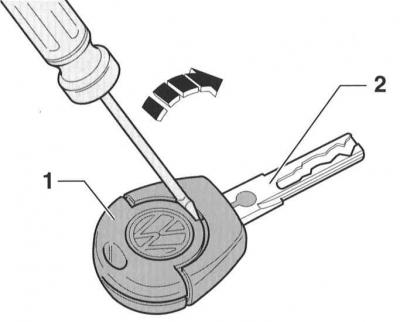
1. Insert a screwdriver into the gap between the transmitter unit –1– and the master key –2–.
2. Turn the screwdriver in the direction of the arrow and thereby disconnect the transmitter unit from the key.
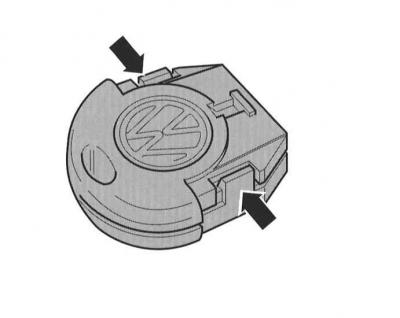
3. Release the transmitter unit by pressing the side latches (indicated by arrows). Remove the transmitter unit.
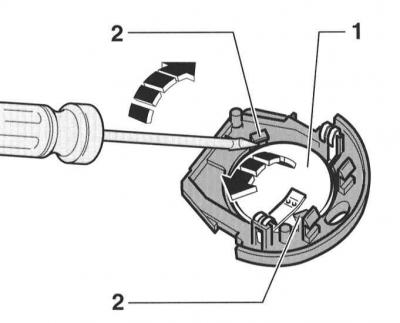
4. Disconnect the upper battery –1– using a screwdriver from the holders –2– as shown by the arrows.
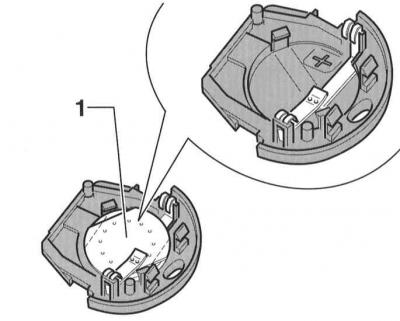
5. Remove the contact plate –1–. When doing so, turn it so that the two straight edges are in contact with both catches. The contact plate can also be removed using a screwdriver.
6. Use a screwdriver to pry the bottom battery away from its holders.
Installation
Warning: When installing batteries, pay attention to the polarity. The polarity (+/–) is indicated on the battery and the case.
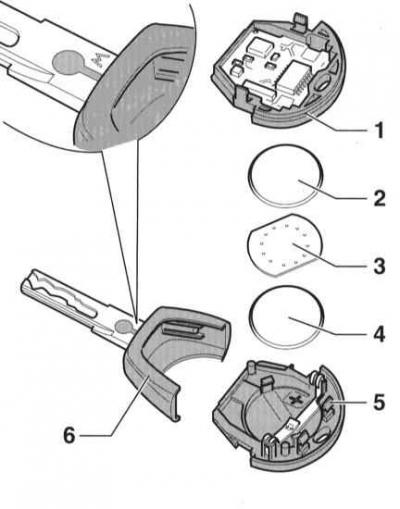
1. Insert the lower battery –4– with the positive pole (+) facing down into the housing –5–. The positive pole (+) is indicated on the housing.
2. Place the contact plate –3– on the battery –4– and turn the latches at the back.
3. Place battery –2– with the positive (+) terminal facing down on the contact plate and secure it in place.
4. Place the transmitter unit –1– on the housing –2– and secure it in place.
Warning: The transmitter unit is shown upside down in the illustration.
5. Insert the complete transmitter unit into the main key –6– and lock it in place.
Warning: The key has a variable code transponder, identified by the embossed letter W.