



Table of contents: Removal ↓ Installation ↓
Removal
Remove the ventilation chamber cover.
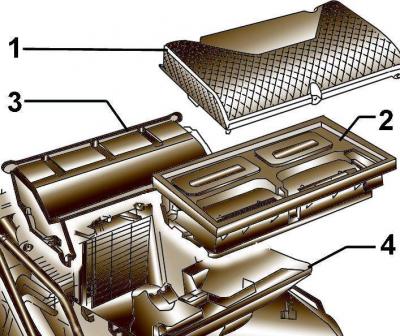
Fig. 17–2. Air intake with hinged flap: 1 – grille; 2 – inlet channel; 3 – folding flap; 4 – body
Remove grille 1 (Fig. 17–2) from the air intake.
Turn off the ignition.
Disconnect the control cable from the air intake flap.
Unscrew the three bolts A and IN (Fig. 17–3) and disconnect the clamp WITH fastening the cable sheath to the air intake body.
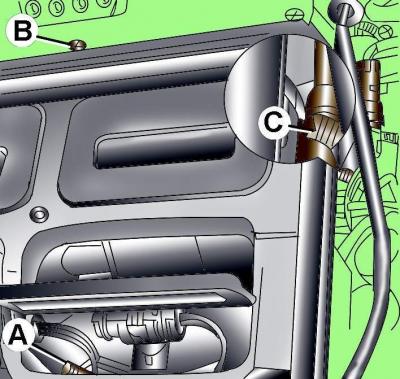
Fig. 17–3. Location of bolts (A, B) securing the intake duct and clamp (C) securing the control cable housing
Remove the air intake duct from the vehicle.
Installation
Installation is carried out in the reverse order of removal, taking into account the following.
Apply sealant before installing the intake duct D, 176 001 A3 in places WITH and D.
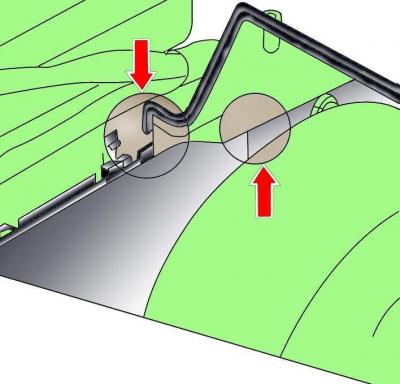
Fig. 17–4. Application locations of sealant D 176 001 A3 before installing the intake duct D shown in Fig. 17–4.
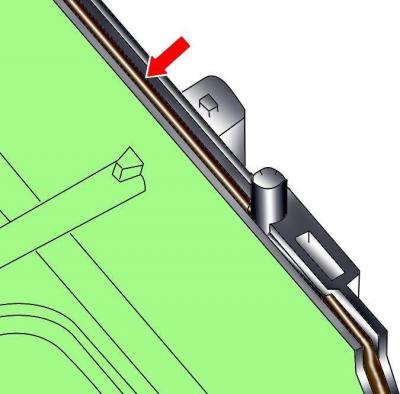
Fig. 17–5. Location of installation of additional soft rubber seal on the intake manifold housing flange
If the windshield fogs up, place a 3mm diameter soft rubber seal on the intake manifold housing flange (Fig. 17-5).
(The original version is on the portal: AudiManual.ru)